In the world of education, captivating and interactive presentations can make a significant difference in engaging students and enhancing learning outcomes. That’s where ClassPoint comes in. As an all-in-one teaching tool, ClassPoint is designed to empower educators by providing a wide array of interactive features seamlessly integrated into Microsoft PowerPoint presentations. However, one limitation that teachers using iOS devices such as Macbooks and iMacs face is the lack of direct accessibility for ClassPoint. In this blog post, we will explore a solution to address usability of ClassPoint on Mac by exploring virtual machines, a technology that allows Mac users to run Windows applications, including ClassPoint.
ClassPoint’s OS Compatibility
Currently, ClassPoint is supported on Windows 11 and Windows 10 (version 1703 or later). With these operating systems, users on Windows devices can seamlessly integrate ClassPoint’s interactive features into their PowerPoint presentations. However, ClassPoint is currently not available on MacOS devices.
If you are a Mac user, you may be faced with the challenge of making ClassPoint accessible on your device. The good news – there is a workaround that you can try to run ClassPoint as if you’re on a Windows operating system. Thanks to virtual machines! Mac users, like you, can now create a Windows environment on your MacOS device, allowing you to run Windows applications seamlessly, including Microsoft PowerPoint with ClassPoint integrated. This virtual machine solution provides all Mac users with a pathway to access and utilize ClassPoint’s interactive features despite the current limitations.
What is a virtual machine?
A virtual machine (VM) is a software emulation of a computer system that enables you to run multiple operating systems simultaneously on a single physical machine. It creates a virtual environment within your Mac, allowing you to install and use another operating system, such as Windows, alongside your macOS.
Using a virtual machine, you can set up a separate Windows environment on your Mac, which functions just like a regular Windows computer. This enables you to install and run Windows applications, including Microsoft PowerPoint with ClassPoint, without needing a dedicated Windows device.
Let’s get started with the step-by-step guide that will walk you through the process of setting up and utilizing a virtual machine on your Mac to run ClassPoint.
The solution: Run Windows on Mac
Now that you’re aware of a direct solution to your device compatibility problem, you may be wondering what specific virtual machine app you should be using. Our best bet? Parallels Desktop.
Parallels Desktop for Mac offers a wide range of powerful features that enable Mac users to seamlessly run Windows applications alongside their macOS environment. With Parallels, you can unlock a multitude of benefits and functionalities, making it an ideal solution for incorporating not just ClassPoint, but an entire Windows operating system into your Mac device.
For a full run through on its features, usability, and device requirements, visit this page.
Steps on How to Run ClassPoint on Mac
Running Windows on your Mac with Parallels opens up a world of possibilities for interactive presentations using ClassPoint. While Parallels Desktop comes at a cost, you can take advantage of the 14-day free trial to explore its features risk-free. Here are the steps on how you can start your ClassPoint journey as a Mac user:
1. Download Parallels Desktop
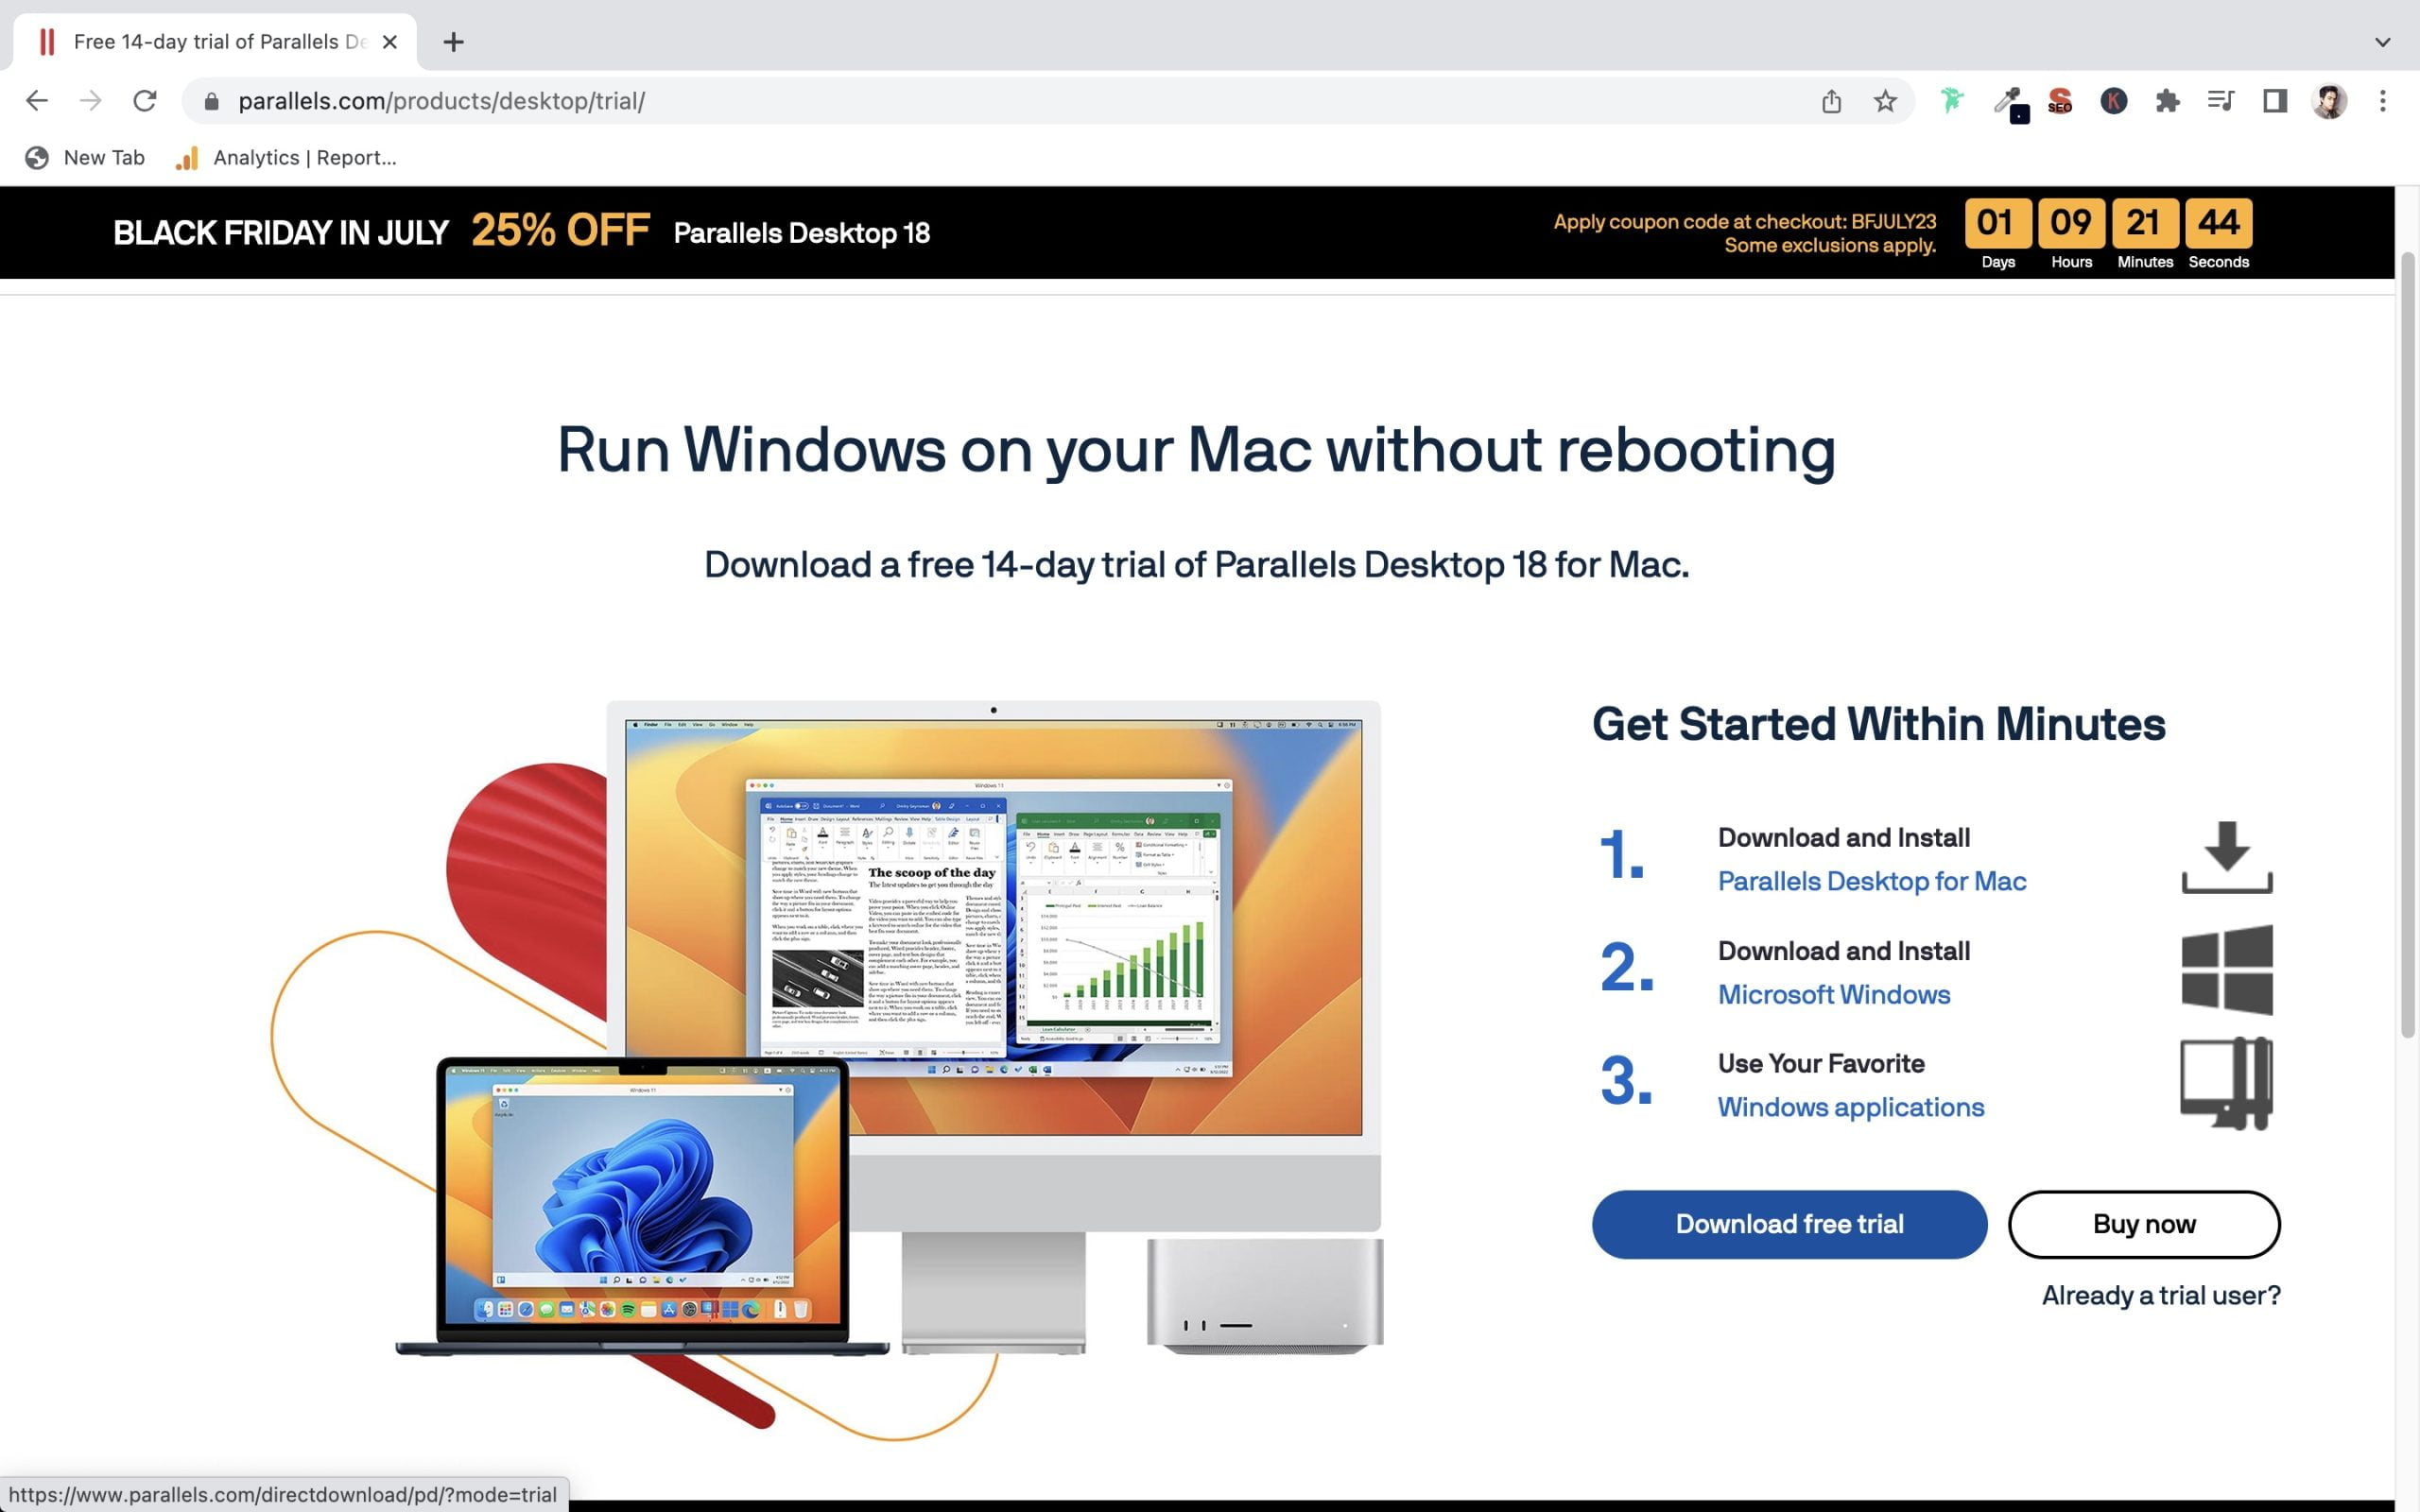
Visit Parallels’ download page and click “Download Free Trial” to experience the power of Parallels at zero cost. If you’re ready to purchase, simply click “Buy Now.”
2. Install Parallels
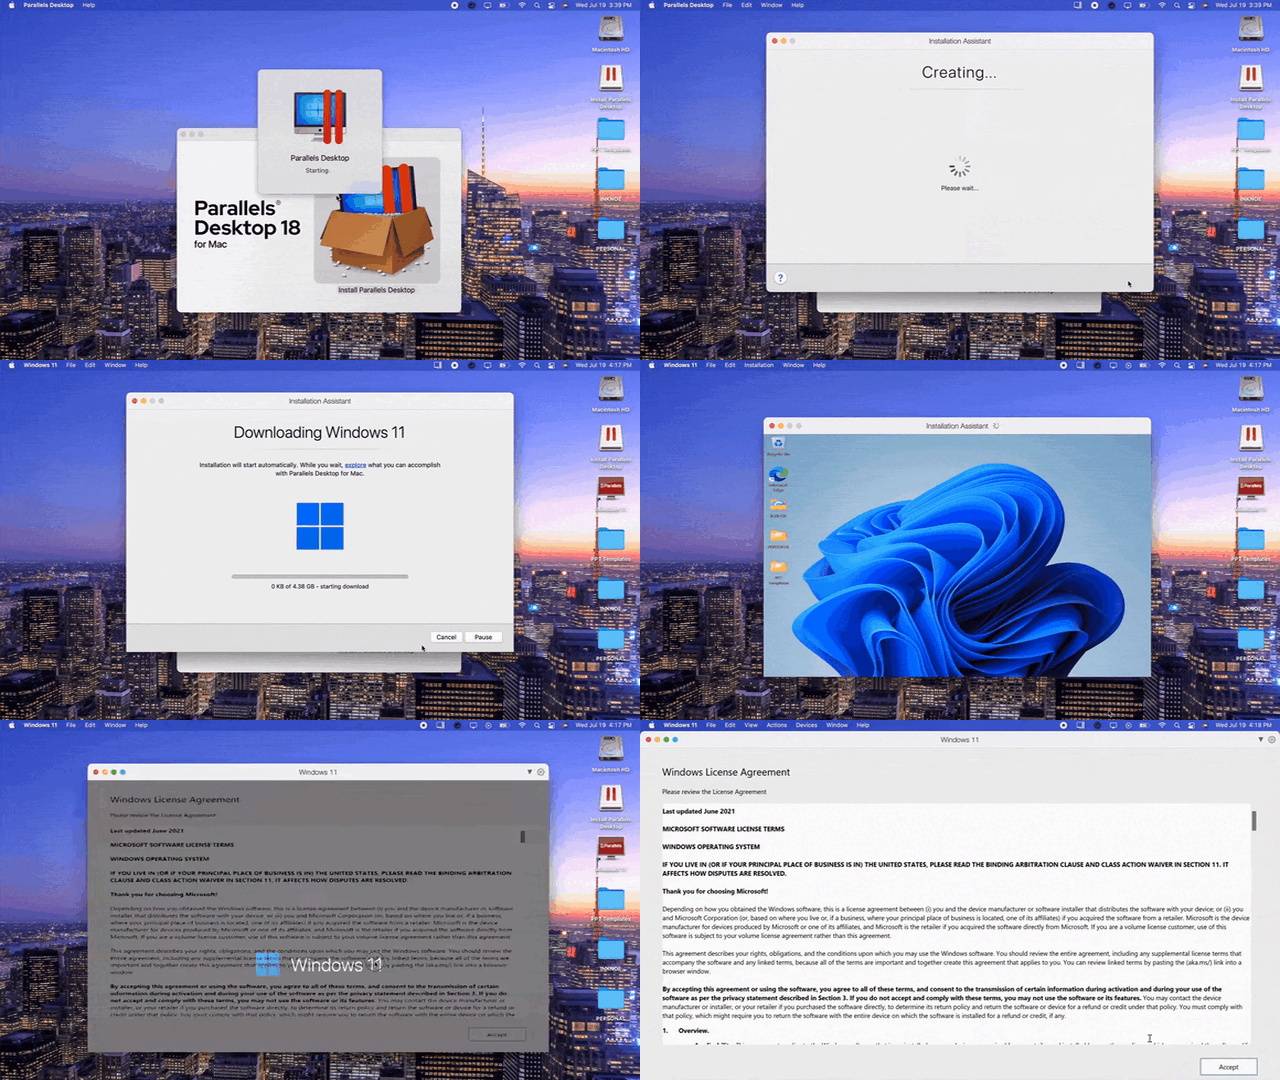
Open the downloaded installer and double-click the Install box (located in your Downloads folder). Follow the on-screen instructions to complete the installation.

3. Set up Windows
Finish the installation process by installing Windows or another operating system of your choice within Parallels. This creates a virtual machine where you can run Windows applications on your Mac.
4. Install Microsoft Office Apps
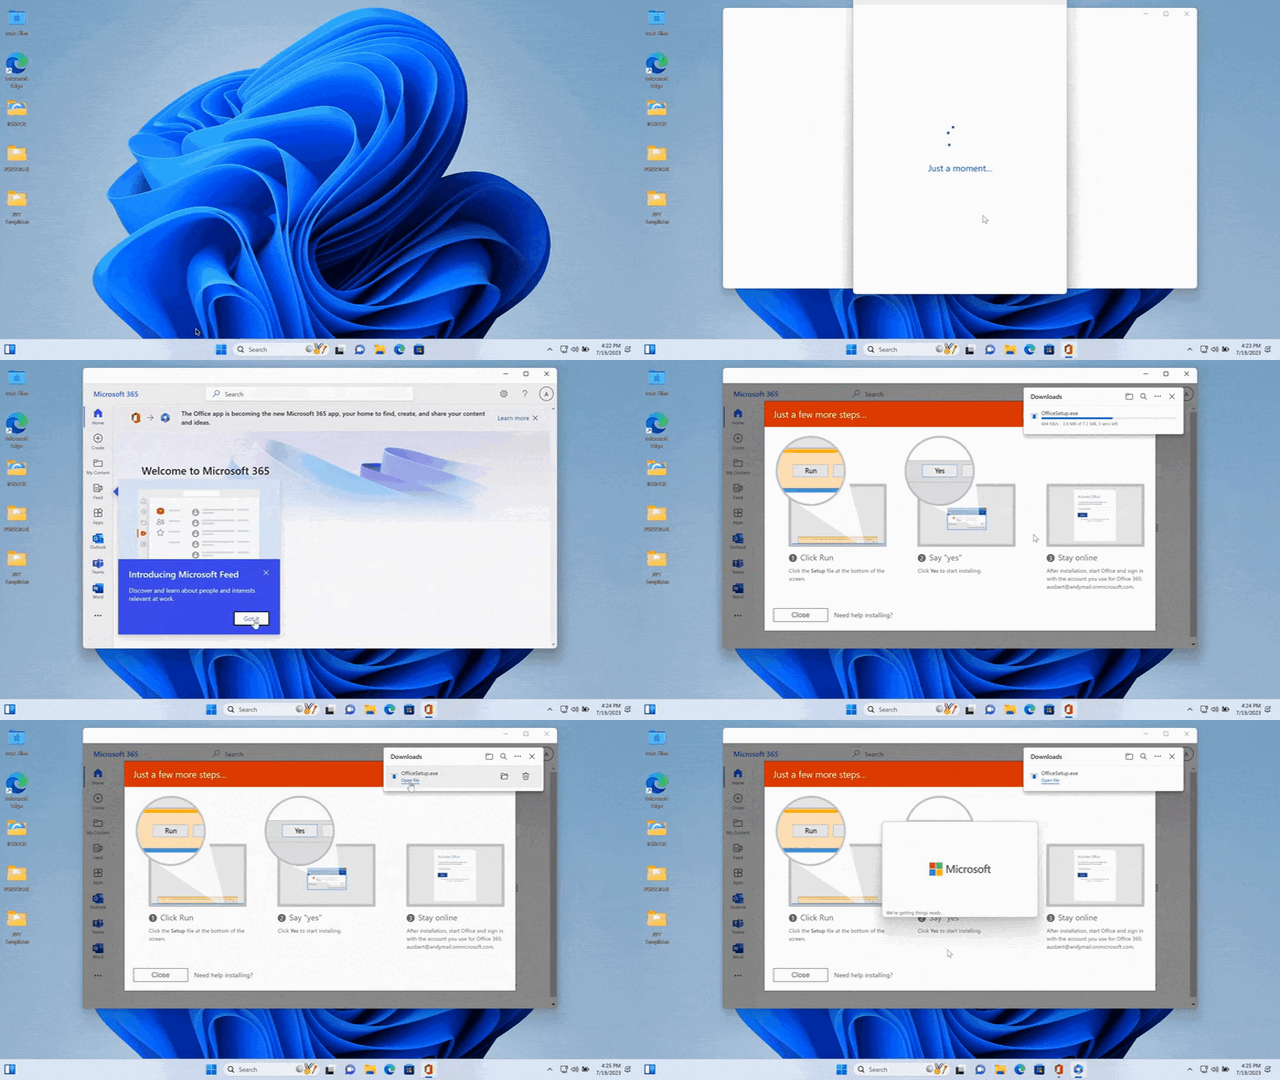
Install Office apps within your Windows virtual machine and sign in to your Microsoft account to access PowerPoint.
5. Sign up for ClassPoint
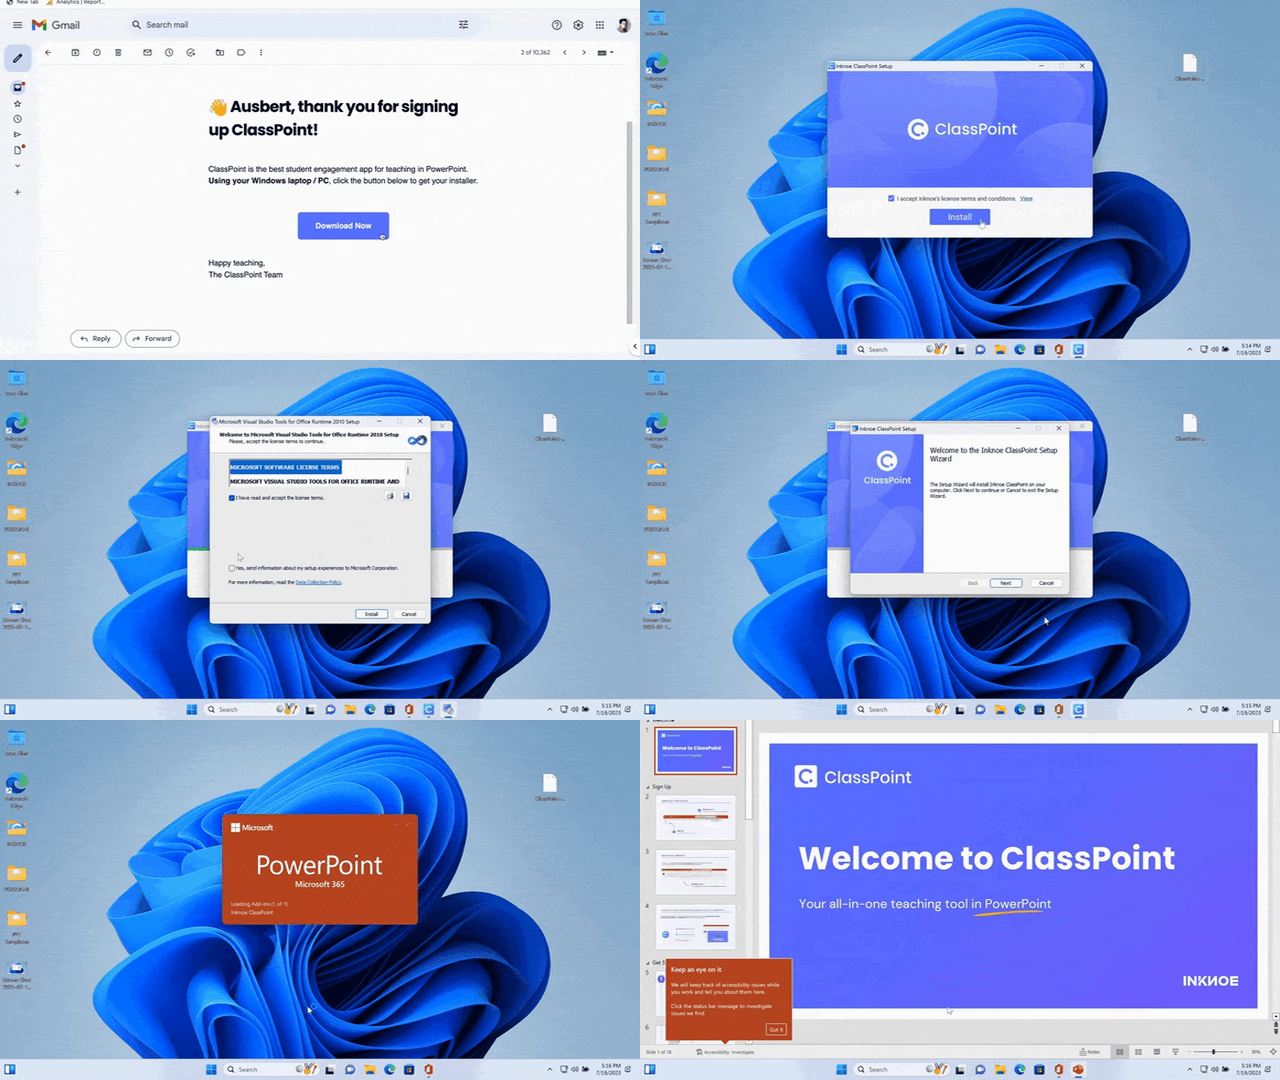
Visit the official ClassPoint website and sign up for an account. You will then receive an installer via your registered email address.

6. Install ClassPoint
Follow the provided steps to install ClassPoint within your Windows virtual machine.
7. Run ClassPoint on Mac
Now, you can enjoy ClassPoint’s interactive features directly on your macOS device, seamlessly integrated with PowerPoint.
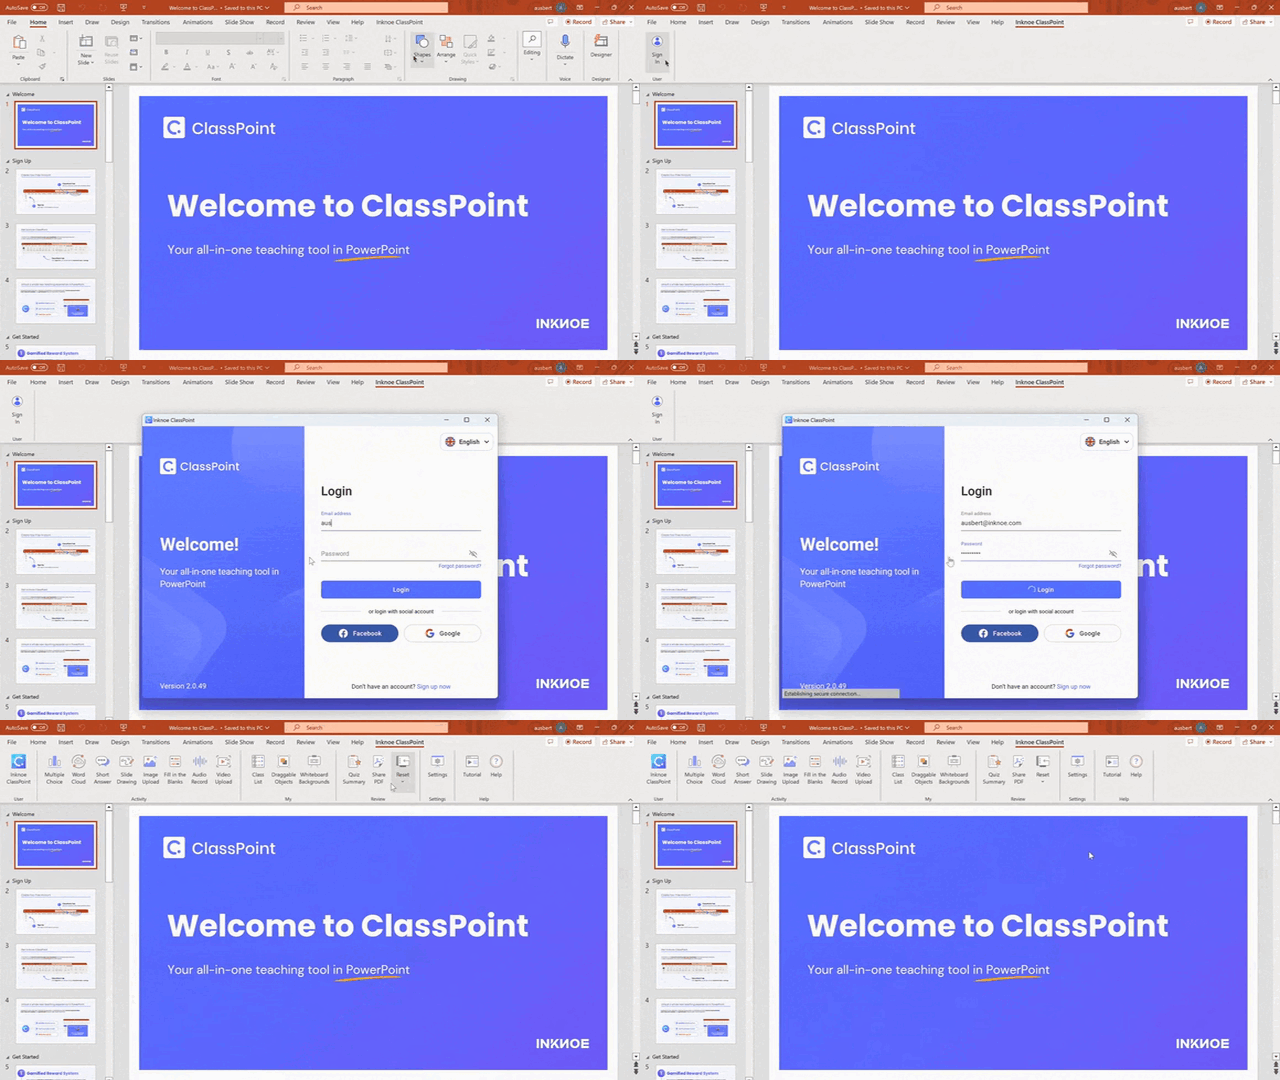
And, just like that, you may then experience ClassPoint’s magic right on your macOS device. Similar to a regular Windows device, you will be able to seamlessly incorporate ClassPoint’s interactive quizzes, presentation tools, and gamification features into your PowerPoint presentations – no less!
If you’re ready to elevate your presenting experience using a virtual machine, check out Parallels’ product plans at Check out Parallels’ product plans here.
Conclusion
While ClassPoint is natively available on Windows, Mac users can still take advantage of its powerful capabilities by using Parallels Desktop for Mac. Parallels offers a seamless virtualization solution, enabling you to run Windows applications, including ClassPoint, alongside your macOS environment.
By following our step-by-step guide, you can seamlessly set up Parallels, install ClassPoint, and integrate its supercharged features into your PowerPoint presentations. Happy presenting!