How to add a timer to PowerPoint? The PowerPoint tool we’ve all come to rely on lacks a fundamental feature – a built-in timer. And we understand the struggle as we tried searching for ways to insert timers to PowerPoint, we were met with a scattered mix of incomplete solutions and unsatisfactory advice.
We get it. We understand the struggle, the frustration, and the need for a dependable timer solution. We’ve been down that road ourselves, and that is why this article is here – not just to highlight the problem, but to offer a solution.
Trust us, we have tried all the different methods to add a timer to PowerPoint, and we have decided to put an end to this enigma by sharing with you the best 4 ways to add a timer to PowerPoint, with and without add-ins. Let us not waste any more time and jump right in!
How to Add a Timer to PowerPoint (With Add-In)
Method #1 With ClassPoint Add-In
The first and most obvious method is through adding timer add-ins to PowerPoint. We have tried many of them including Breaktime and EasyTimer, but these add-in timers either have limited customisability or are unable to run simultaneously while you navigate between slides. We recommend you to try this add-in called ClassPoint, which not only includes a timer feature for PowerPoint but also offers a wide array of additional features to help you elevate and transform your presentations, turn it into an interactive experience, or gamify your slides.
Let us show you how to add ClassPoint Timer to PowerPoint in 4 simple steps:
Step 1: Download ClassPoint
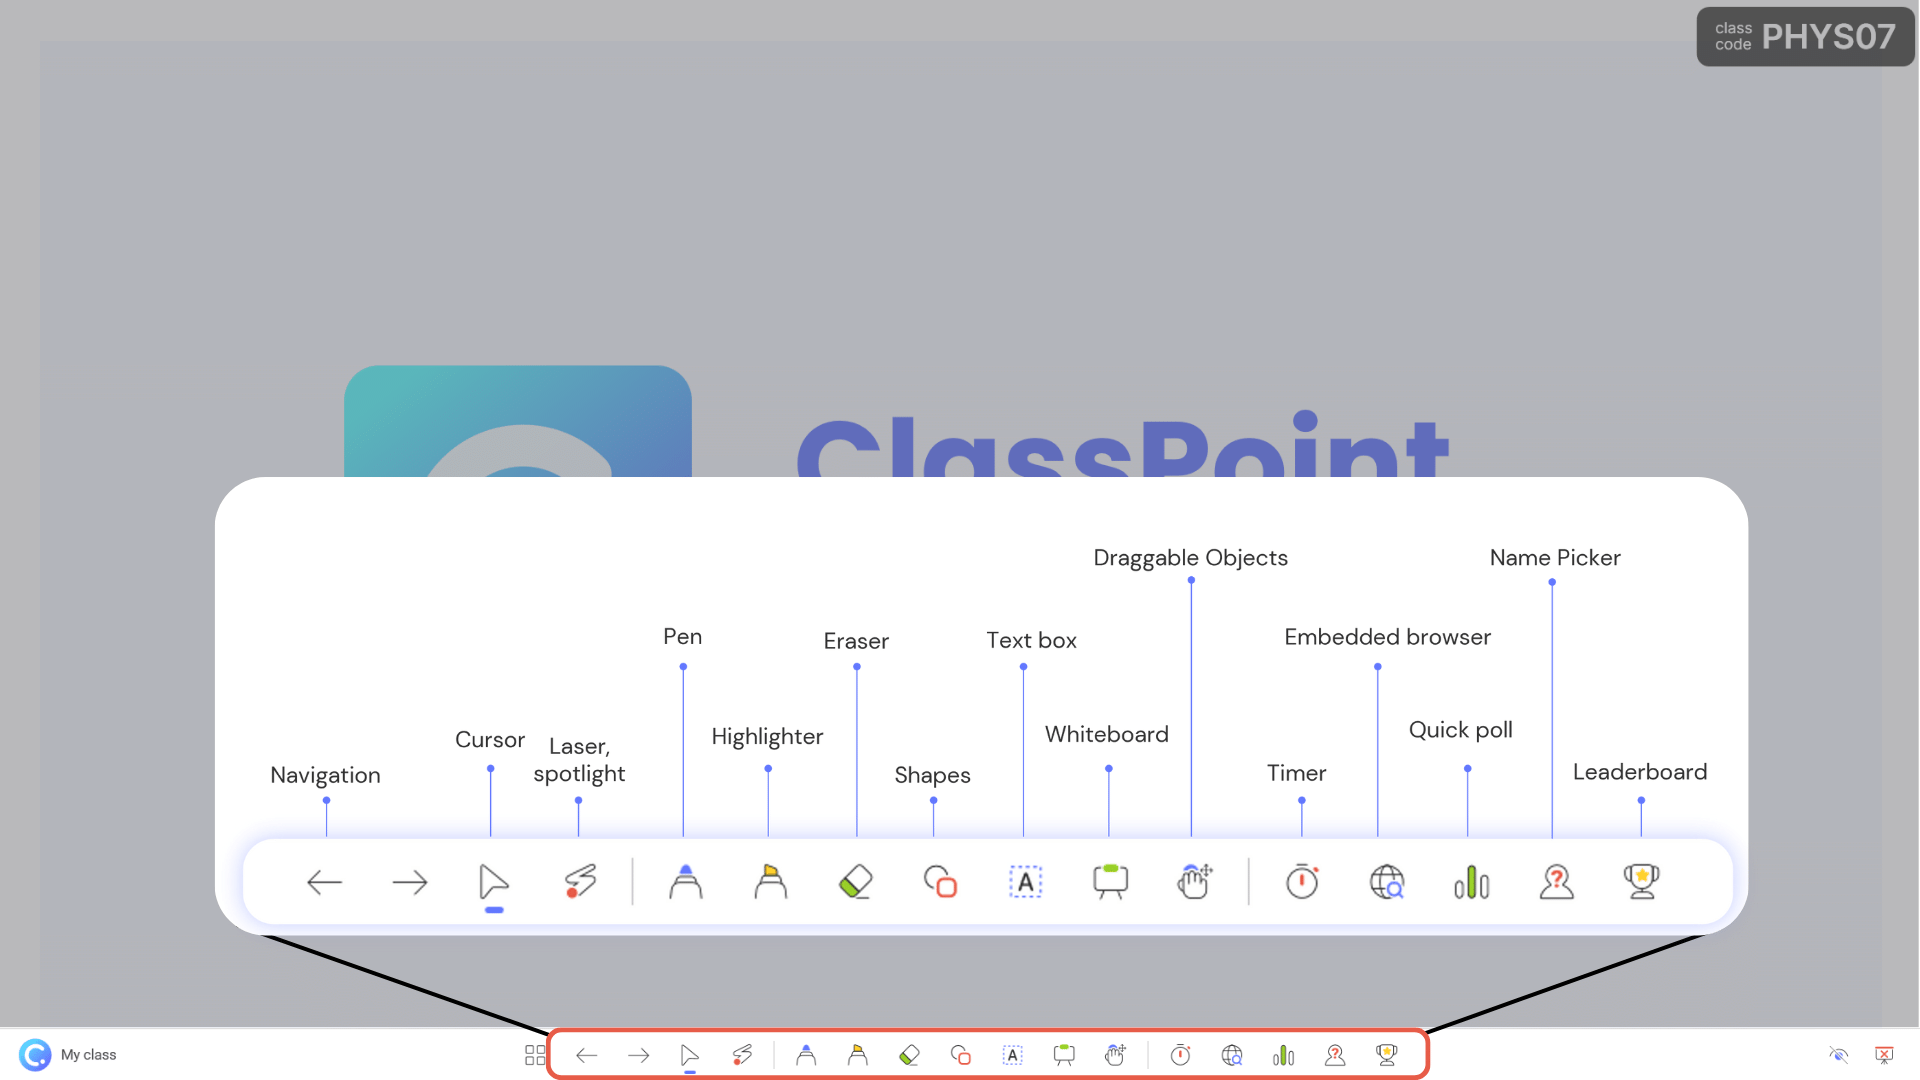
Download ClassPoint and sign up for an account at www.classpoint.io. You will gain access to a wide range of new functionalities and tools in PowerPoint, including PowerPoint Timer and Stopwatch. You can access the PowerPoint Timer and Stopwatch at the ClassPoint toolbar at the bottom of your screen during slide show mode.
Step 2: Run the Timer
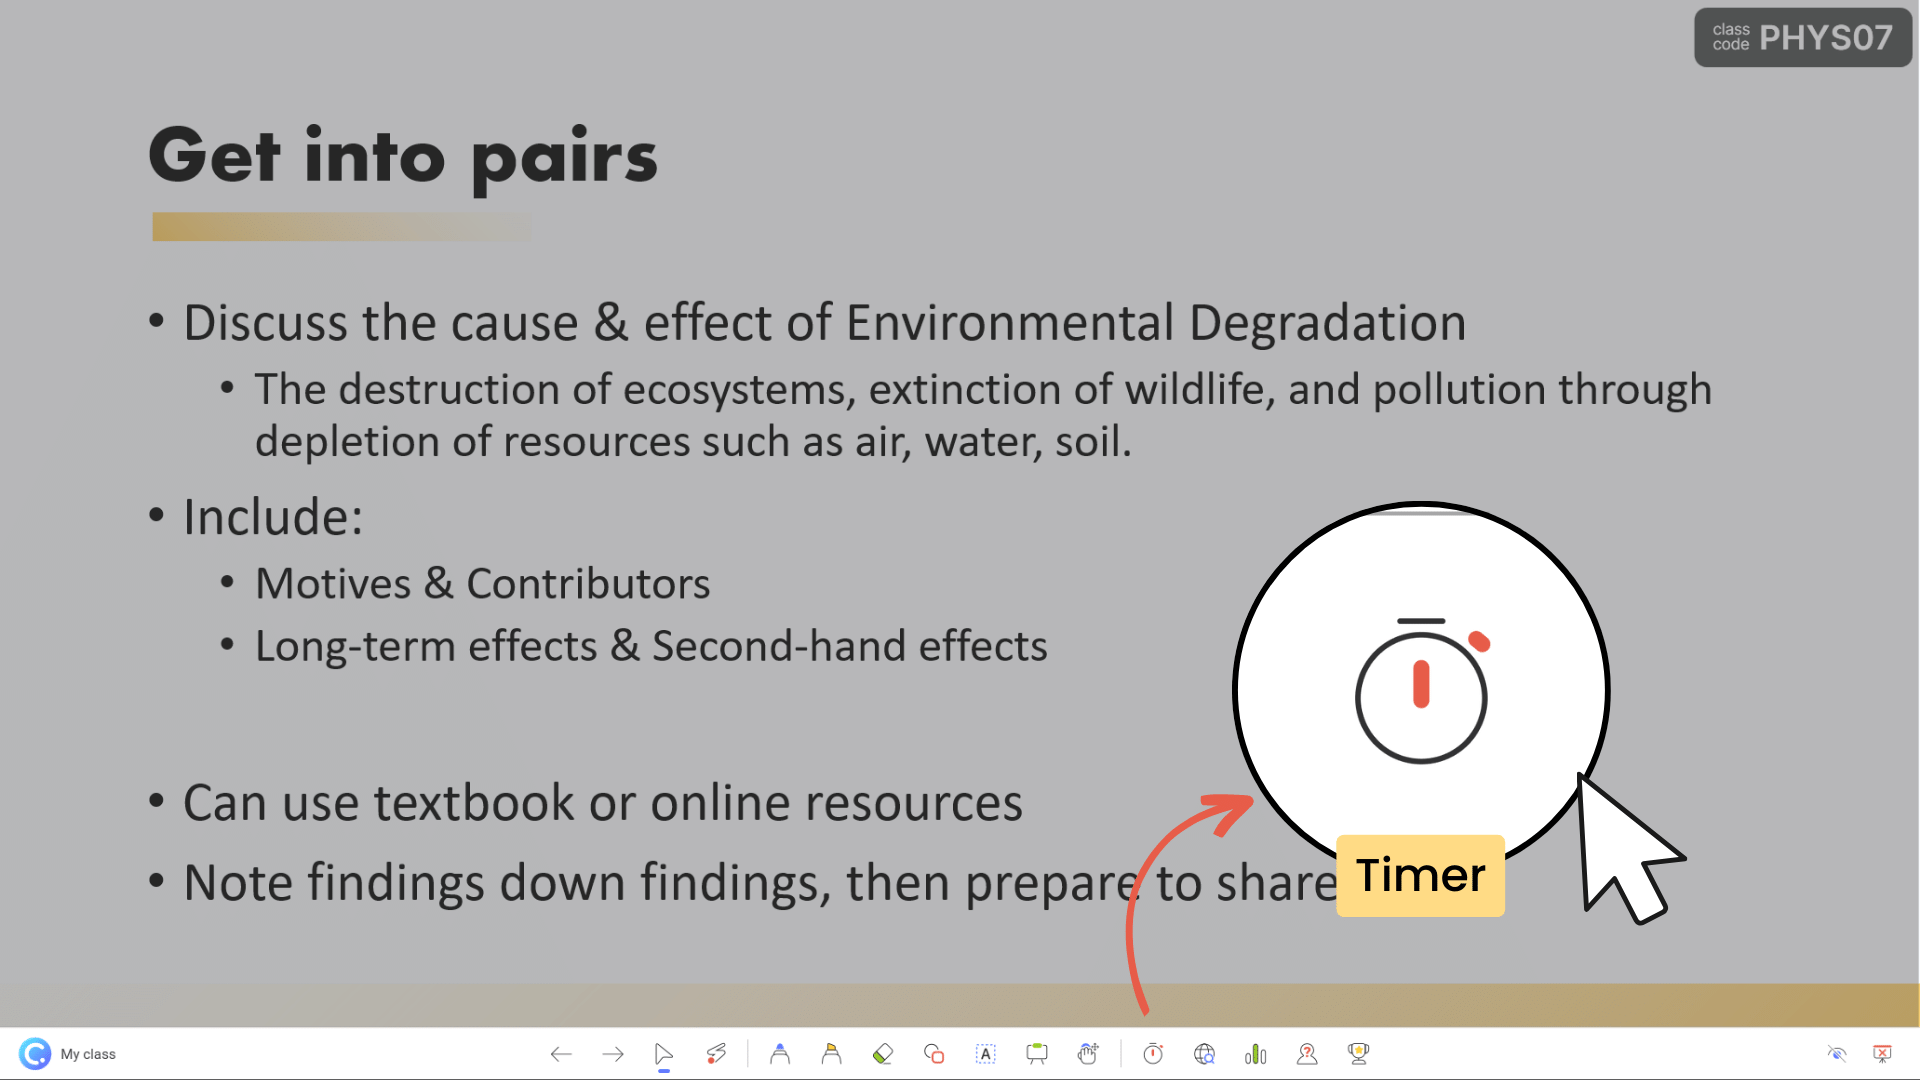
Yes, running a PowerPoint timer has never been easier. It is just one click away! To start the Timer, click on then Timer icon right next to Embedded Browser in the ClassPoint toolbar during slide show mode.
ClassPoint timer has 2 modes – timer and stopwatch, providing full flexibility to adapt to different presentation needs.
3. Customise the Settings
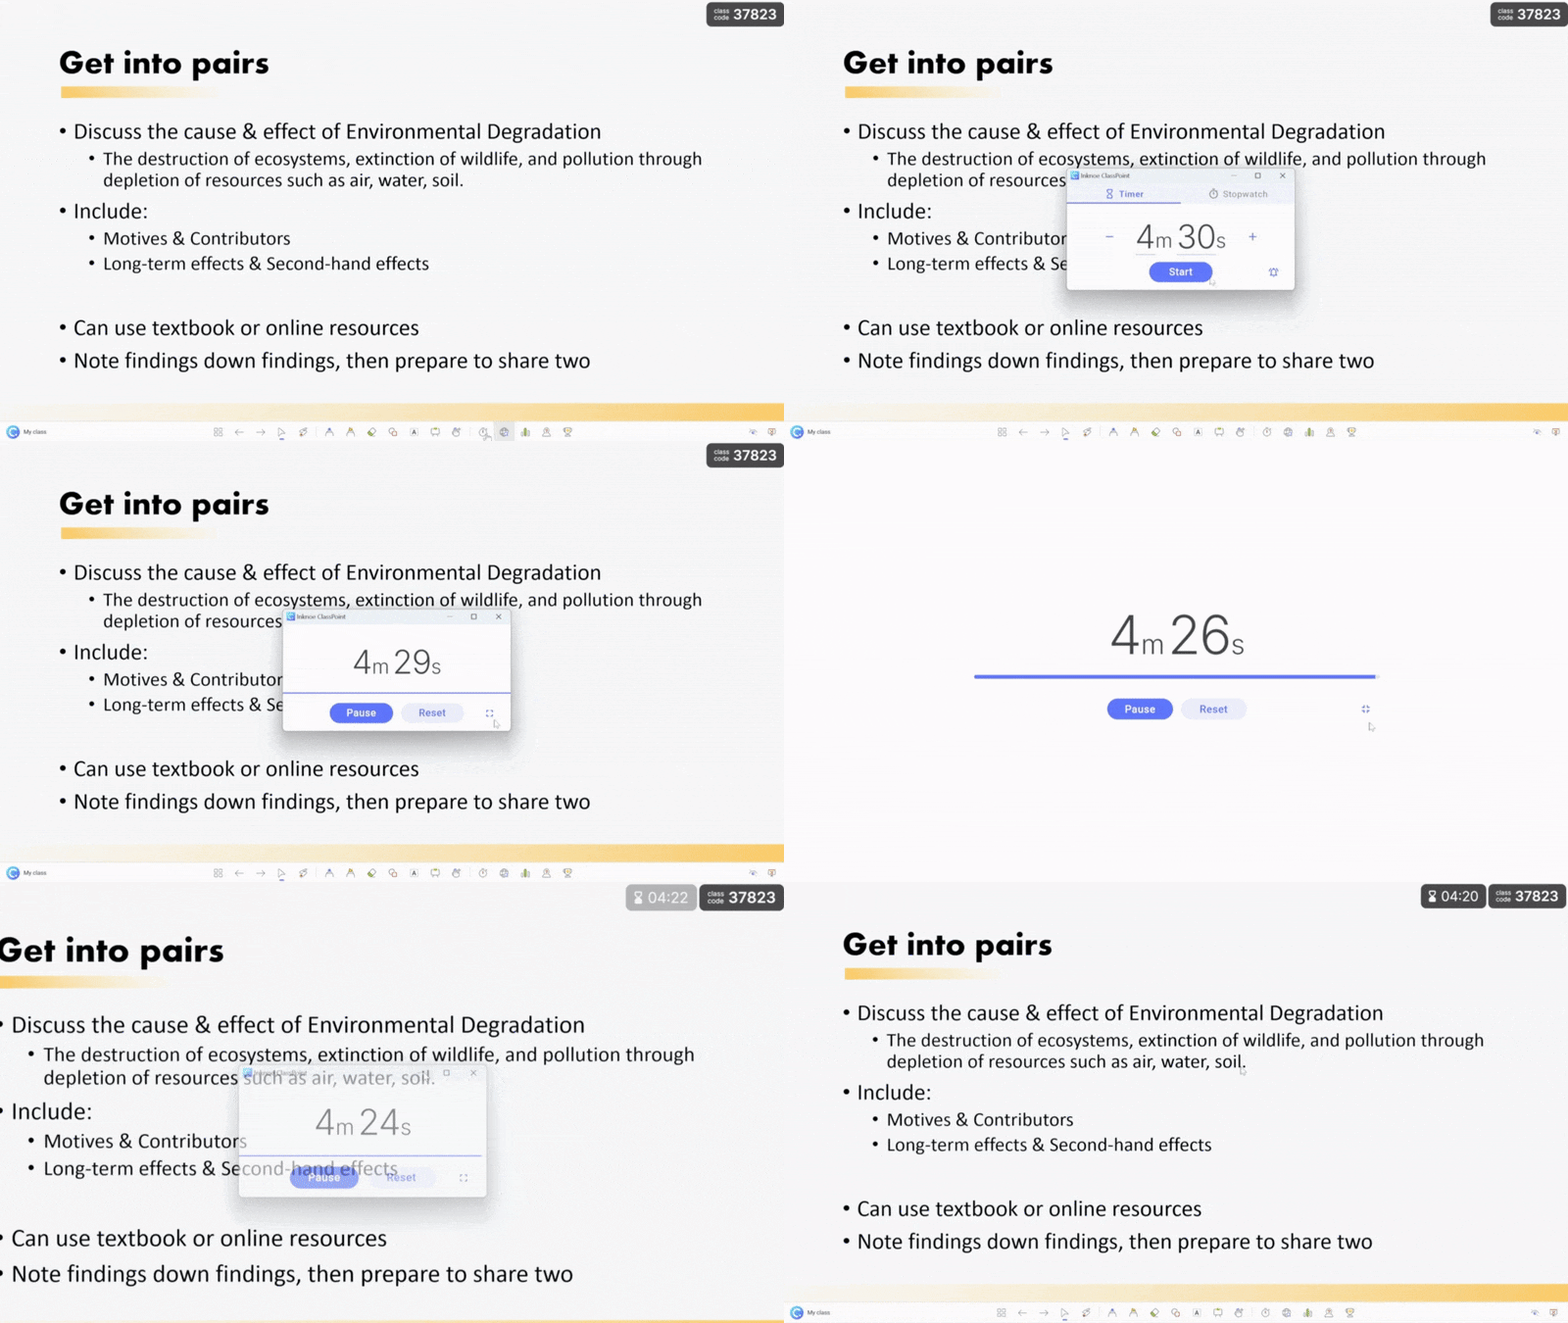
You can easily adjust the timer in increments of 30, 10, or single seconds. Additionally, you can manually input a precise time using the minute and second frames or adjust the quick (+) or (-) buttons.
You can also maximise or minimise ClassPoint timer for optimal visibility, as well as adjusting the various alarm tunes to capture attention.
Here is a detailed tutorial on how to insert ClassPoint Timer to PowerPoint:
How to Add a Timer to PowerPoint (Without Add-Ins)
We know you are eagerly anticipating various methods to add a PowerPoint timer without the need for any add-ins. Because the simpler the better, right? Nevertheless, it is essential to acknowledge that these methods, while add-in-free, often demand more hands-on effort with the use of PowerPoint animations. So if you are not a great fan of PowerPoint animations, we recommend you to stick with ClassPoint Timer above.
However, if you are someone who prefer customization and crave innovative solutions, get ready to roll up your sleeves and dive into these manual yet creatively empowering techniques to add a Timer in PowerPoint!
Method #2 Disappearing Countdown Timer
Step 1: Create the Shapes and Numbers

Start by creating five squares and text boxes containing the numbers 5 through 1. These will be animated to vanish sequentially, with one-second intervals between each disappearance. You can duplicate the shapes and text boxes easily with the keyboard shortcut Ctrl + D.
Alternatively, you can add Smart Art to create a disappearing countdown timer.
Step 2: Group the Shapes and Numbers
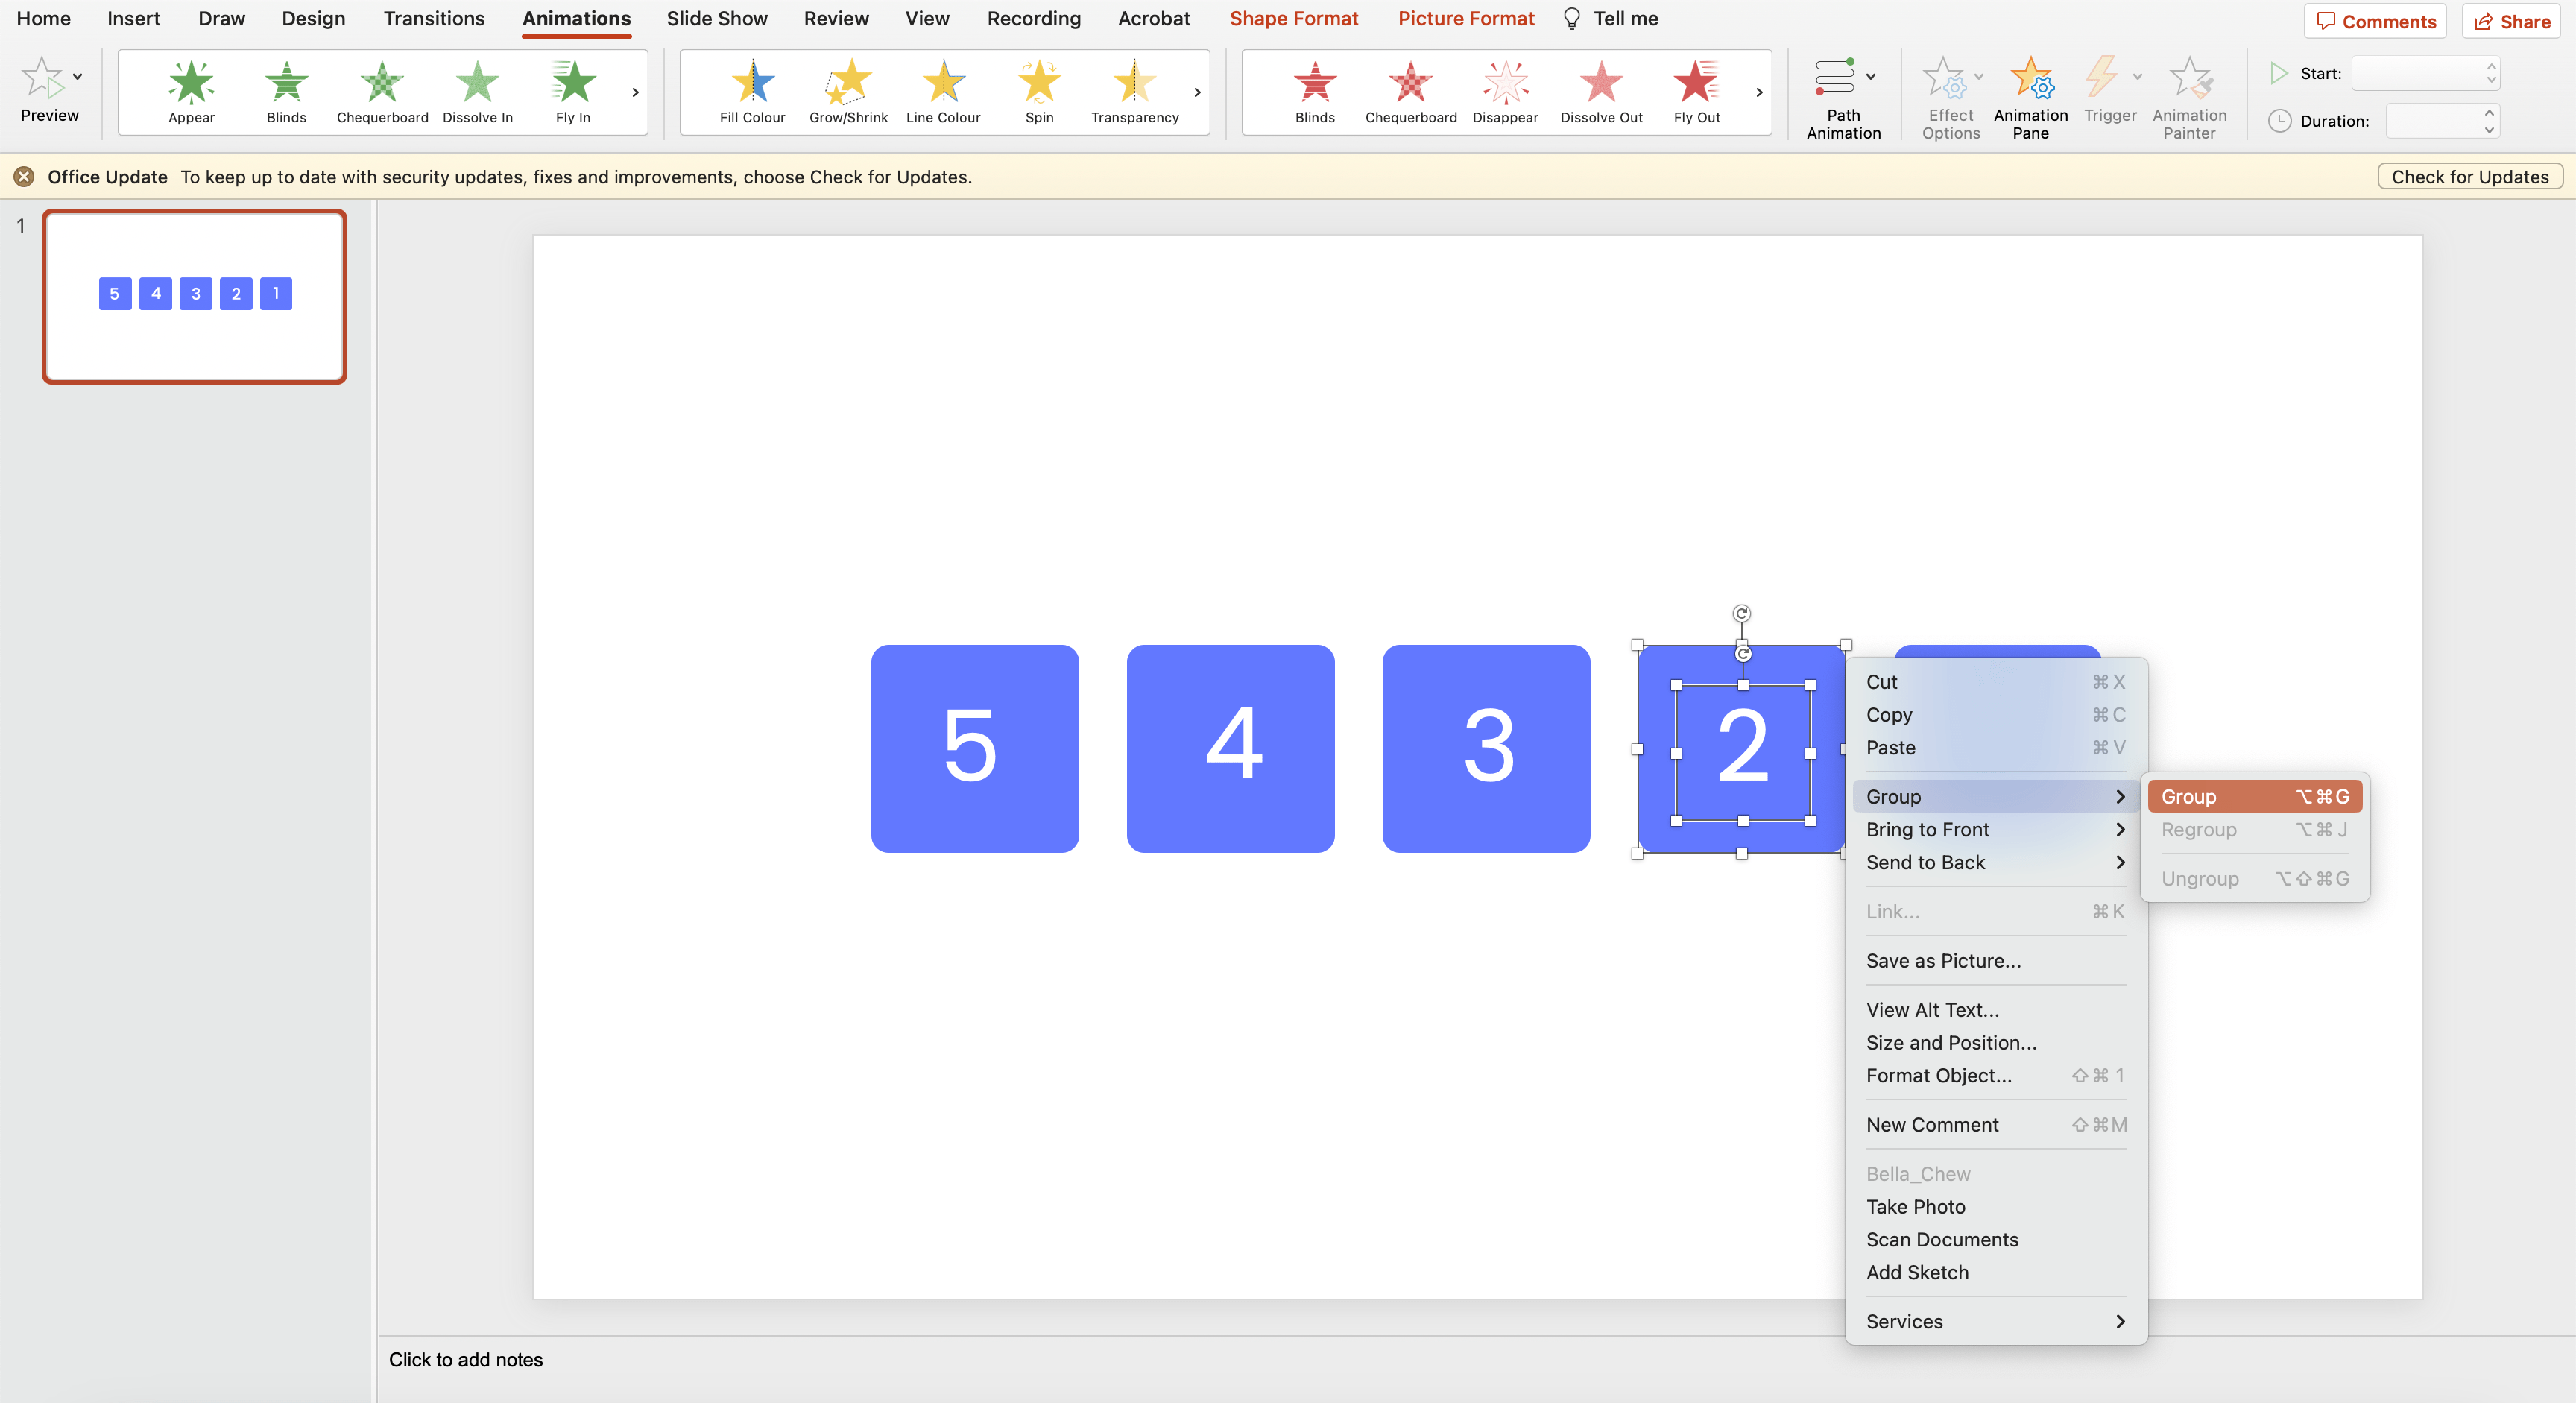
Group the individual squares and numbers.
This is important as you want to animate the squares together with the numbers.
Step 3: Add Animations
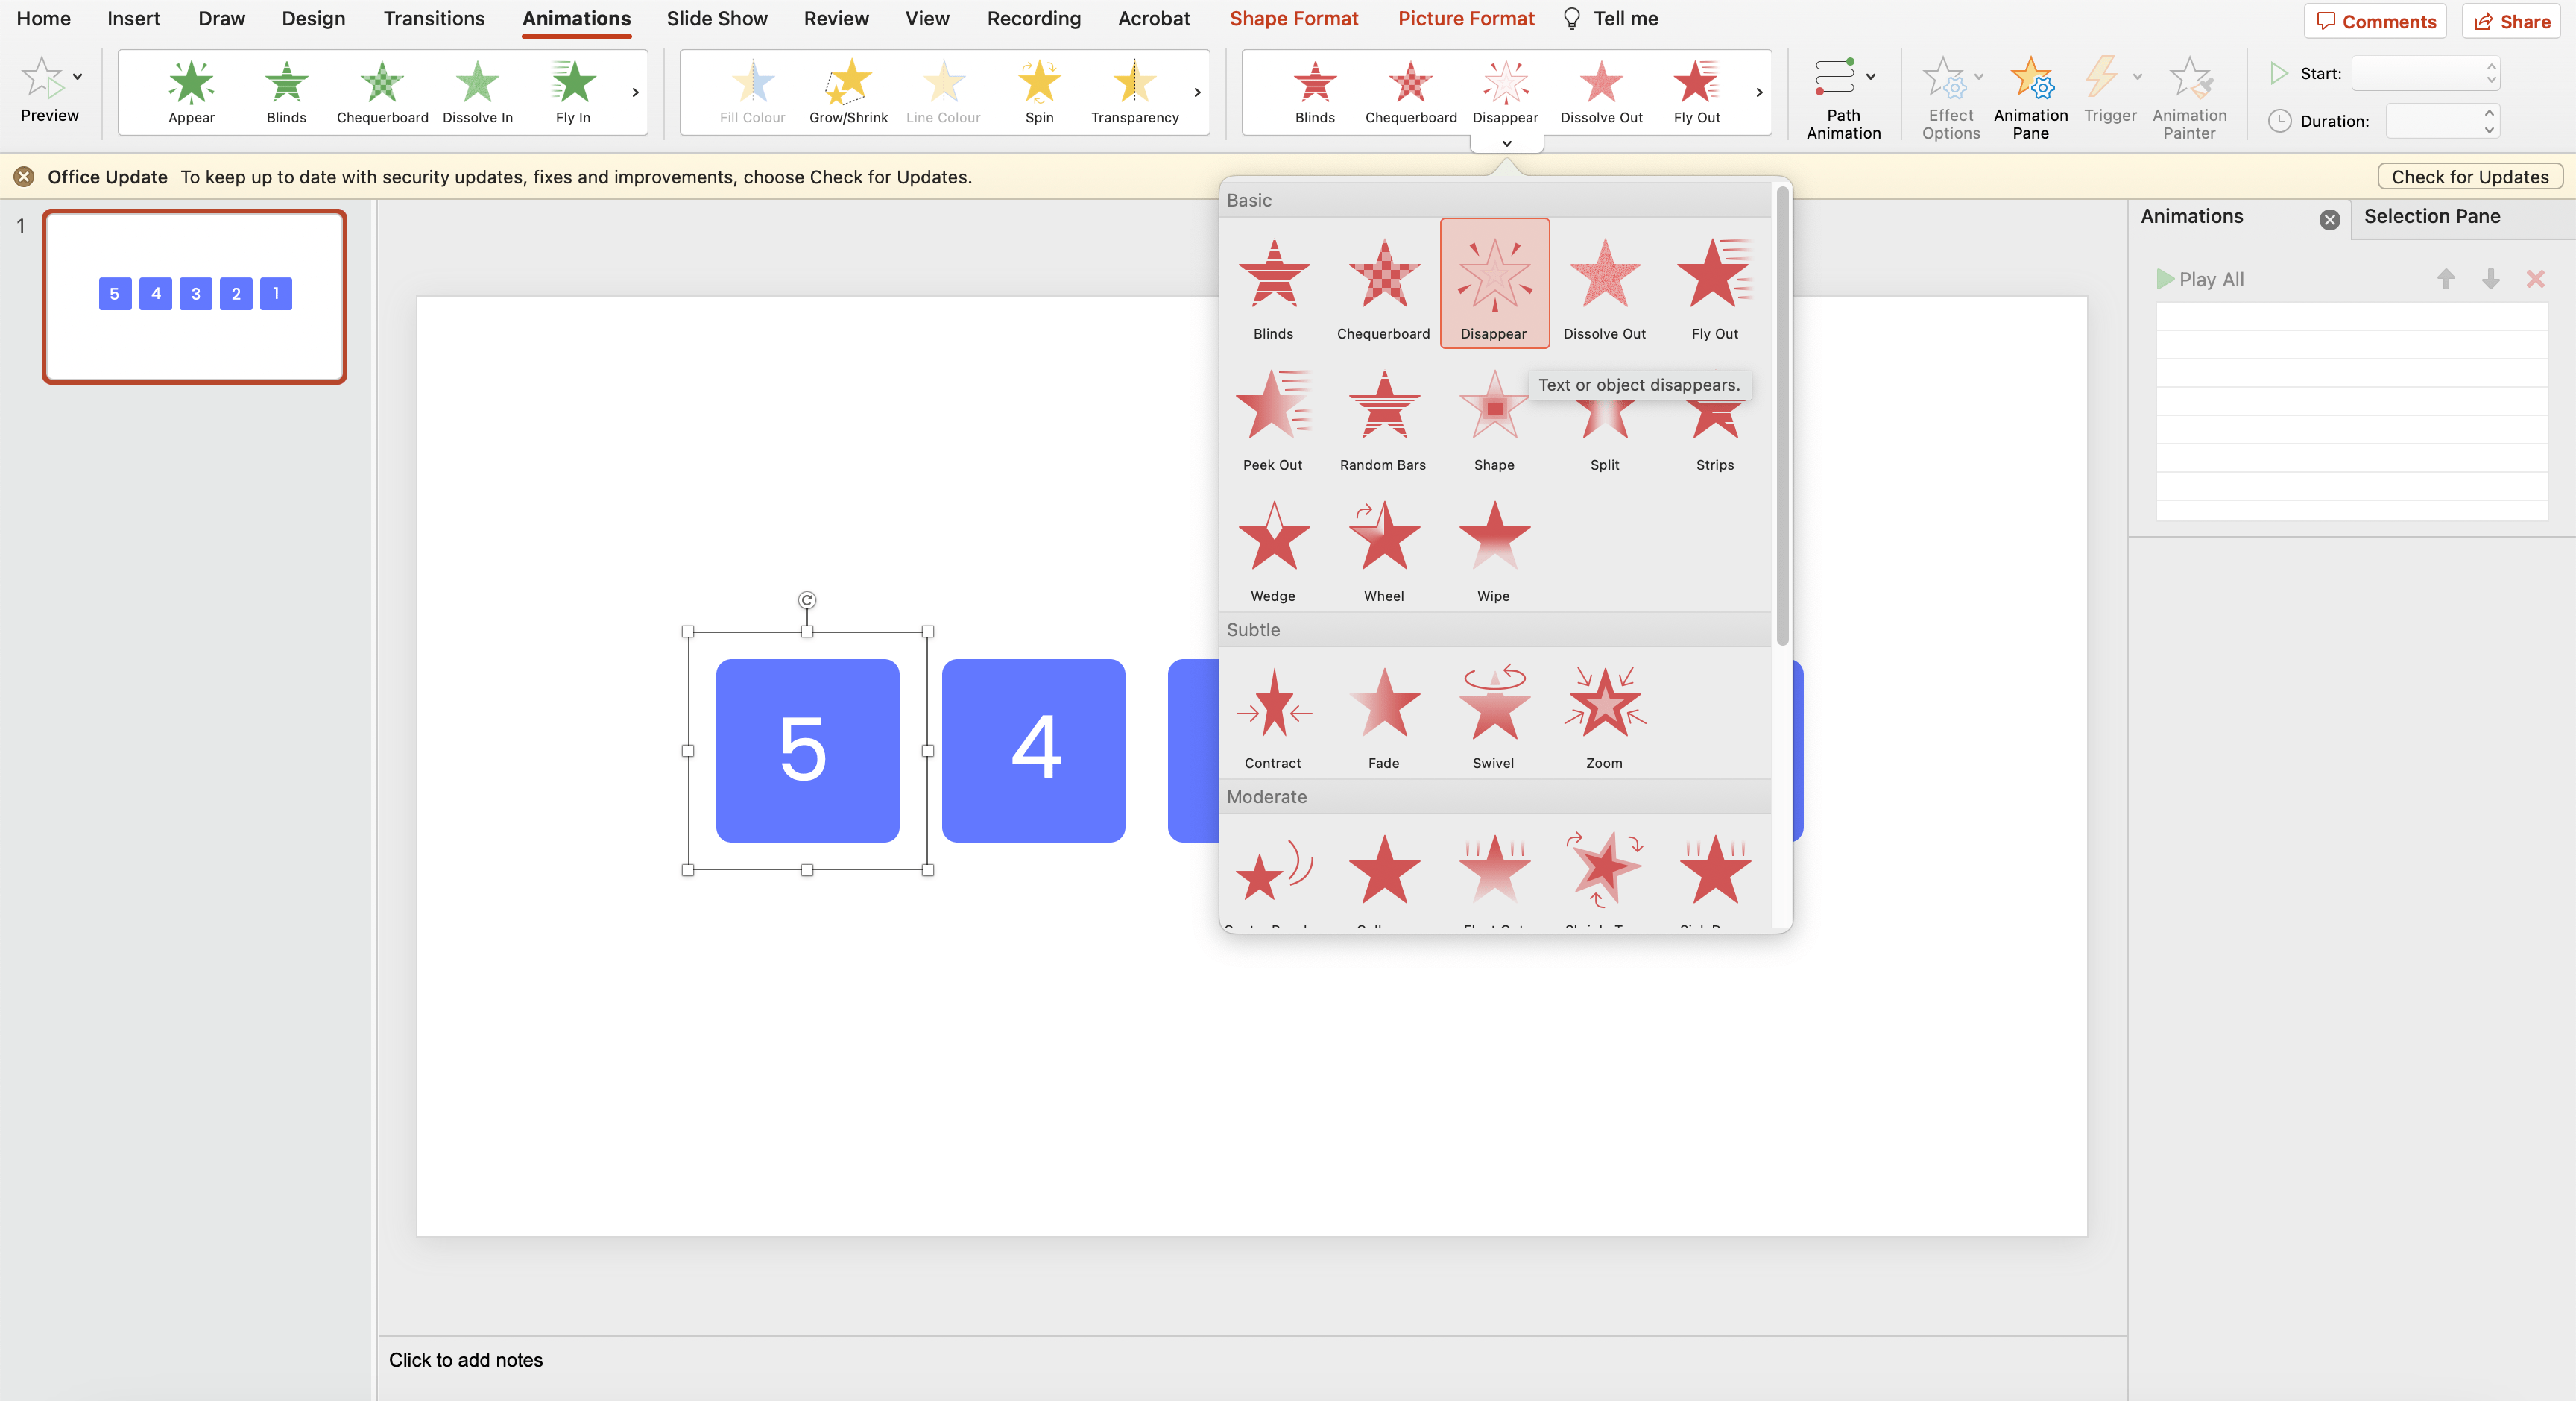
On the Animations tab, go to Exit Animations and select Disappear.
Step 4: Repeat
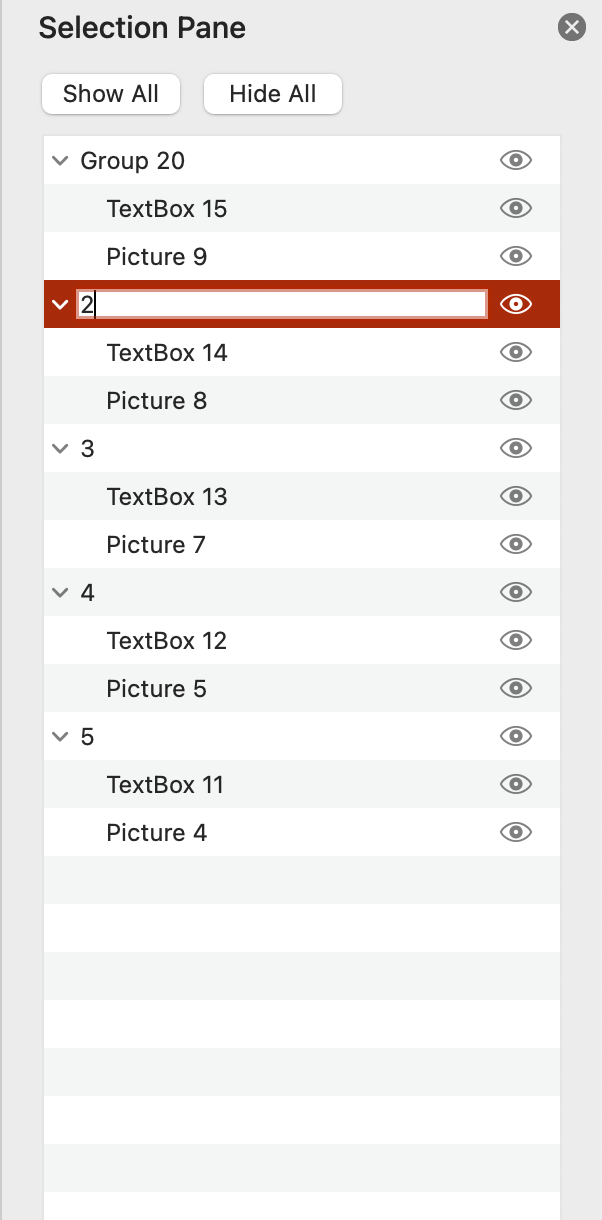
Repeat Step #3 for the remaining rectangles containing the numbers 4, 3, 2, and 1. To ensure you don’t lose track of which item to animate, go to “Selection Pane” and name the shape groups into identifiable terms.
Step 5: Animation Pane and Settings
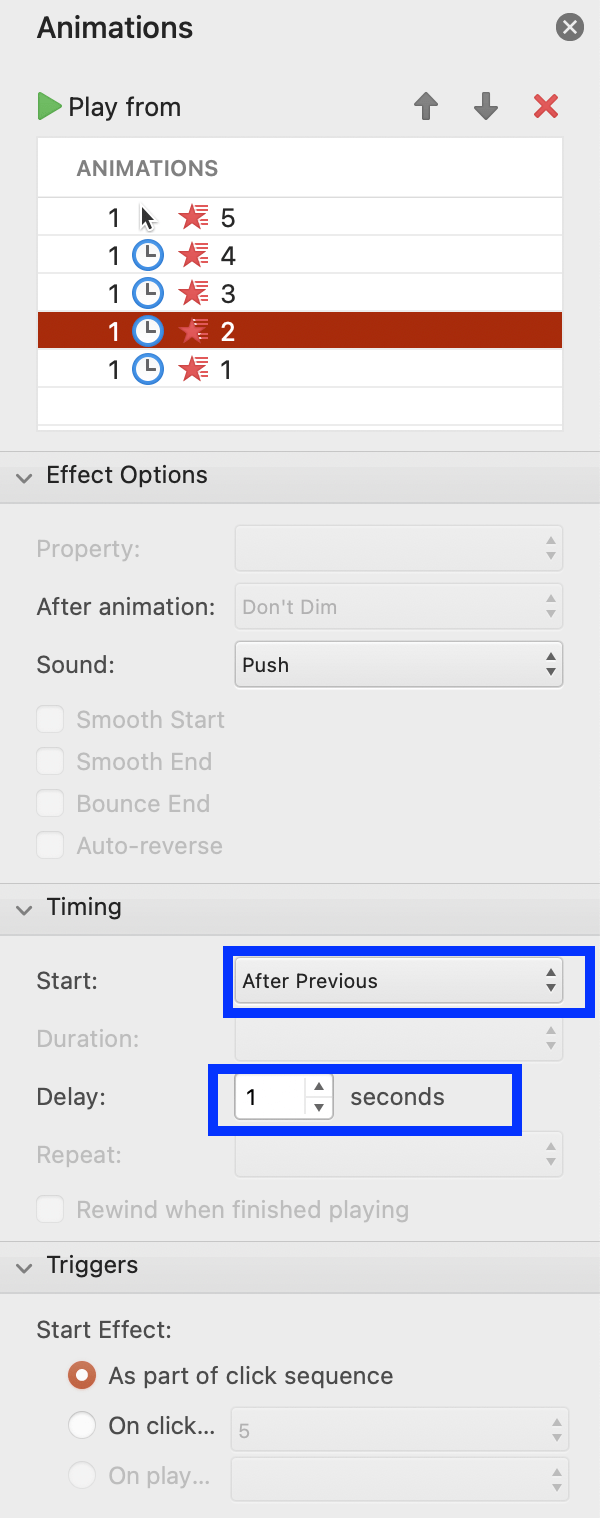
Go to Animation Pane and adjust the setting. Set the number 5 group to “Start on Click” and set the duration and delay to 1 second.
Step 6: Repeat
Repeat Step #5 for all other rectangles, progressing from 4 to 1. Configure the timing to: Start: After Previous, Duration: Auto, and Delay: 01:00.
Step 7: Add Sound (Optional)
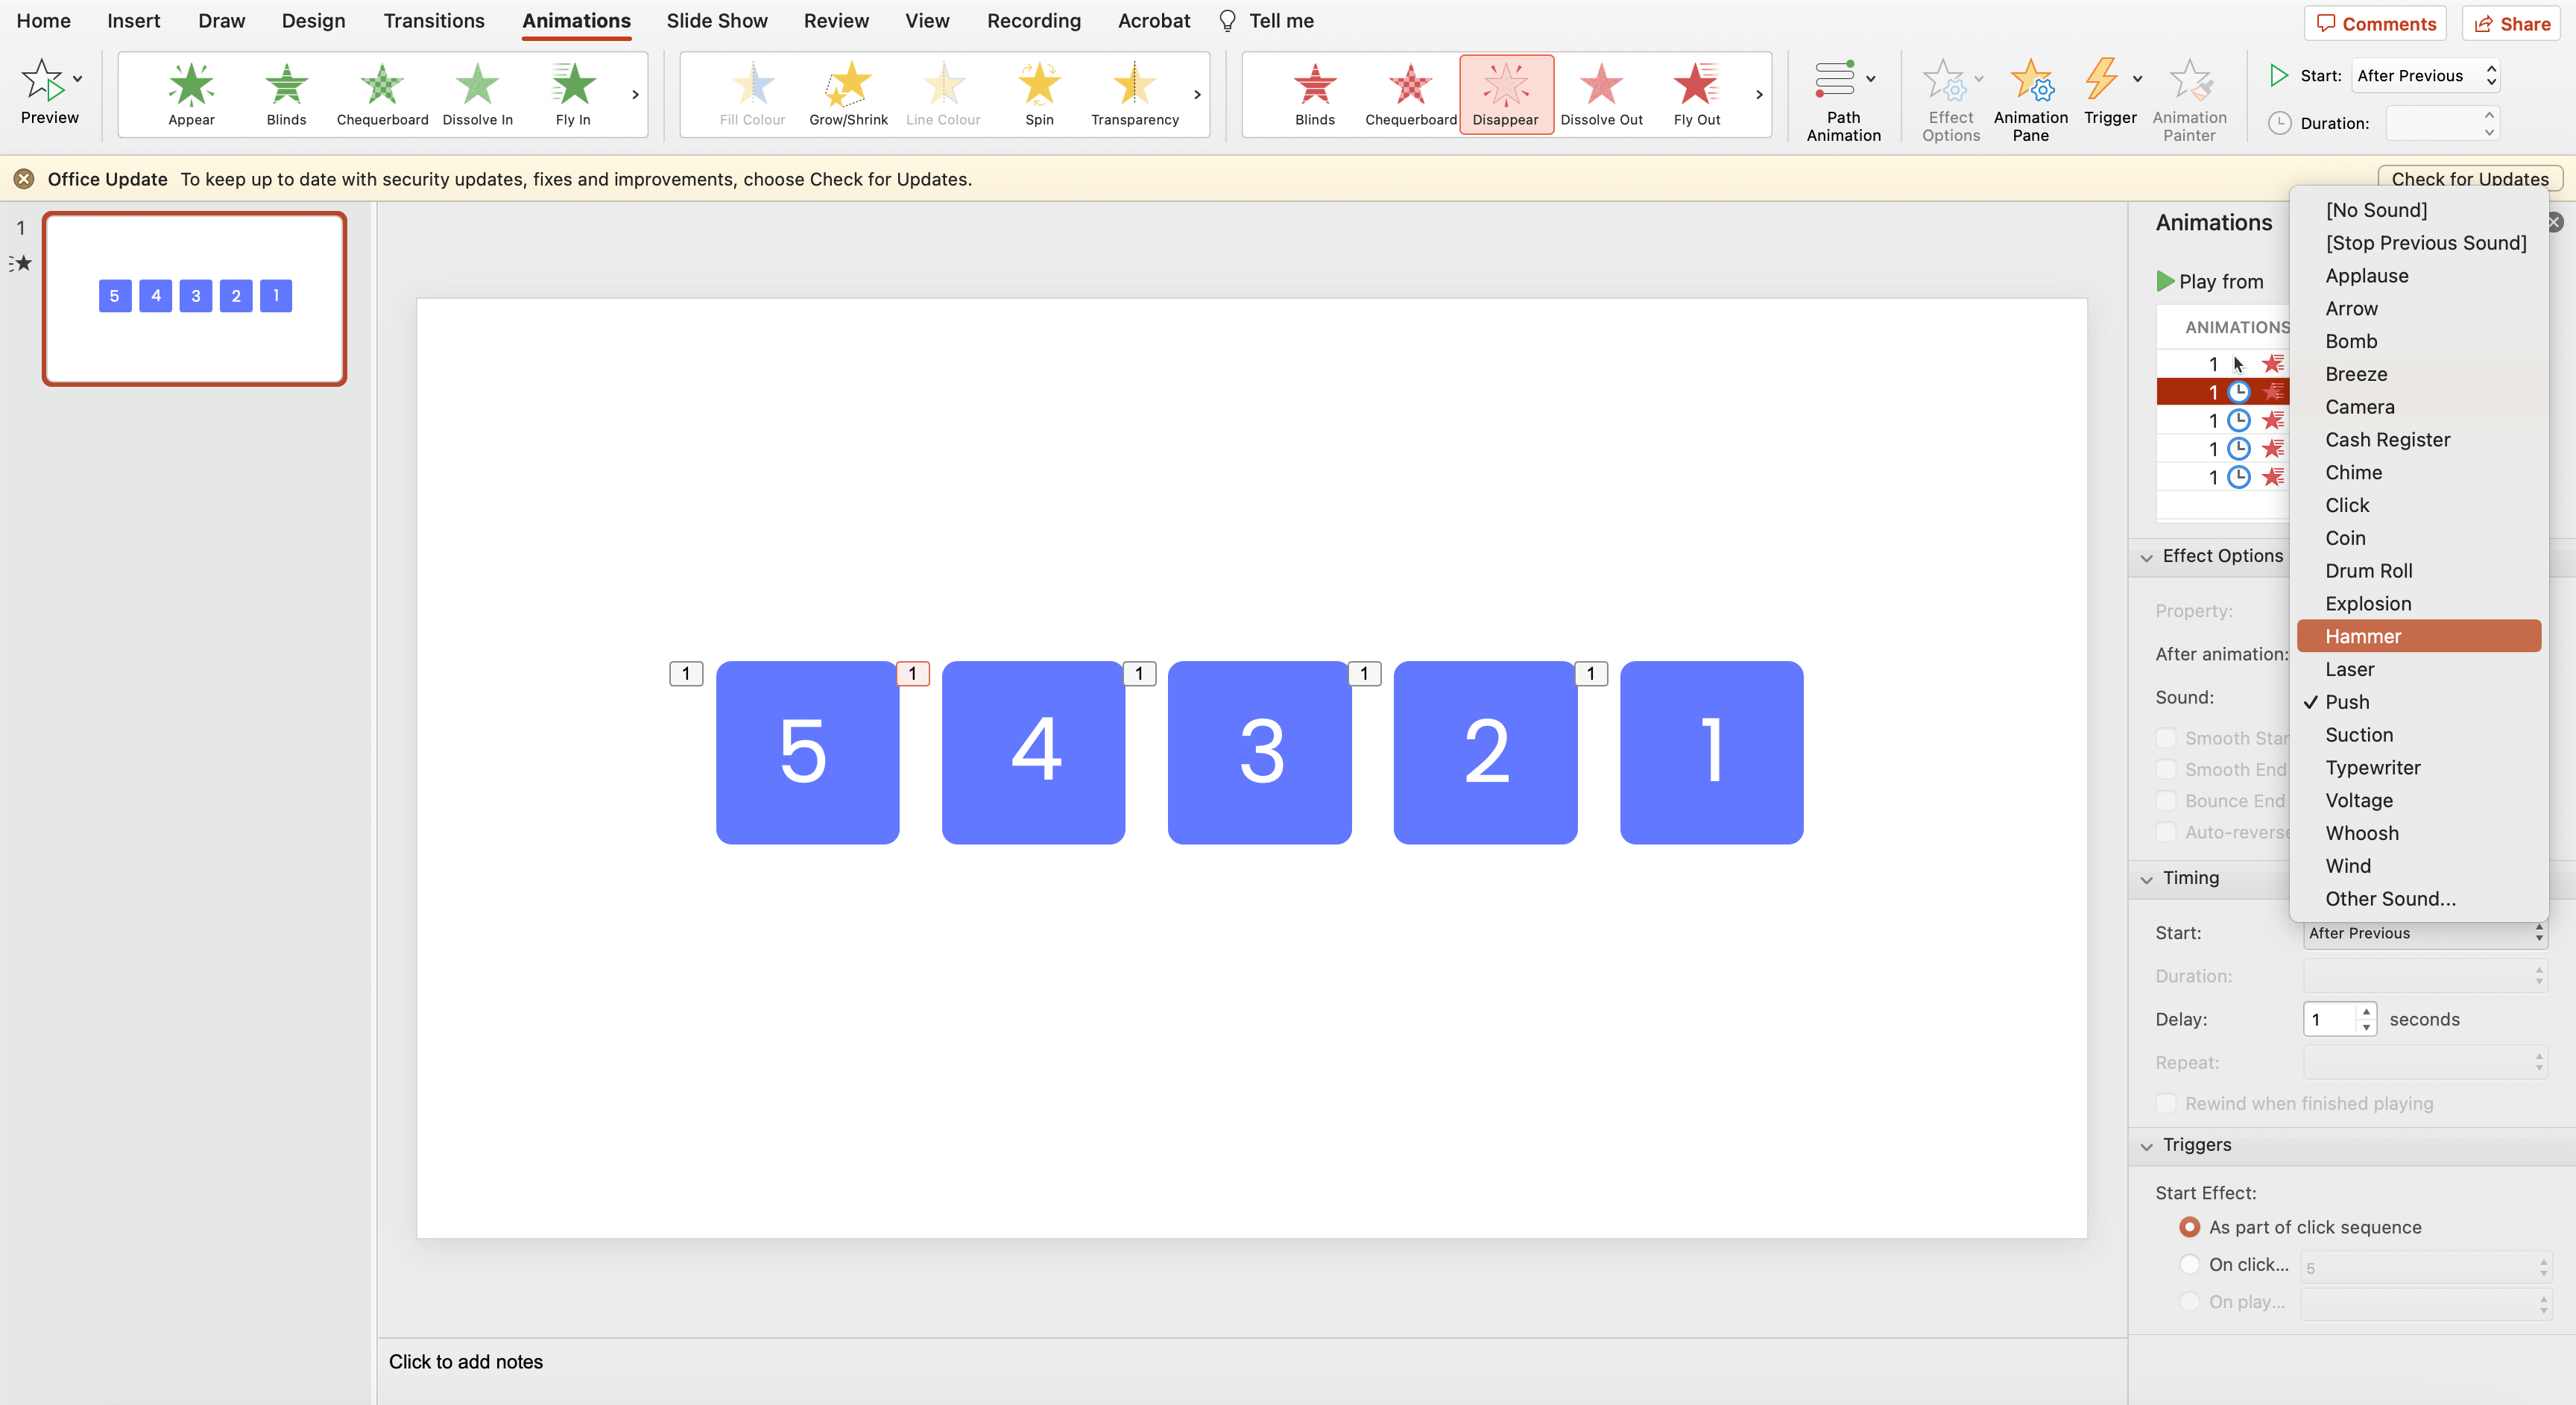
You can also choose to add sound to the animation to better capture your audience’s attention.
There you have it – a disappearing countdown timer!
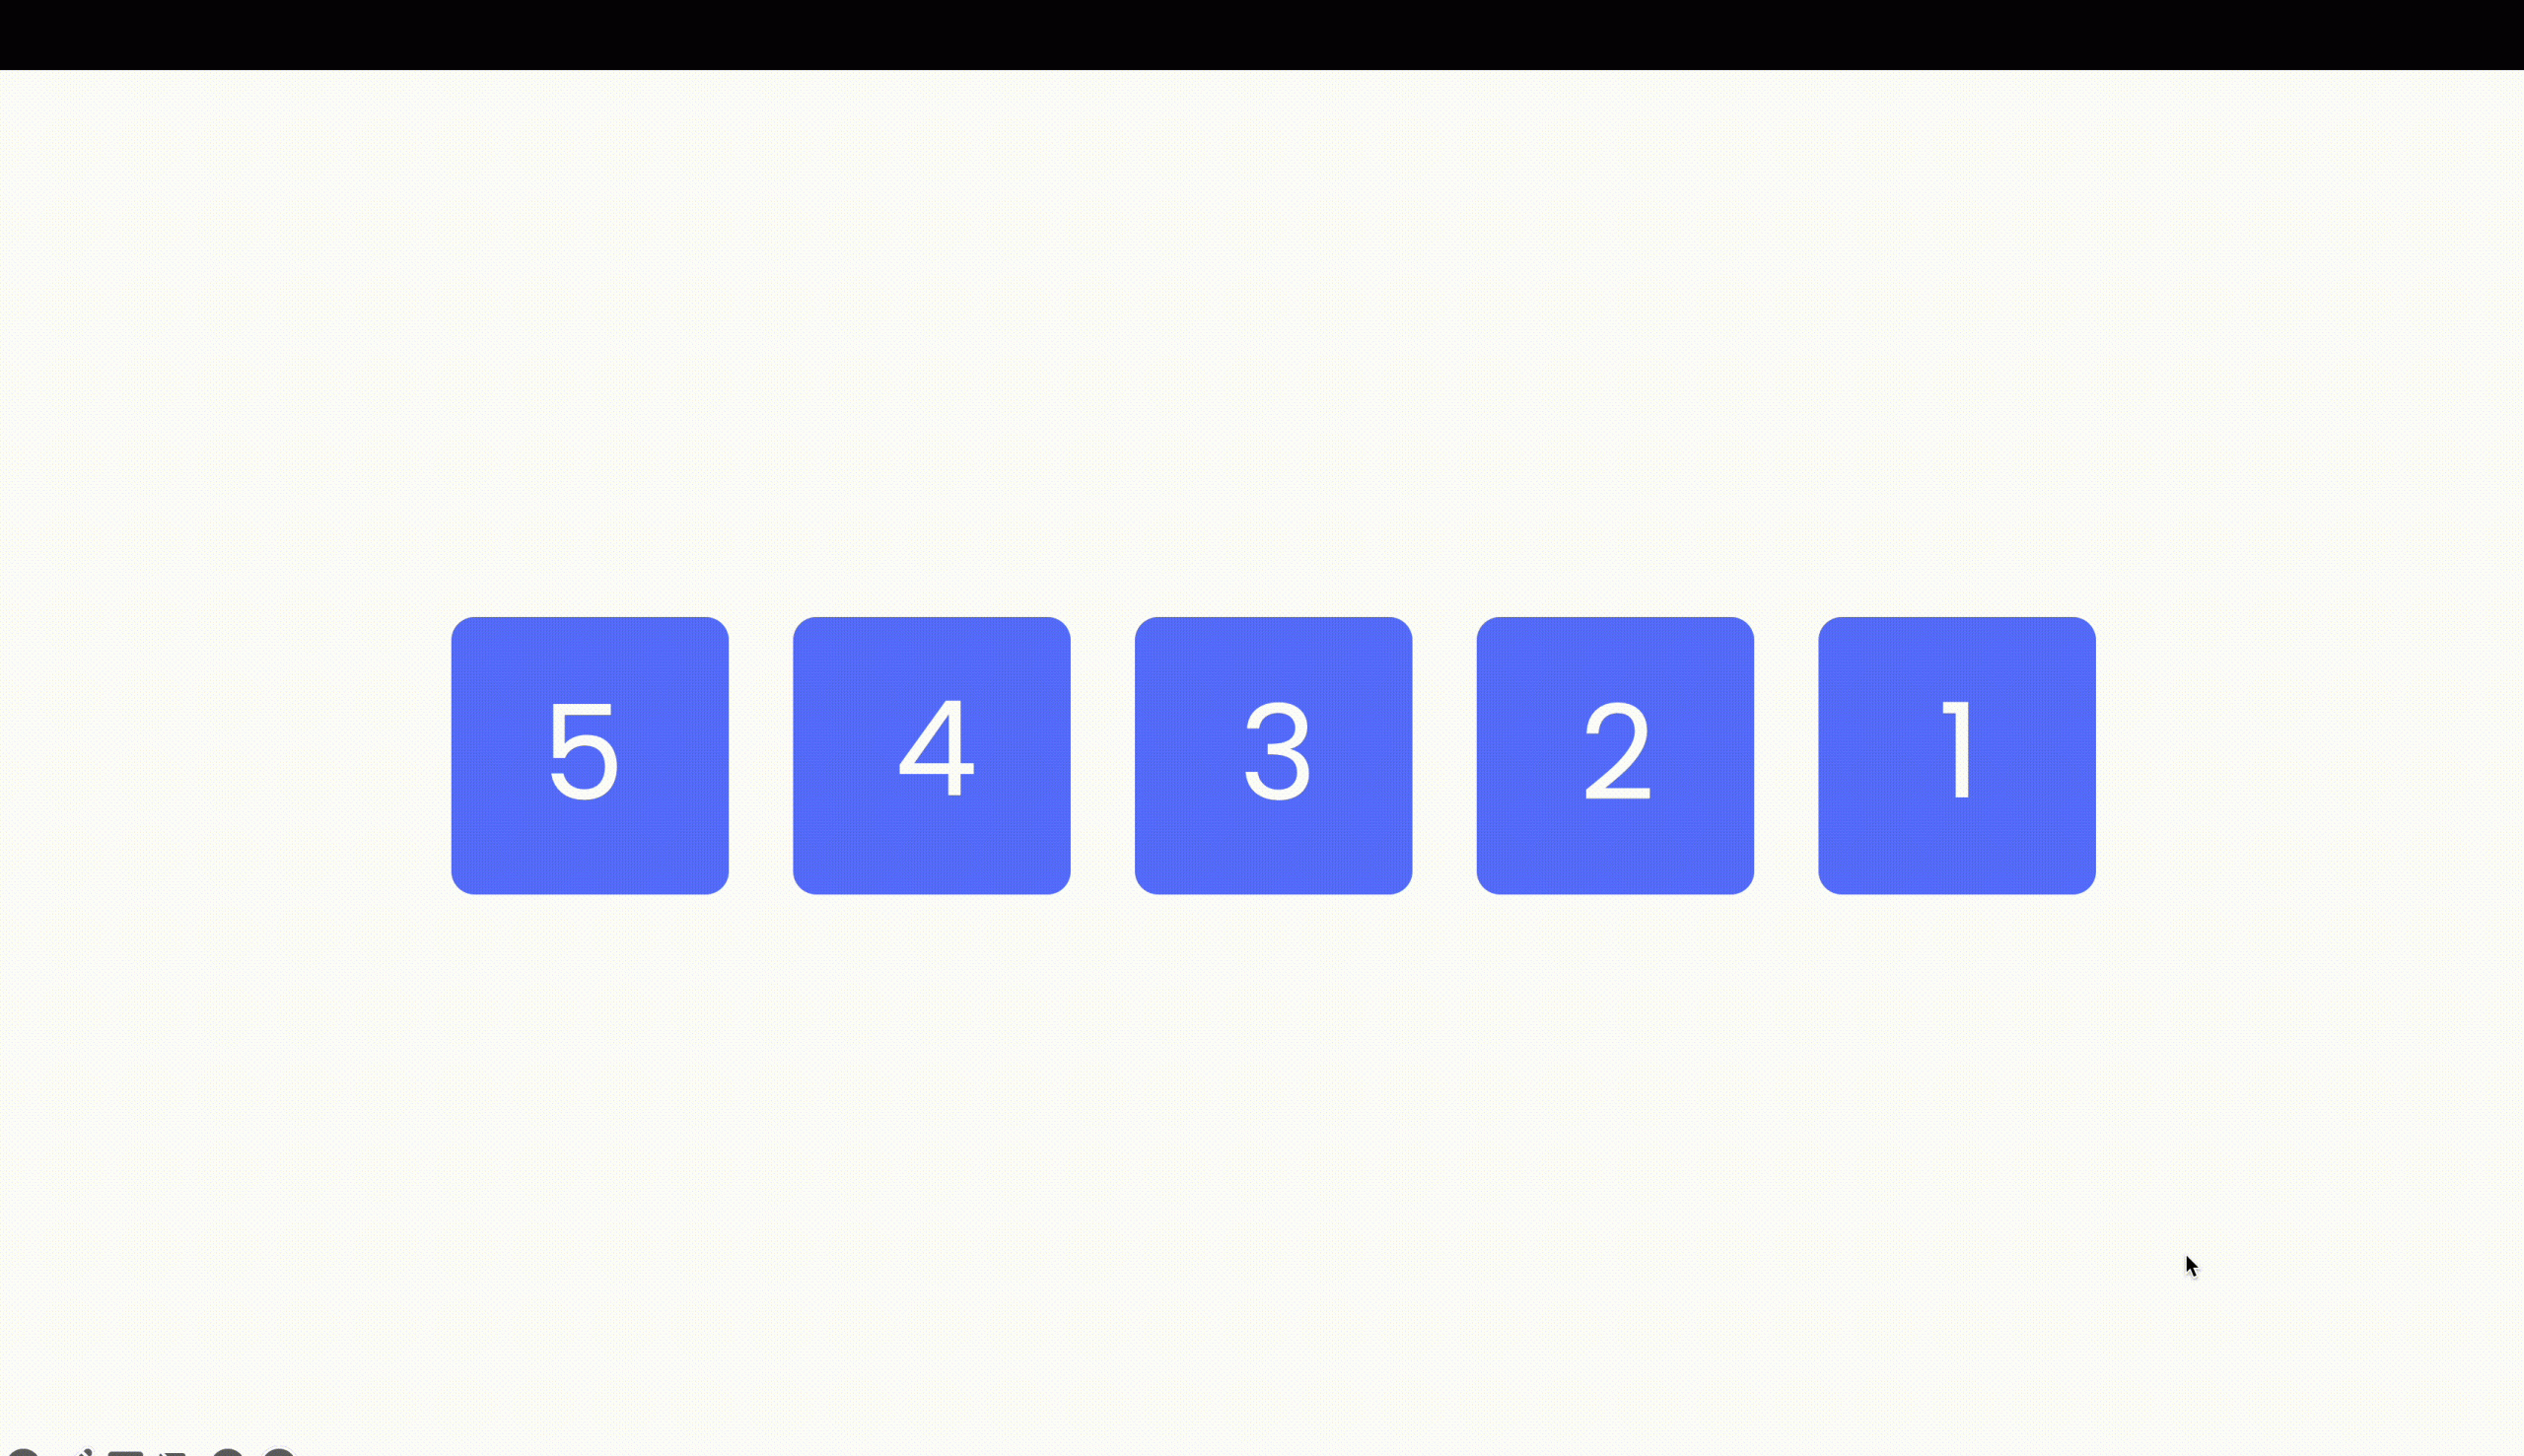
Pro tip: you can add more shapes and numbers depending on how many seconds you want to countdown to be.
Method #3: Clock Countdown Timer
The countdown clock timer method also leverages PowerPoint animations, specifically employing a distinct animation known as “Spin.”
Step 1: Create the Clock Base

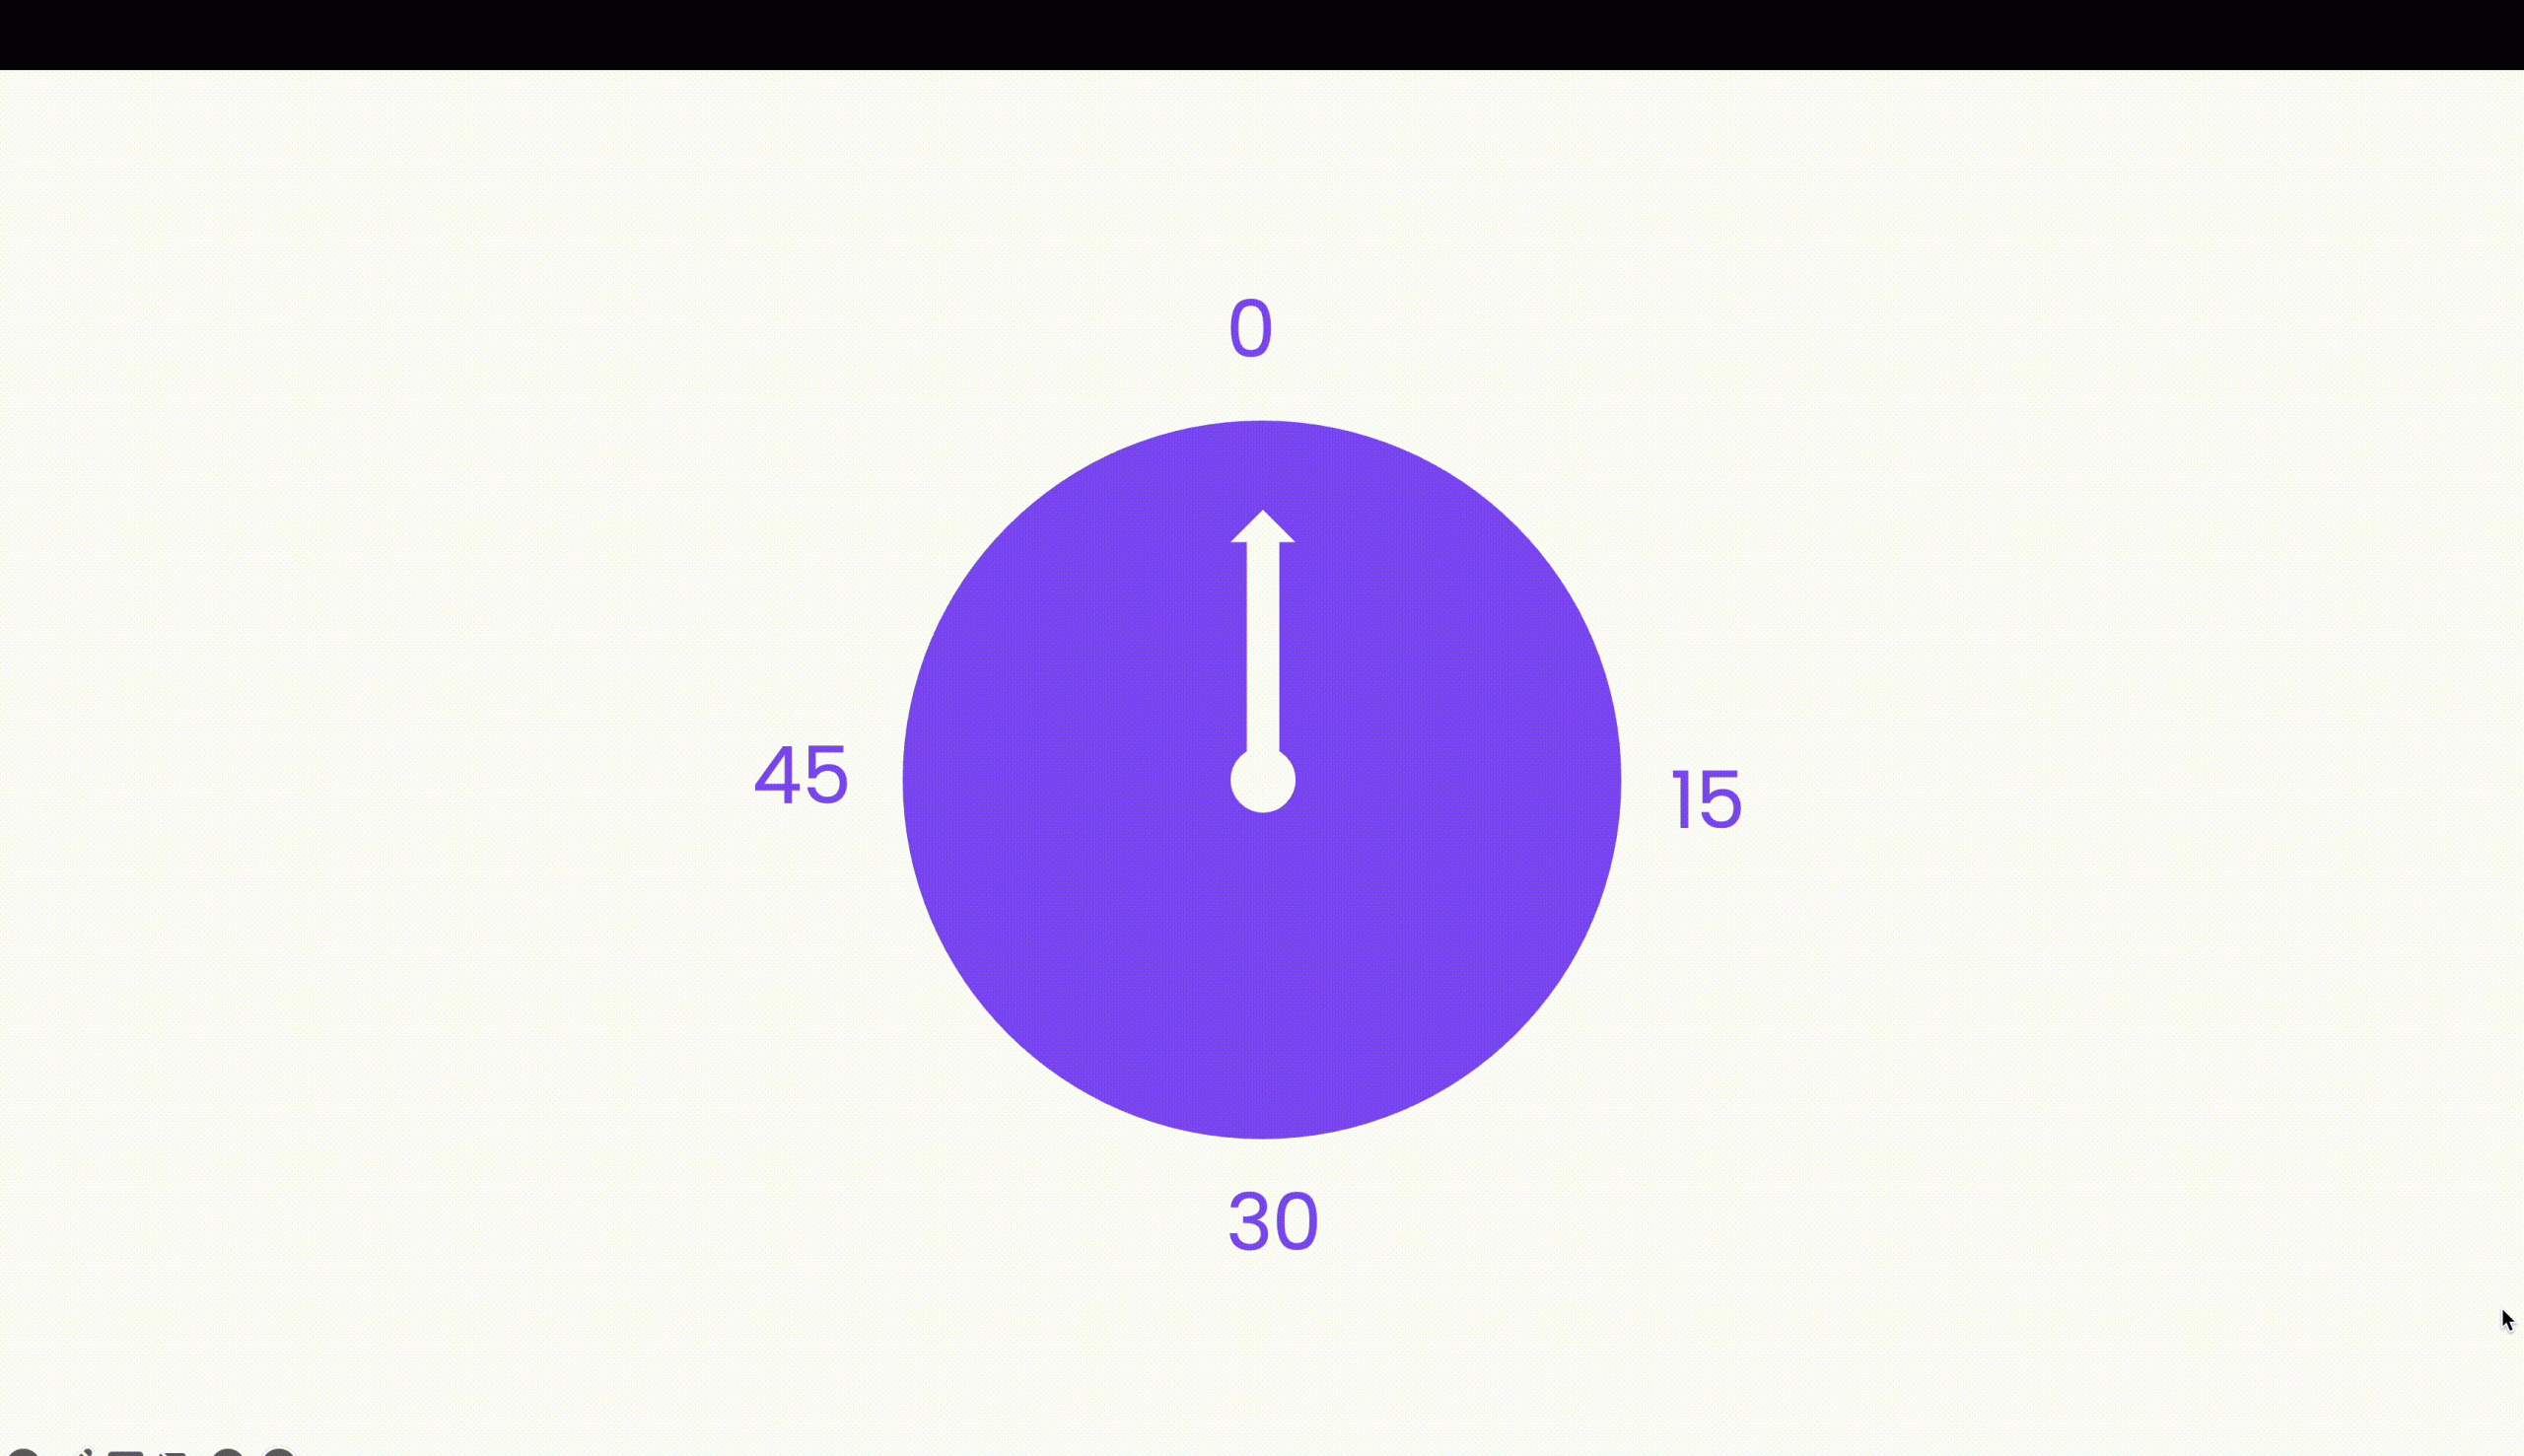
First, you need to create a clock base by adding a circle, as well as an arrow to represent the clock hand. Group the clock base elements.
Step 2: Add Numbers/Time
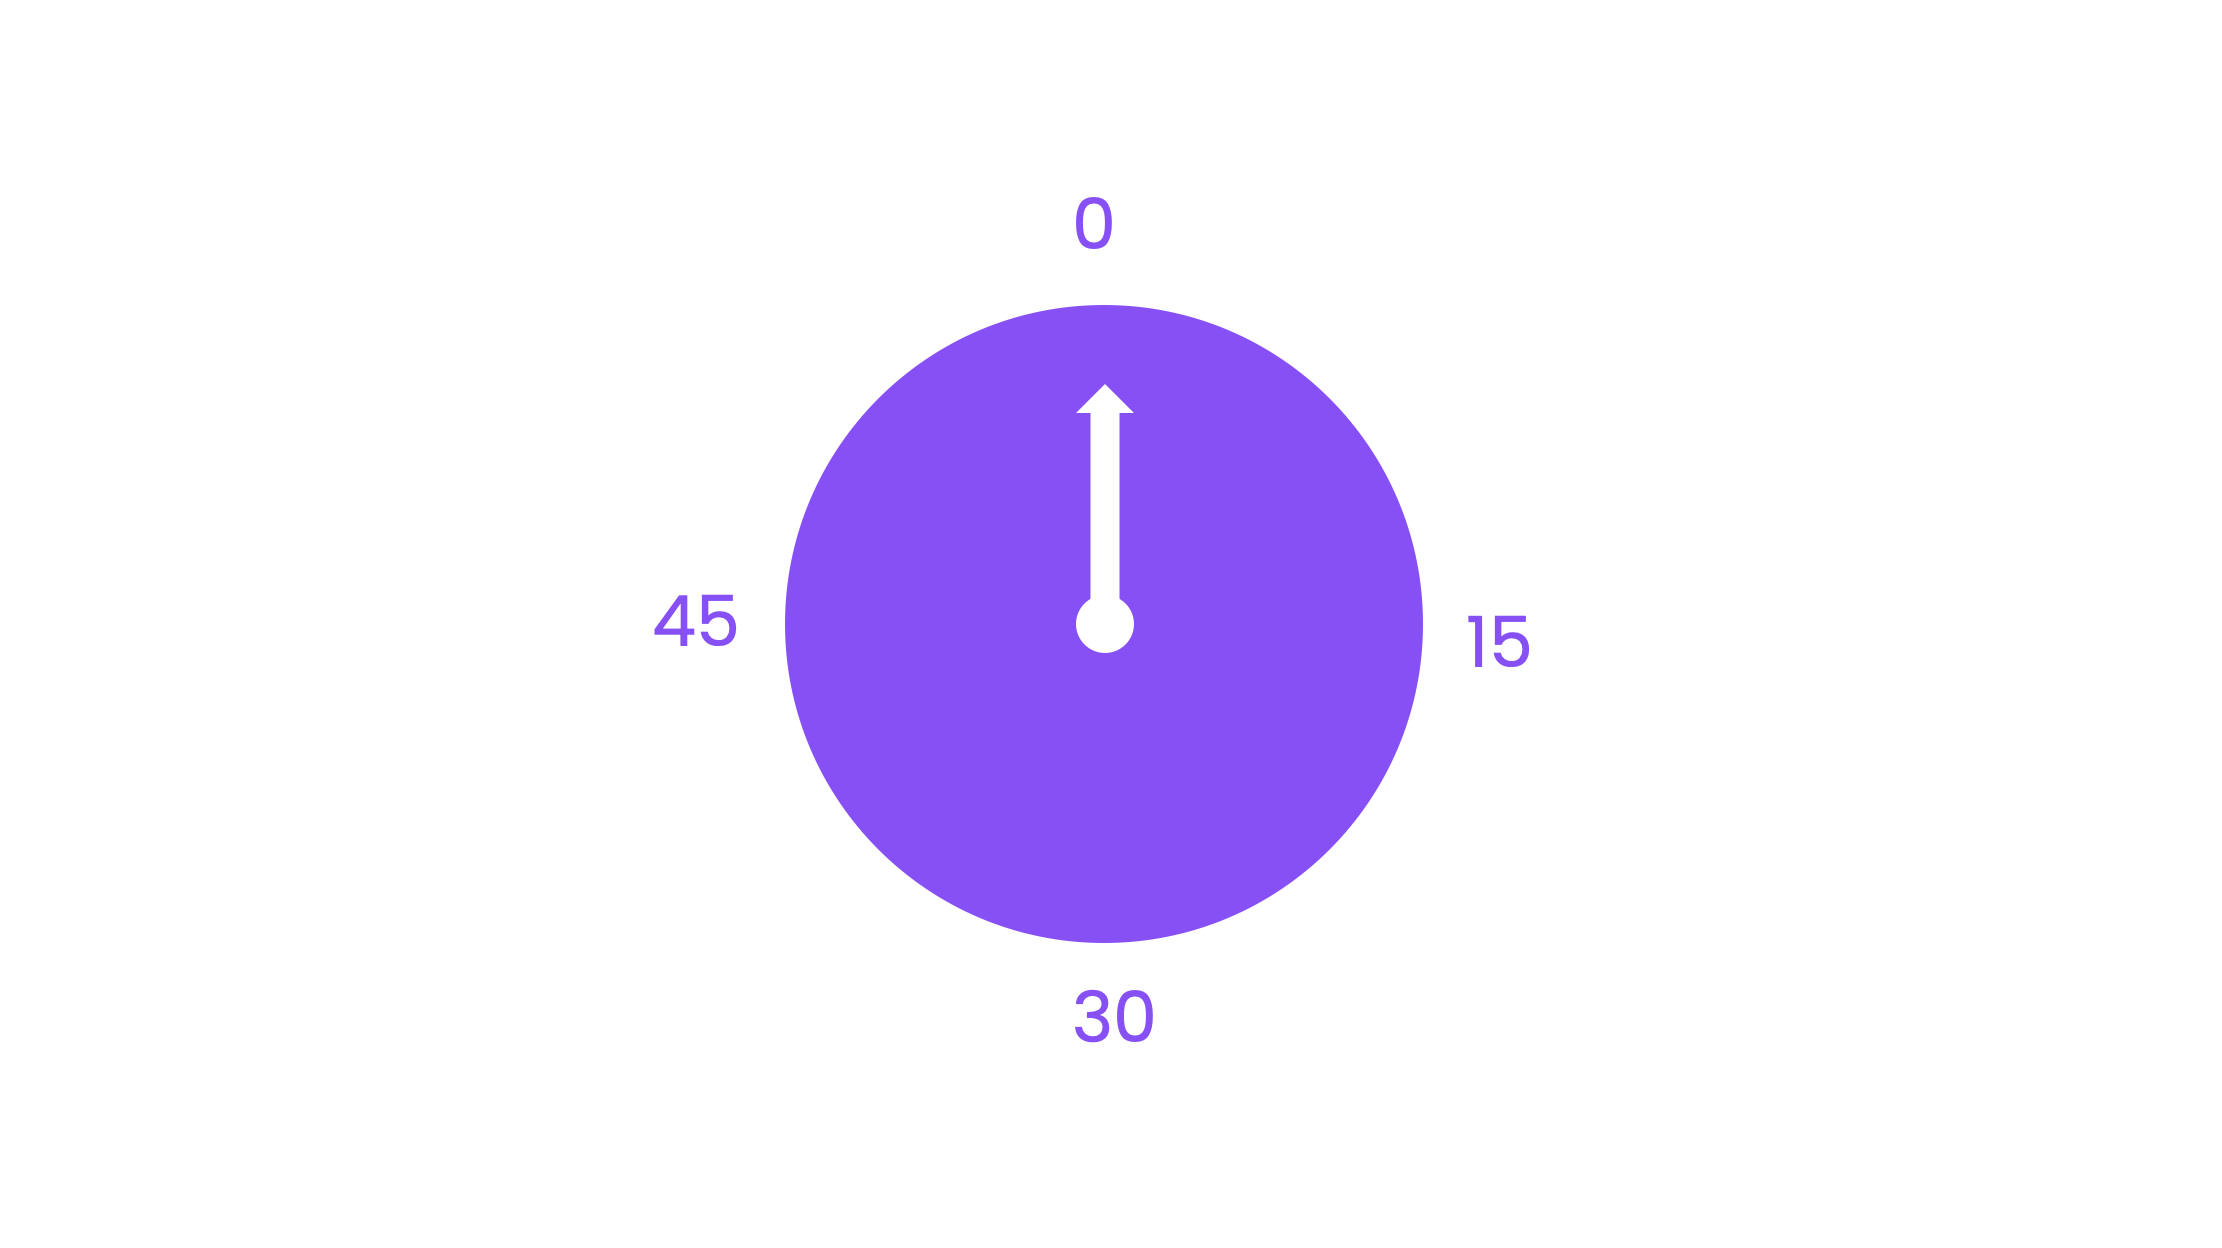
Add numbers to the outer rim of the clock. Depending on your desired clock functionality, you can include numbers at intervals of 1, 5, 15, or 60. In our scenario, we intend for the clock to operate as a 1-minute countdown timer, thus we integrated numbers as seconds at 15-second intervals.
Step 3: Add Animations
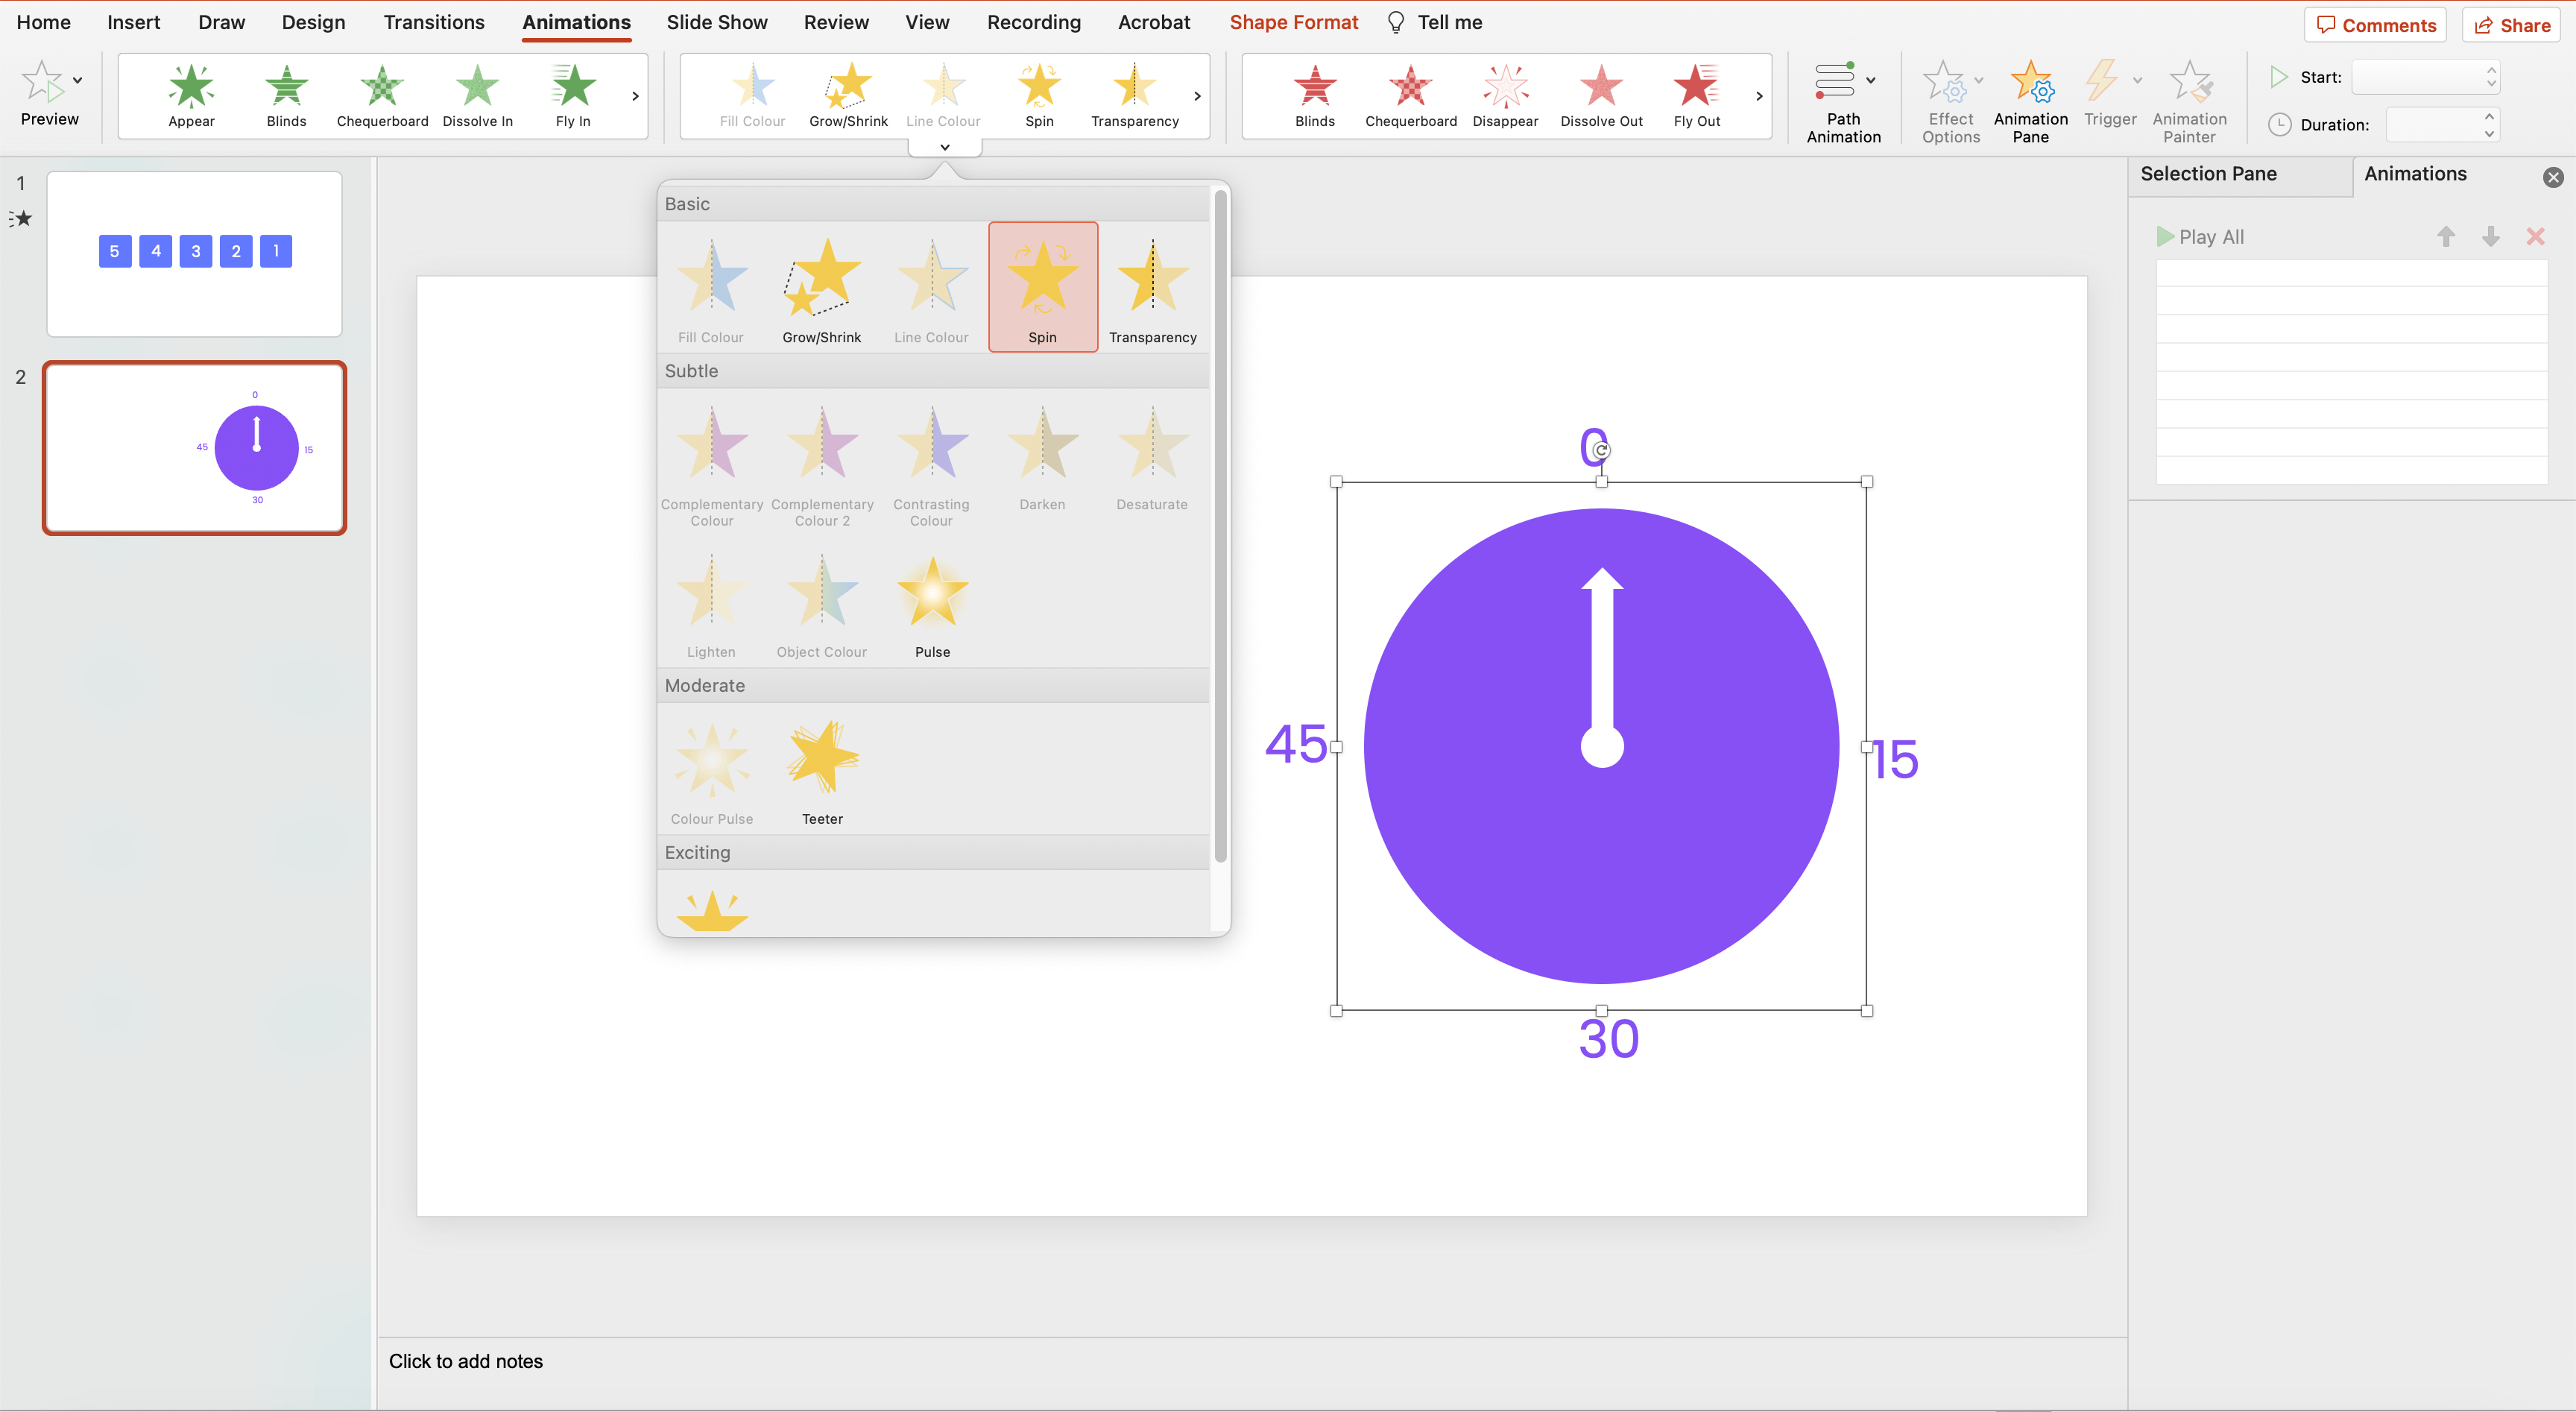
Next, add animations to the clock. On the Animations tab, go to Animations and select Spin.
Step 4: Customise the Animation Settings
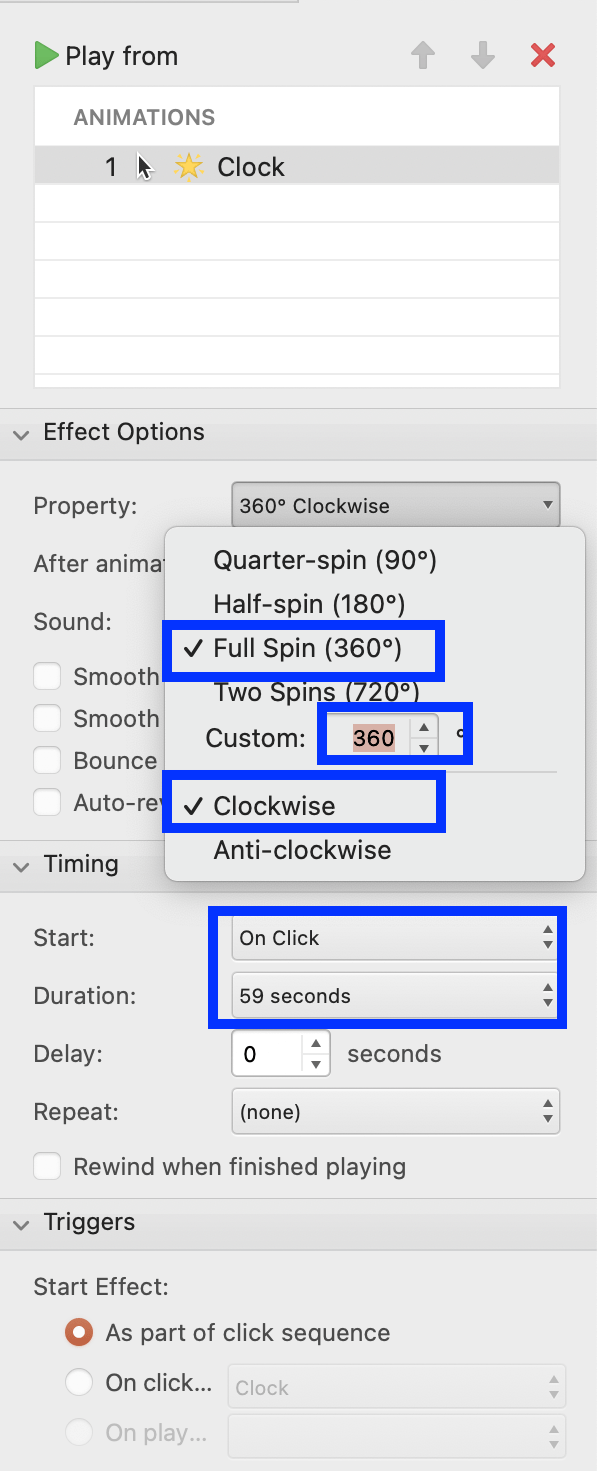
Configure the effect options to: 360 degree full spin clockwise, and the timing options to: start: on click, duration: 60 seconds (or your desired countdown period).
That’s it. You can test it out by going to slide show mode!
Method #4: Bar Countdown Timer
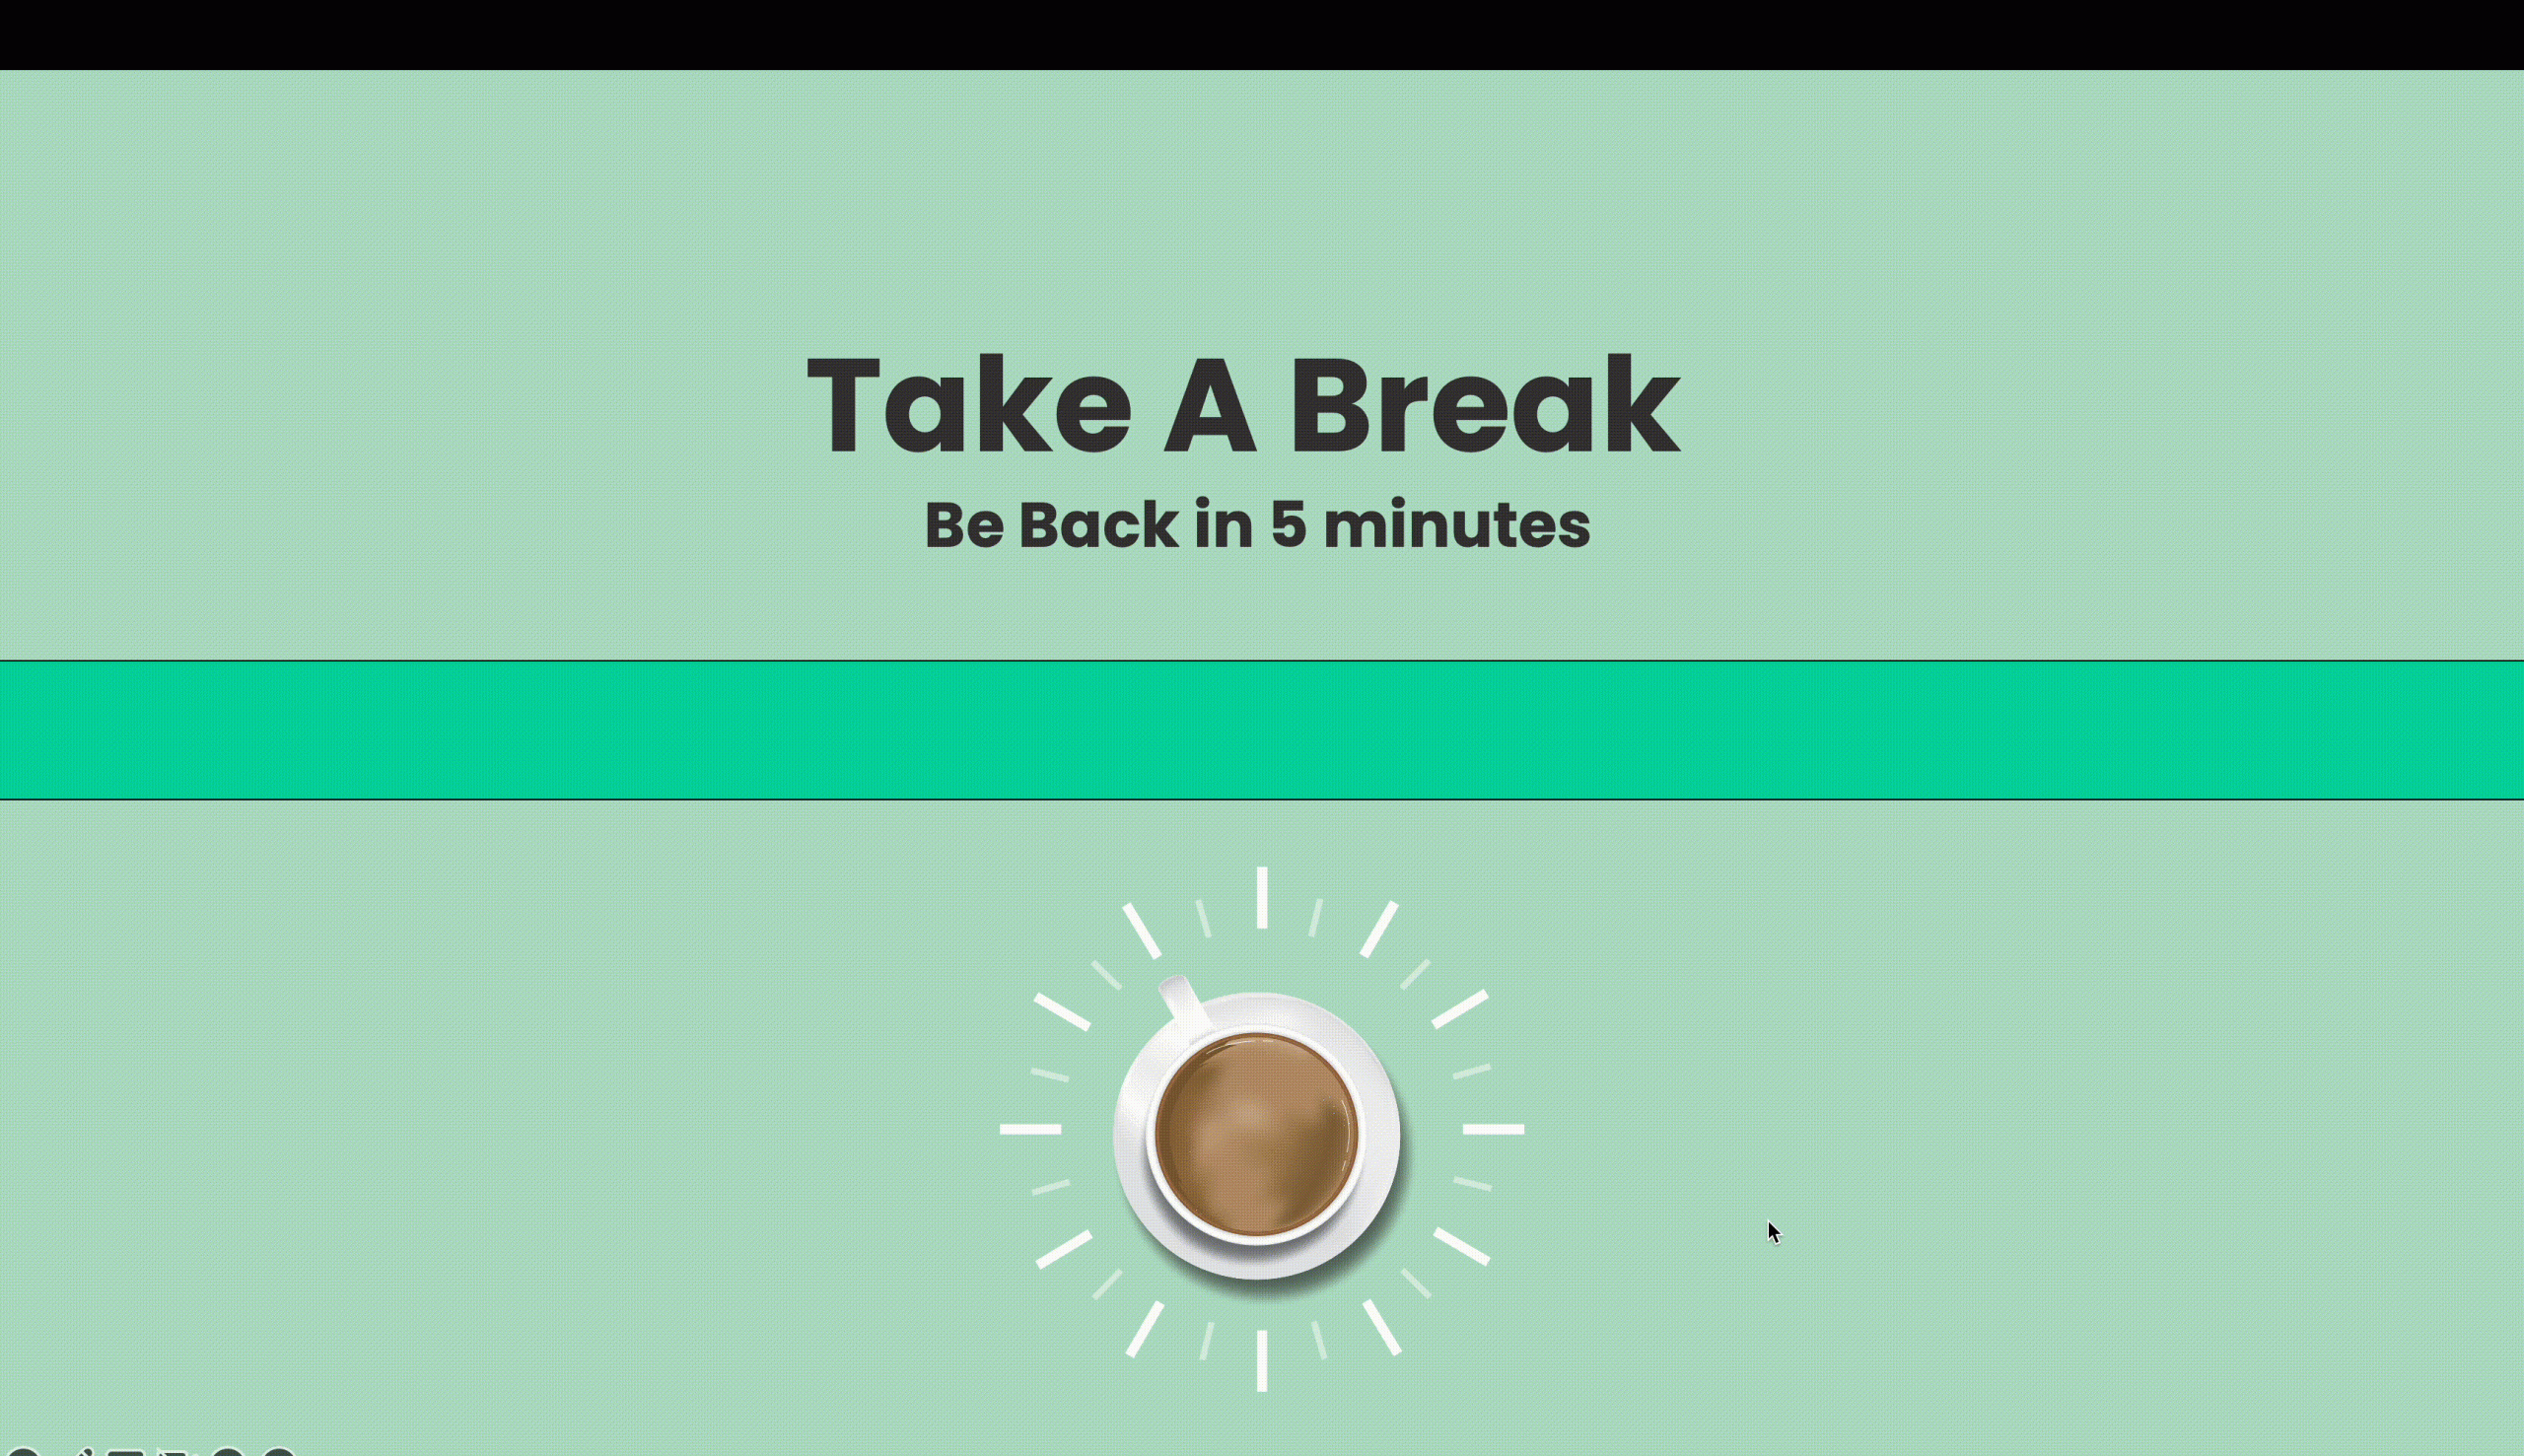
The final method without using any add-ins is a bar countdown timer, which works very similar to the disappearing timer. We would be using the PowerPoint animation “fly out” in this case.
Step 1: Create 2 Rectangles

Create two rectangles that span the width of the PowerPoint slide.
Step 2: Stack the Rectangles

Stack the 2 rectangles on top of one another. The bottom rectangle will function as the base and the top rectangle will be the animating bar. Make sure to use distinct colours for both rectangles as well so they can be told apart from one another.
Step 3: Add Animations
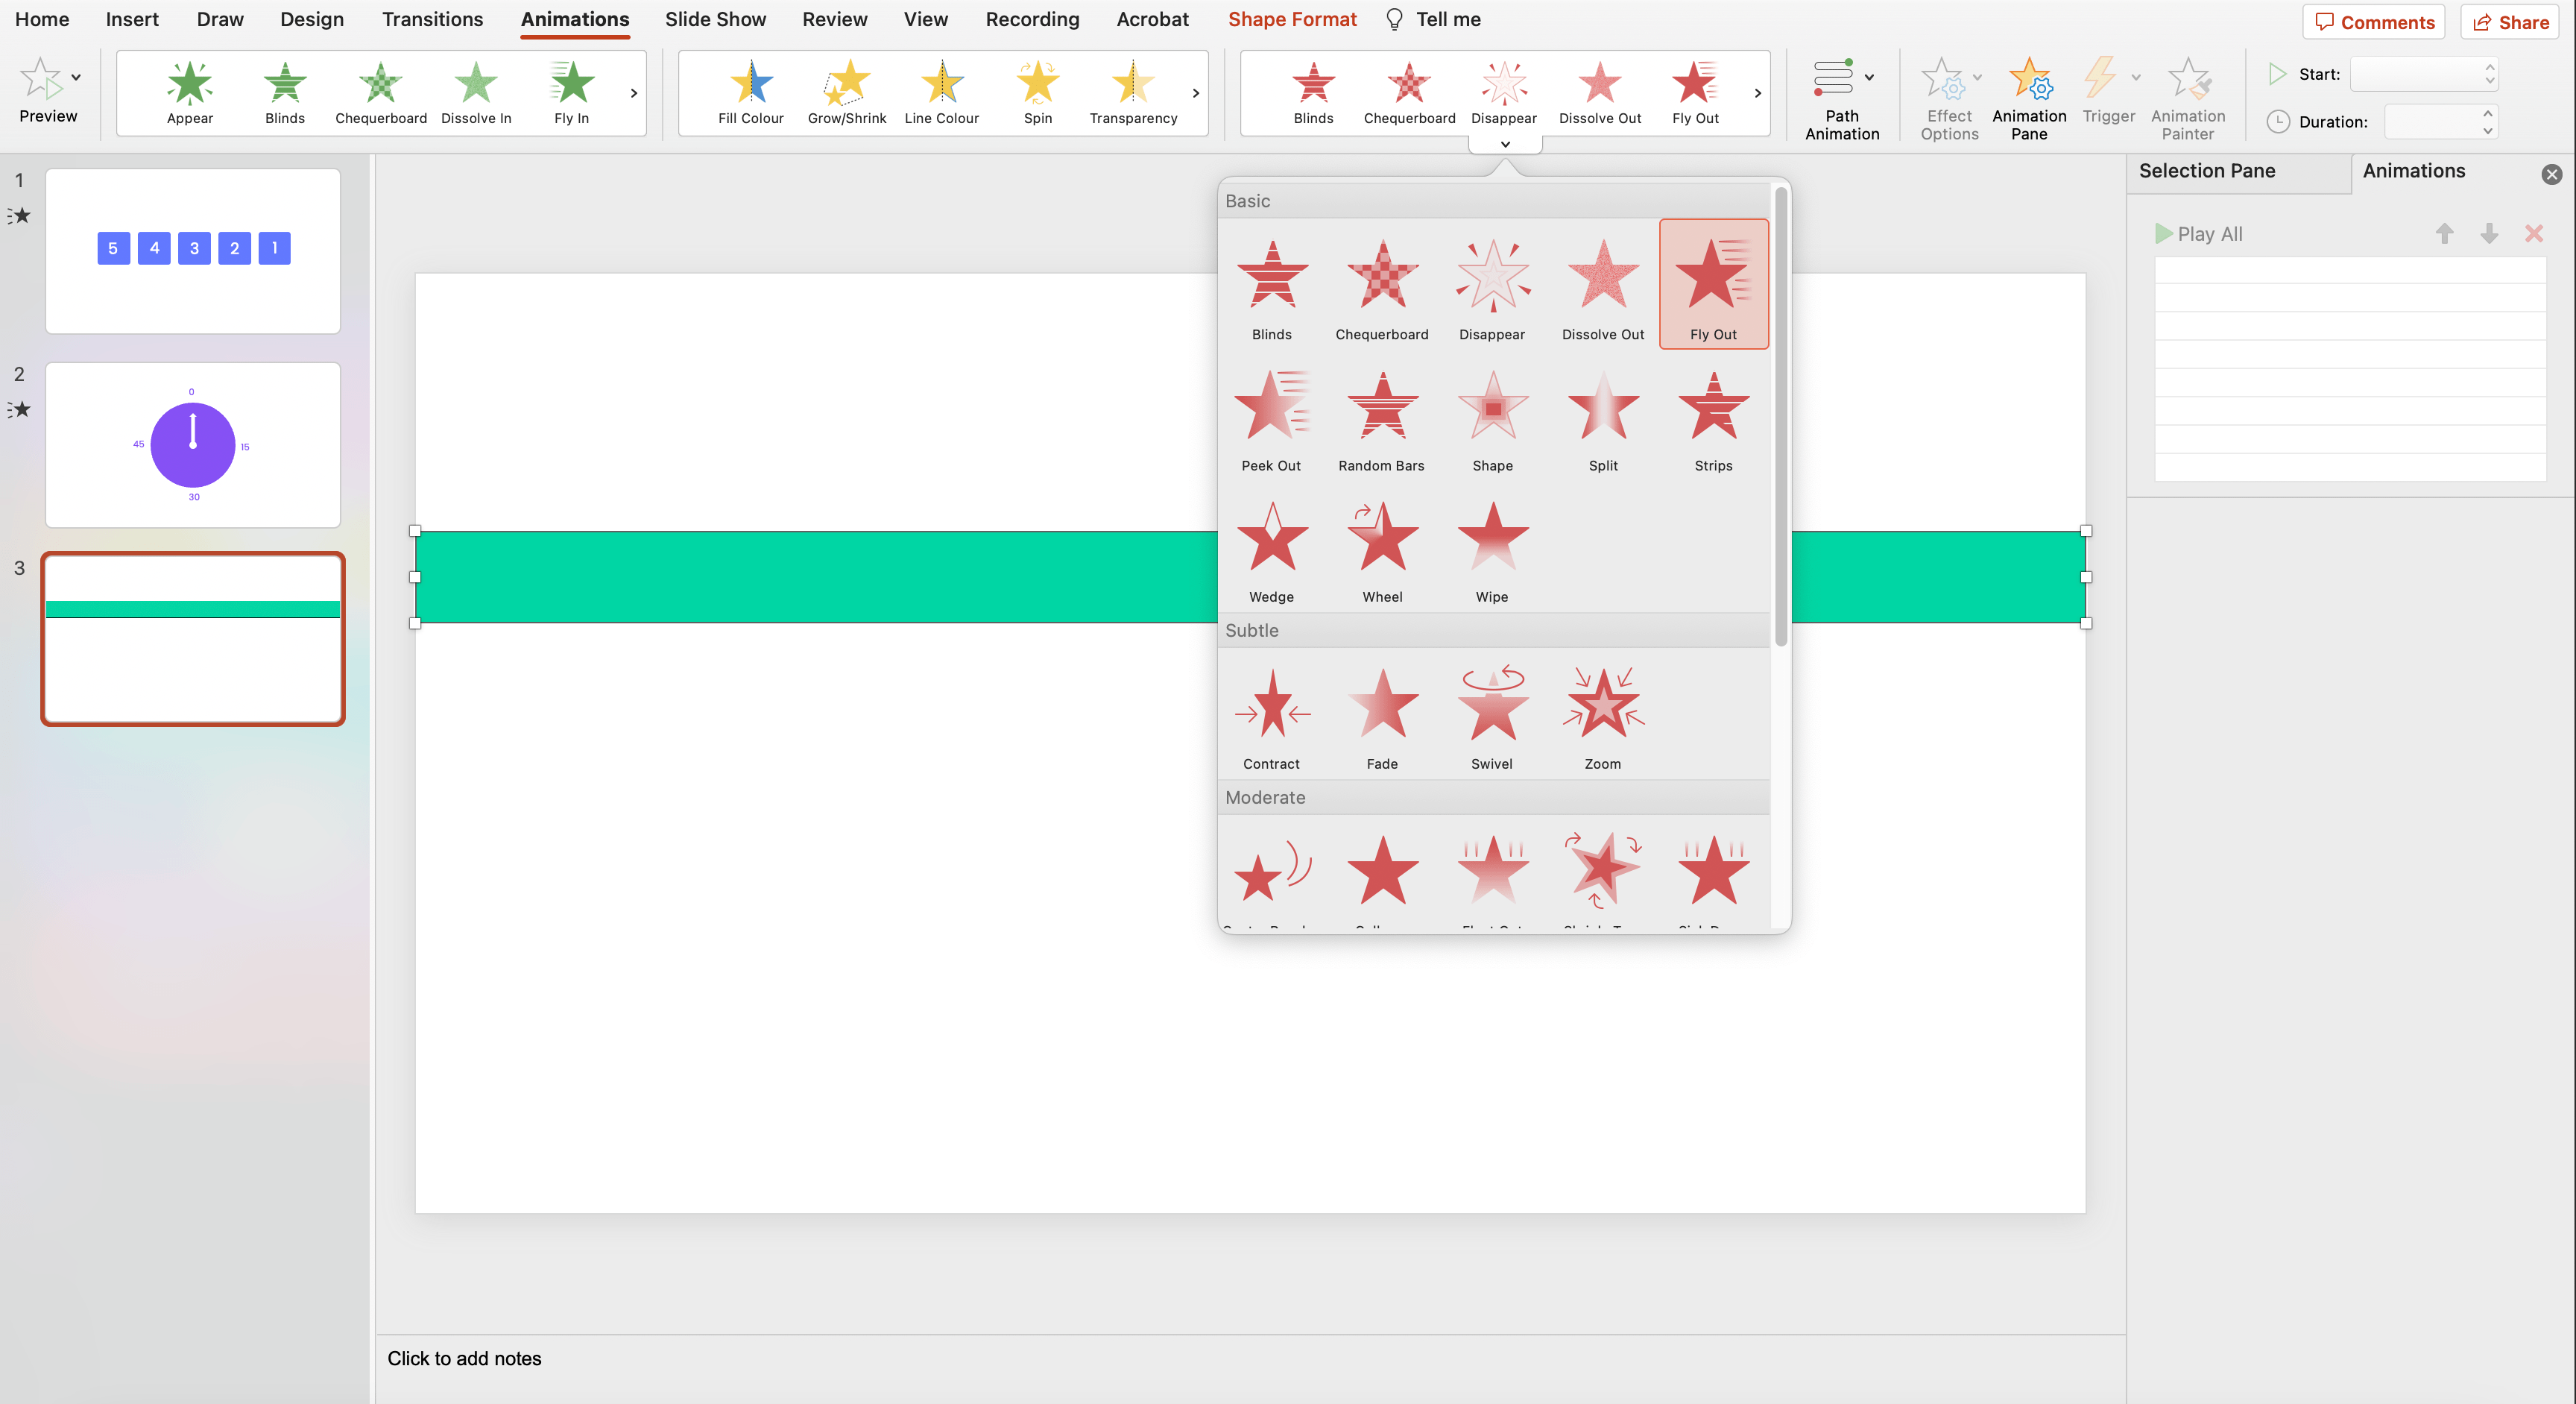
Select the top rectangle and add animations to it. On the Animations tab, go to Exit Animations and select Fly Out.
Step 4: Customise the Animation Settings
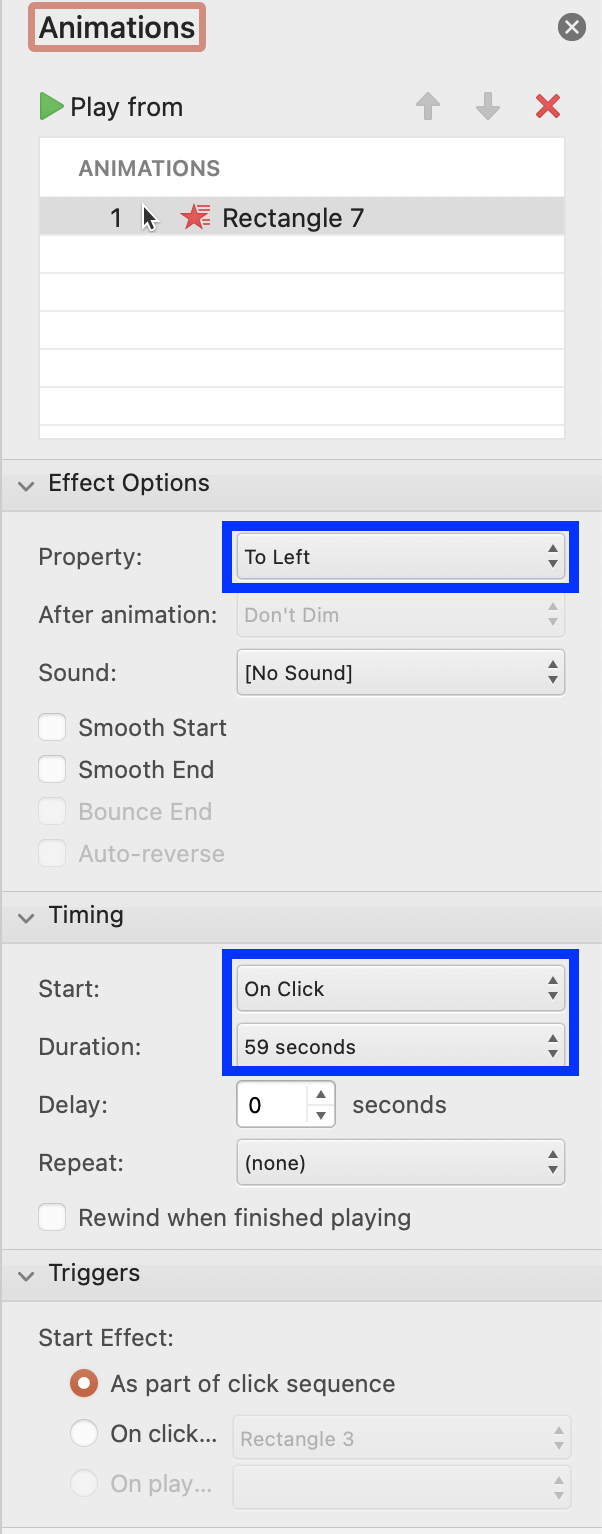
Configure the effect options to: properties: to left, and the timing options to: start: on click, duration: 60 seconds (or your desired countdown period).
Congratulations! You have successfully mastered the 4 best ways to add a Timer to your PowerPoint! These PowerPoint timer techniques will undoubtedly enhance your presentations, making them more engaging, organized, and seamlessly timed for a truly impressive impact.
Ways to Use A PowerPoint Timer
- Business Professionals
- Pitch Presentations: Ensure concise business pitches, emphasizing key points within a limited timeframe.
- Training Workshops: Break down business training sessions into time-bound segments, keeping professionals engaged and facilitating better knowledge retention.
- Teachers
- Paced Lessons: Set timers for presentations and teaching to ensure all materials and learning objectives are covered.
- Class Transitions: Timers are effective ways to signal transitions between different segments of a lesson, or between different subjects.
Here are more ways you can use a PowerPoint timer in class to improve student learning.
- Creatives
- Idea Generation: Use timers for rapid idea generation exercises, encouraging creative ideas and concepts to surface.
- Artistic Presentations: Coordinate visual transitions with timers for effective artistic presentations that blend images, text, and music seamlessly.
- Students
- Timed exercises: Set timers for exercises and test practices to foster a sense of accountability and time management.
- Study Breaks: Use timers to for short breaks during study sessions, to help maintain focus and prevent burnout
- Public Speakers
- Keynote Addresses: Time keynotes perfectly by setting up timers, delivering impactful messages within allocated time slots.
- Storytelling: Enhance storytelling by synchronizing timer transitions with narrative peaks, adding a layer of dramatic effect.
- Remote Teams
- Virtual Meetings: Use timers for agenda segments during virtual meetings, ensuring focused and concise meetings.
- Icebreaker Activities: Set timers for remote team icebreakers to create time-bound bonding experiences when physically apart.
Conclusion
In the realm of presentations, time isn’t just a measurement; it’s a storyteller, a catalyst, and a guiding force that can elevate your delivery from good to unforgettable. Navigating the absence of a native PowerPoint timer and the uncertainty of finding reliable solutions can be a daunting journey. However, armed with the knowledge of the best four timer methods we have shared with you explored, you are now empowered to create well-timed and engaging presentations with finesse!
As you embrace these techniques—each click, animation, and countdown—you are not just crafting slides; you’re curating an experience. Now it is your moment to shine – use the above tutorials or the following template to let your next presentation be a testament to your mastery of time, leaving your audience in awe and ensuring your message resonates long after the final slide.