What is the key to a successful presentation? You might say valuable information or good public speaking. And while that is true, a good presentation means having an engaged audience. Luckily, there are many ways to create more engaging presentations, including interactivity, captivating material & delivery, and visually well-designed presentations.
Today, you can start creating captivating and beautiful presentations with Canva, and add interactive Engagement with ClassPoint. With Canva and ClassPoint together, your presentations can become more visually and actively engaging.
About Canva
Canva is an online tool that allows you to create different visuals for your classroom. Teachers can create lessons, learning materials like infographics, posters, worksheets, and activities, and even Bitmoji scenes in just minutes. Canva’s visuals for presentations, paired with ClassPoint’s interactive questions, whiteboard, and annotation tools, can really transform your classroom.
If you are not a creative type, don’t worry! Canva has thousands of templates that you can use and customize to fit your needs. Plus, your students can use it too. As an educator on Canva, you and your students can send work back and forth.
To use Canva, sign up on their website, and access Pro for free as an educator! And if you are not using ClassPoint yet, you can download and install it from our website!
How to use Canva and ClassPoint to create more engaging presentations
This article explains how to appsmash Canva and ClassPoint to create more engaging presentations by starting with Canva’s incredible templates and customize it with their friendly user interface. Then save your PowerPoint, and add interactive activities using the PowerPoint add-in, ClassPoint. Secondly, use Canva and ClassPoint together to create exciting in-class activities to boost student engagement.
Create Visually Engaging Presentations
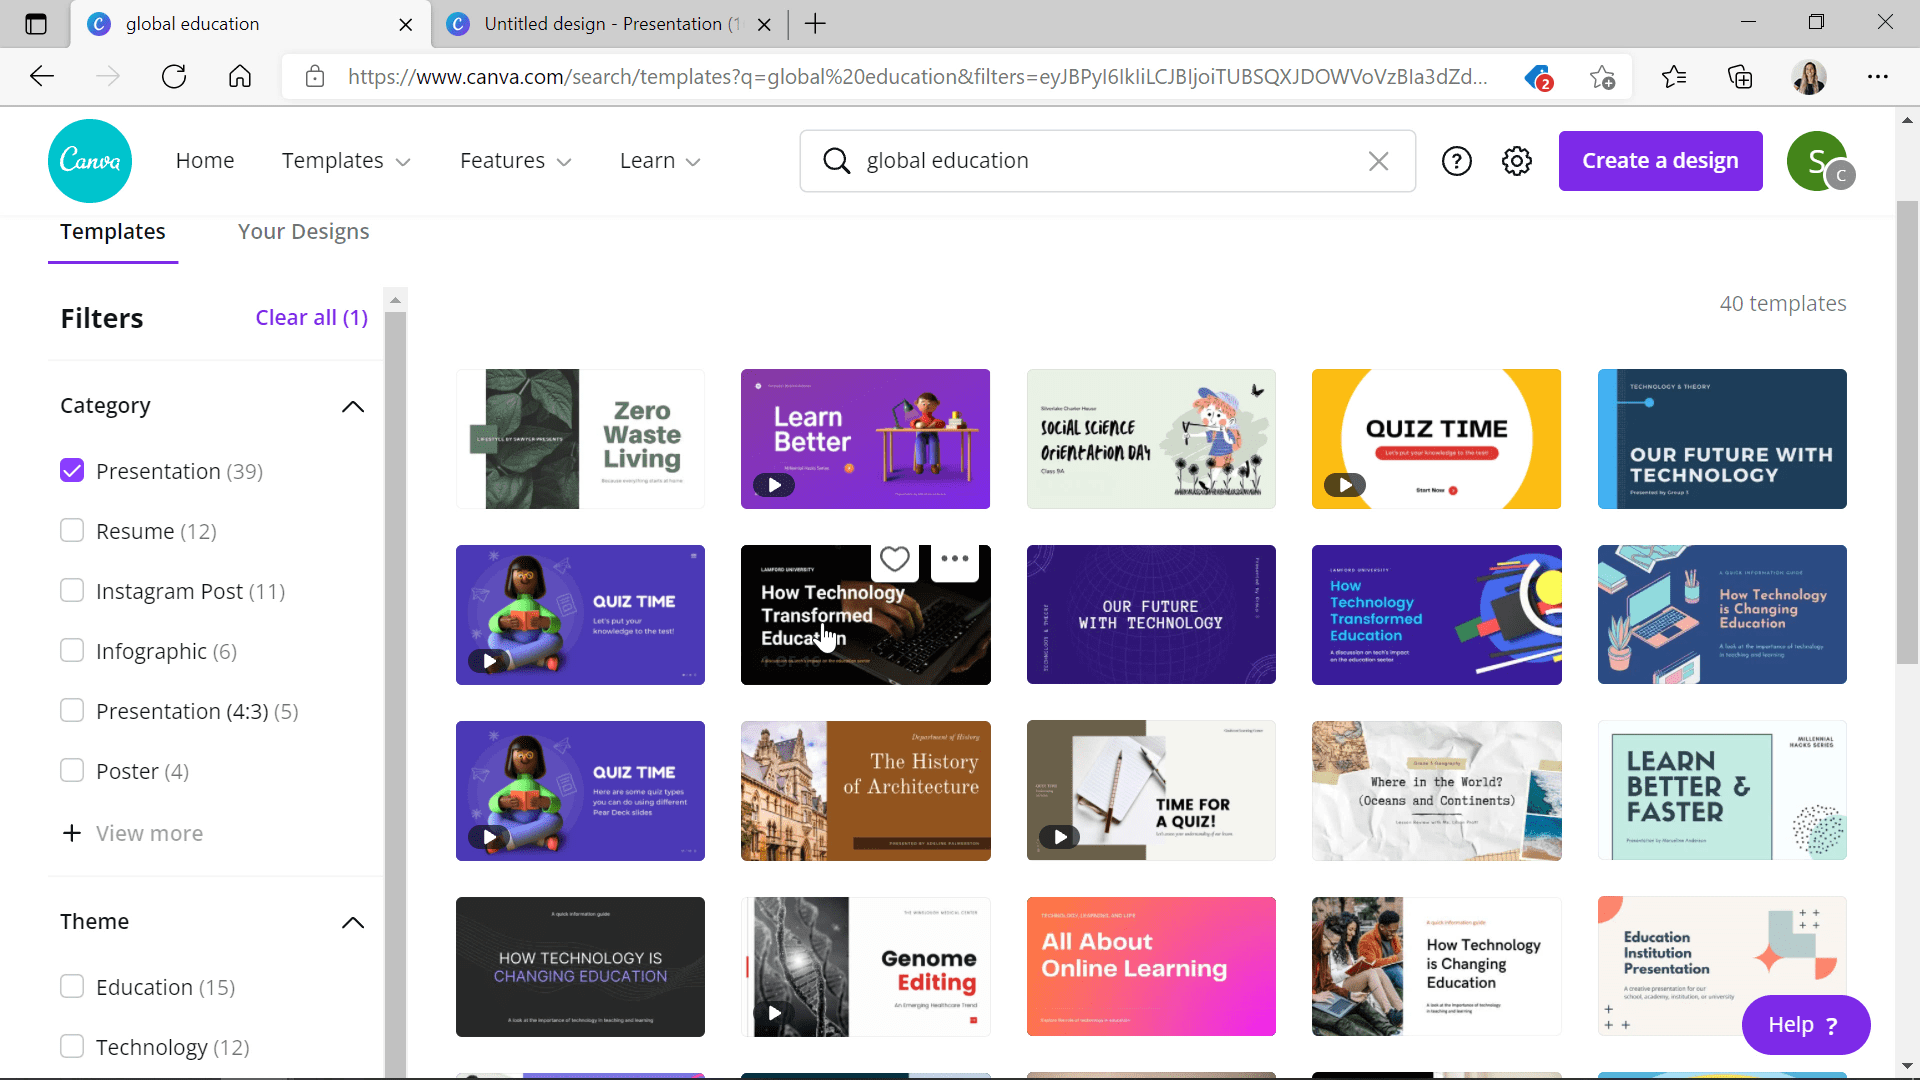
Use Canva to create engaging beautiful presentations. With Canva, you can create a presentation from scratch or use one of their many pre-made templates, and customize as you need.
Using their search bar, you can key many different topics such as your topic, design style, or event type, and then filter the search to Presentations only. When one catches your eye, you can begin editing it and changing any aspect of the file!
Canva’s editor is extremely friendly and easy to use, and you don’t need graphic design editing experience to walk away with a beautiful presentation. They offer a full image and element library that you can make use of, add more text or shapes, and change the colors using their color themes. We recommend adding in your lesson information, as you customize their template so you can use & remix many of the template elements as well as get inspired by your content to search for your own elements to add.
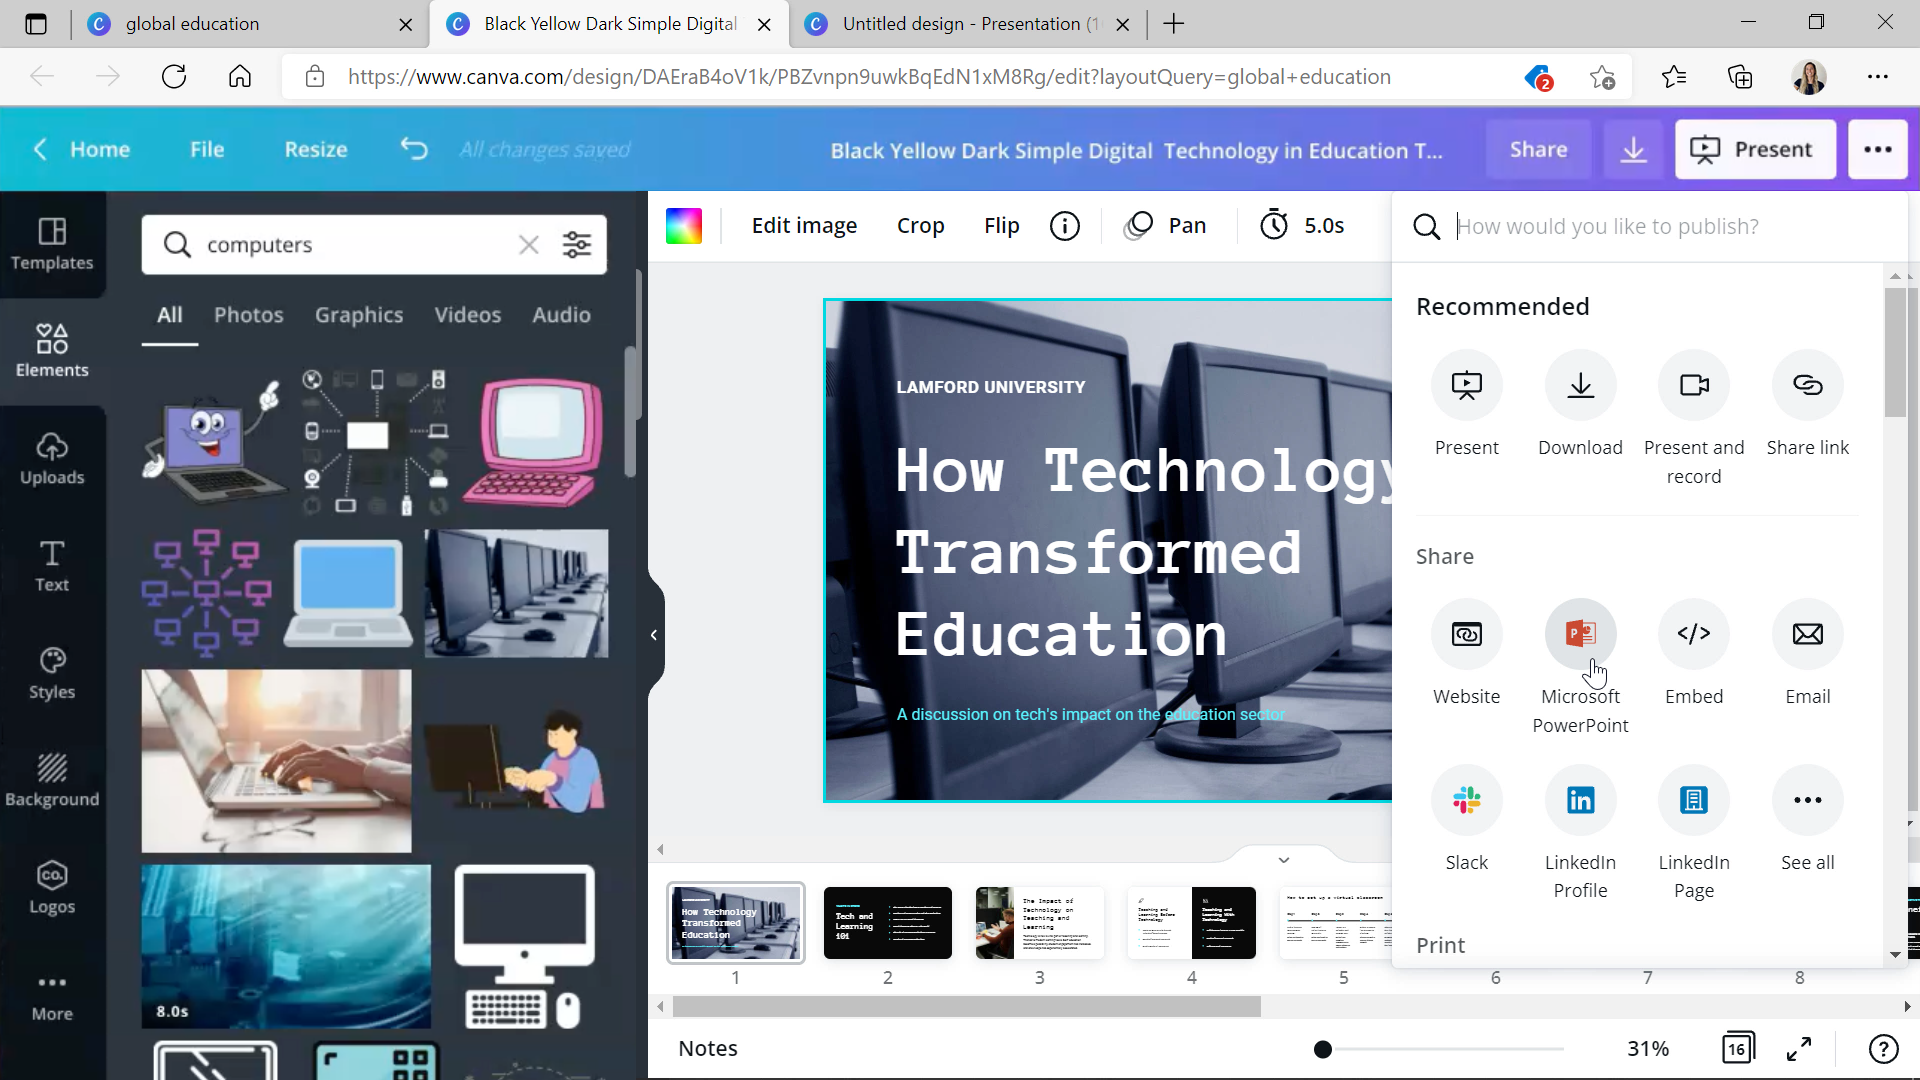
Once all your changes are made, download the Canva template as a PowerPoint file. Now, you can open the PowerPoint, add any extra info you forgot, add slide transitions, and add in your ClassPoint questions!
Add Engaging Activities to your Presentation
Using both Canva and ClassPoint, you can add attention-grabbing and interactive activities to your presentation.
First Tip:
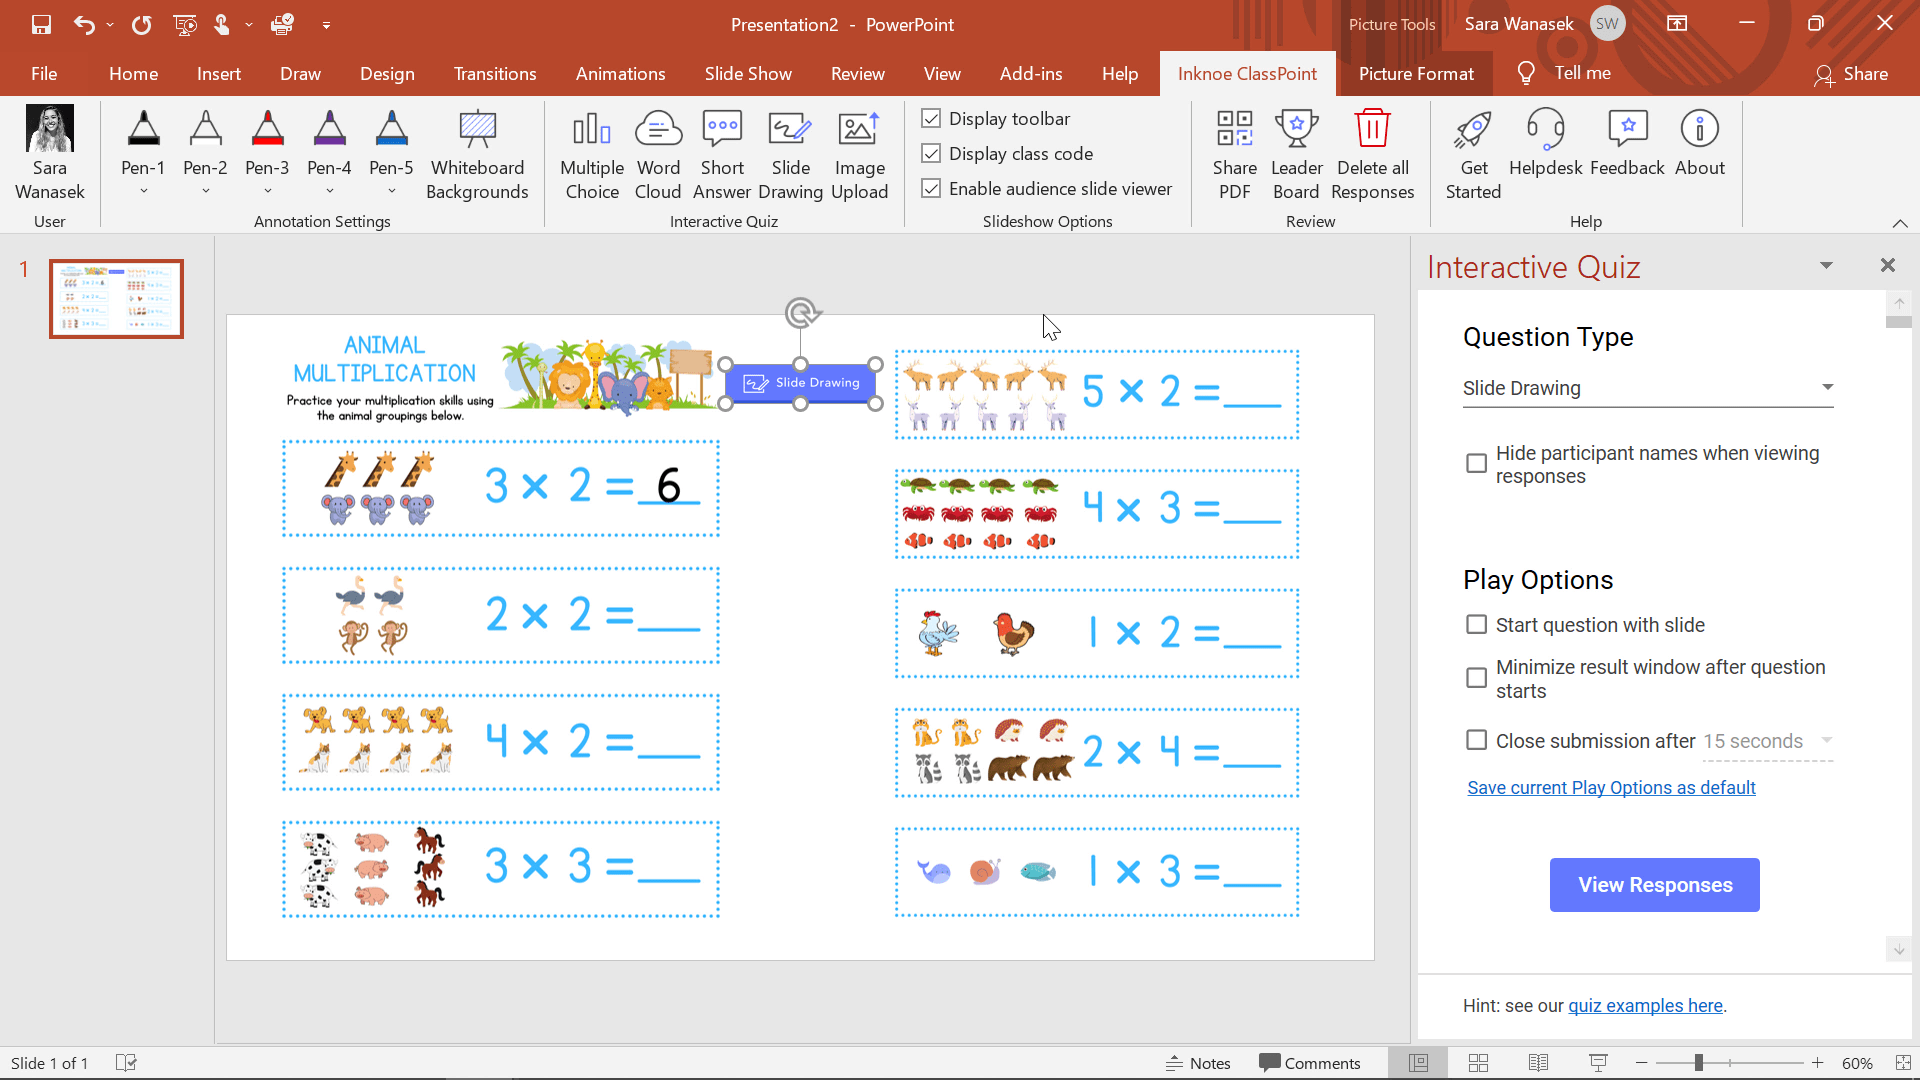
Check out Canva’s activity templates! Along with slides templates, Canva’s library also holds many other visual tools such as worksheets! (Again, you can create many different kinds of teaching resources in Canva!) Take a worksheet, and insert it into your presentation to use as an in-class activity with your students.
To demonstrate, this image below is from a Math worksheet in Canva, where we added in a Slide Drawing question, so students could complete the activity right from their device during class. You can also find educational diagrams, passages, or images on Canva, and add or remove items to turn it into an activity by asking them a single word Word Cloud to describe, a short answer to fill in the blank, or slide drawing question to complete or identify an image. The options are endless when you take the best of these two tools!
Second tip:
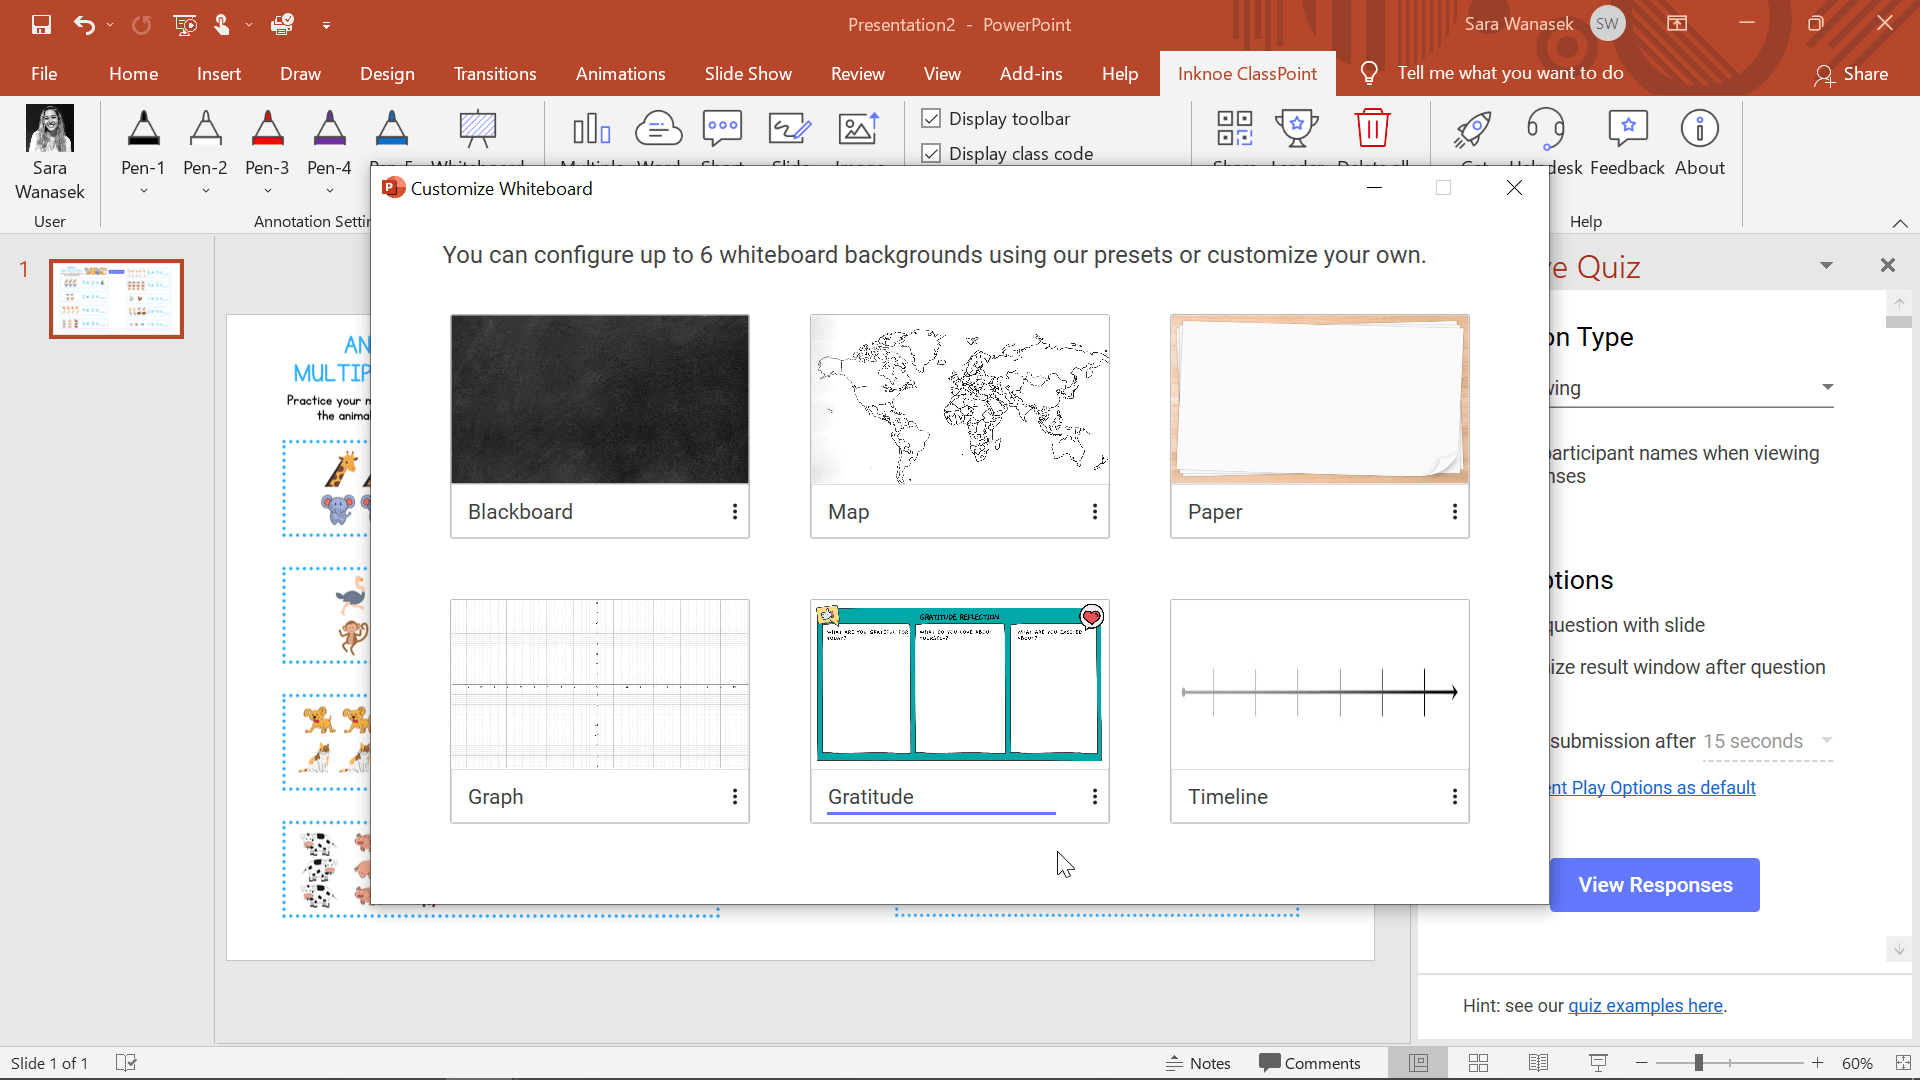
Add custom whiteboards to your presentations! Canva’s library holds many different backgrounds that you can use as a customized whiteboard with ClassPoint. For example here, we added a map, a paper background, a timeline, and a gratitude chart, but the options are endless! Whether it is a visually appealing border, backdrop, or activity, Canva has it all.
ClassPoint’s whiteboard backgrounds can be handy for adding more information into your presentation whenever needed or as a tool for conducting activities. Turn a frequent activity, such as K-W-L (know, think, want to know) chart into a saved whiteboard background for you to open & insert it into your live presentation whenever you want to use it!
Third tip:
Add ClassPoint questions to any slide as an understanding check or to keep your participants engaged. You can add questions about your material to challenge their understanding & help them remember it, or you can ask fun questions to simply keep your participants involved and engaged during your presentation. If you are looking for get-to-know-you, opinion, or random trivia questions, Canva has slides templates with questions you can use! Or you can just take the layout of their question slide, add it to your presentation, and change the question to match your learning objectives or material covered.
Design Thinking with Your Students
Challenge your students creativity and understanding with a student Canva activity! Now that you know the surface of what Canva can offer, did you think you could save all the fun for yourself?! Not only is Canva great for teachers, it’s a great digital media design tool for student’s to explore their own creativity & design thinking to communicate a message.
Create an activity using Canva with your students to help them think and answer questions visually instead of analytically. Students can create their own designs in Canva in response to your prompt or question.
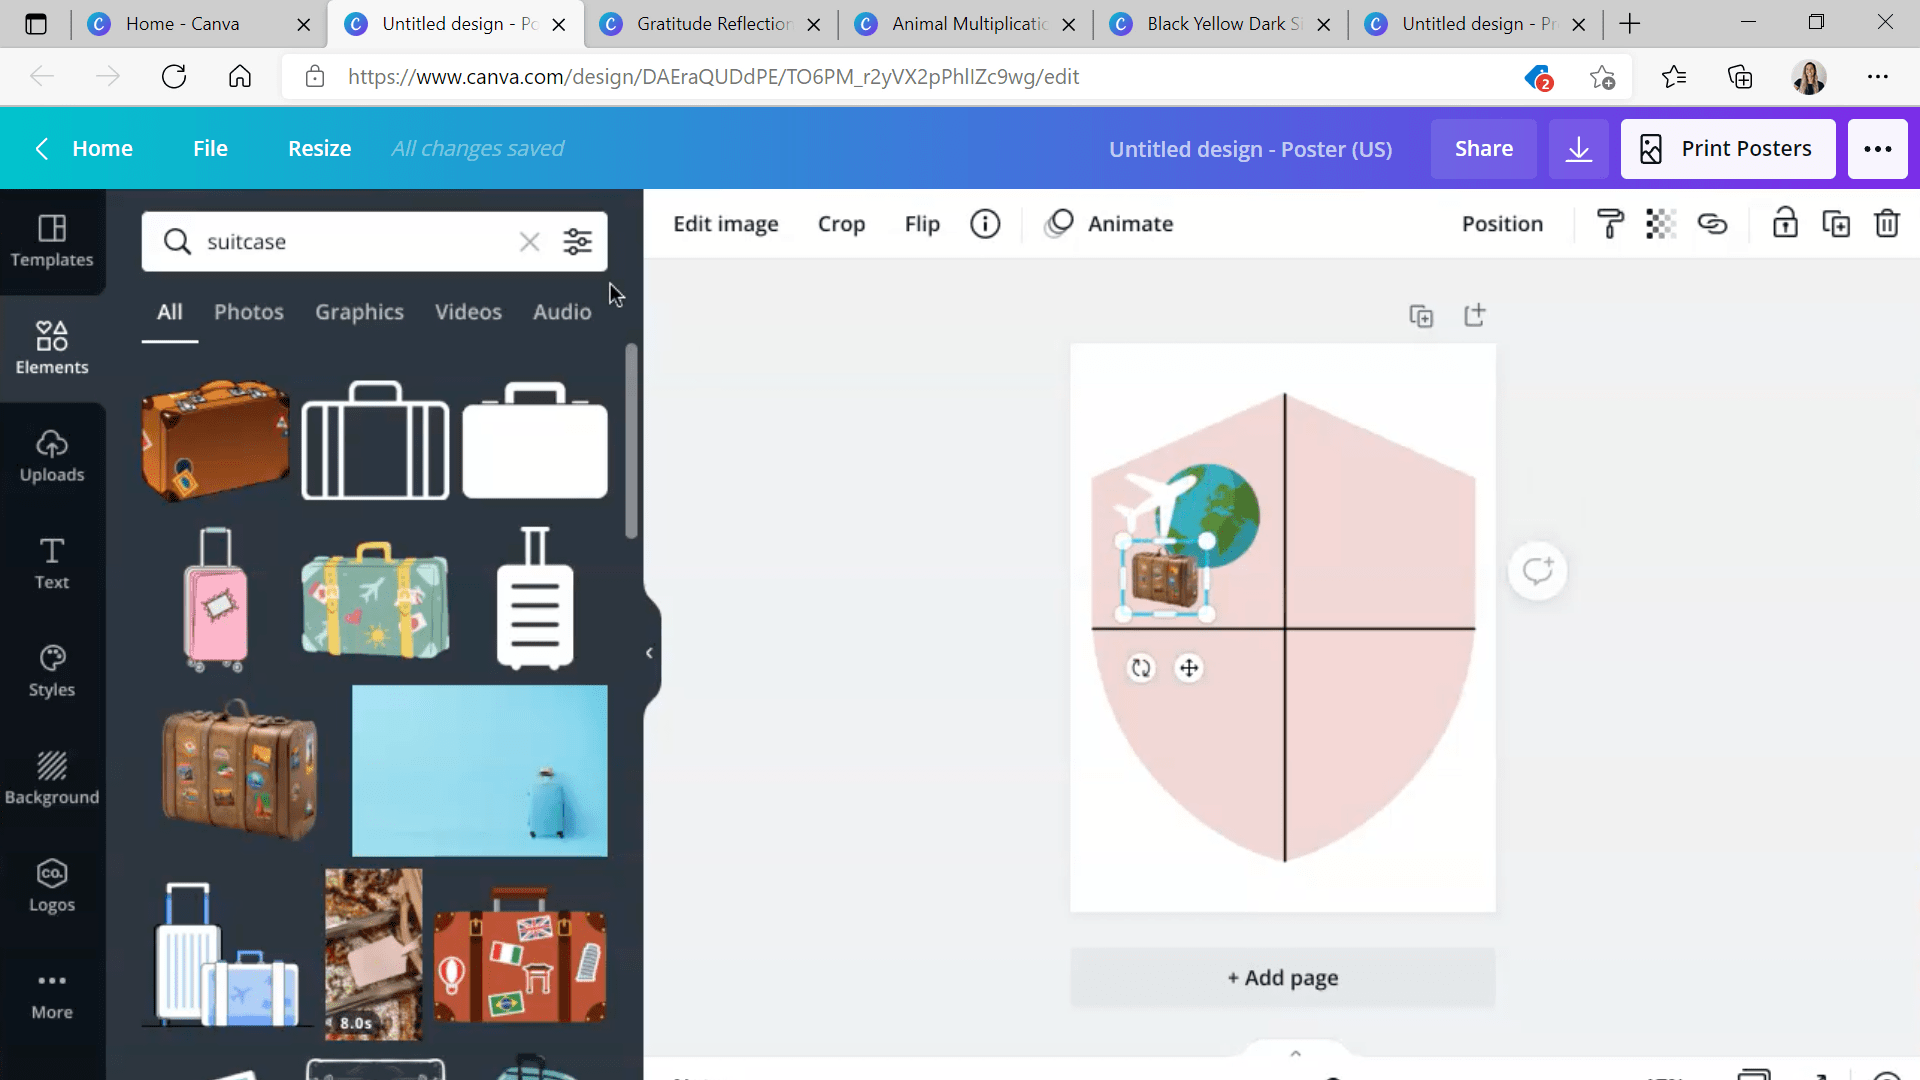
To demonstrate, we asked students to create a shield or crest that represented themselves in the image above! But this is a great place for students to create a visual representation of any form of comprehension, understanding, or opinion from any subject.
Whether this is an in-class activity or a take-home assignment, have them share their designs with the class instead of just submitting it to you! They can save their digital art as an image to their device & upload it to your slides using the Image Upload question. This way, you can quickly view all the responses together as a class. Pro tip: use pick-a-name to randomly select students to explain their design to the class!
Collaborative Visual Group Projects
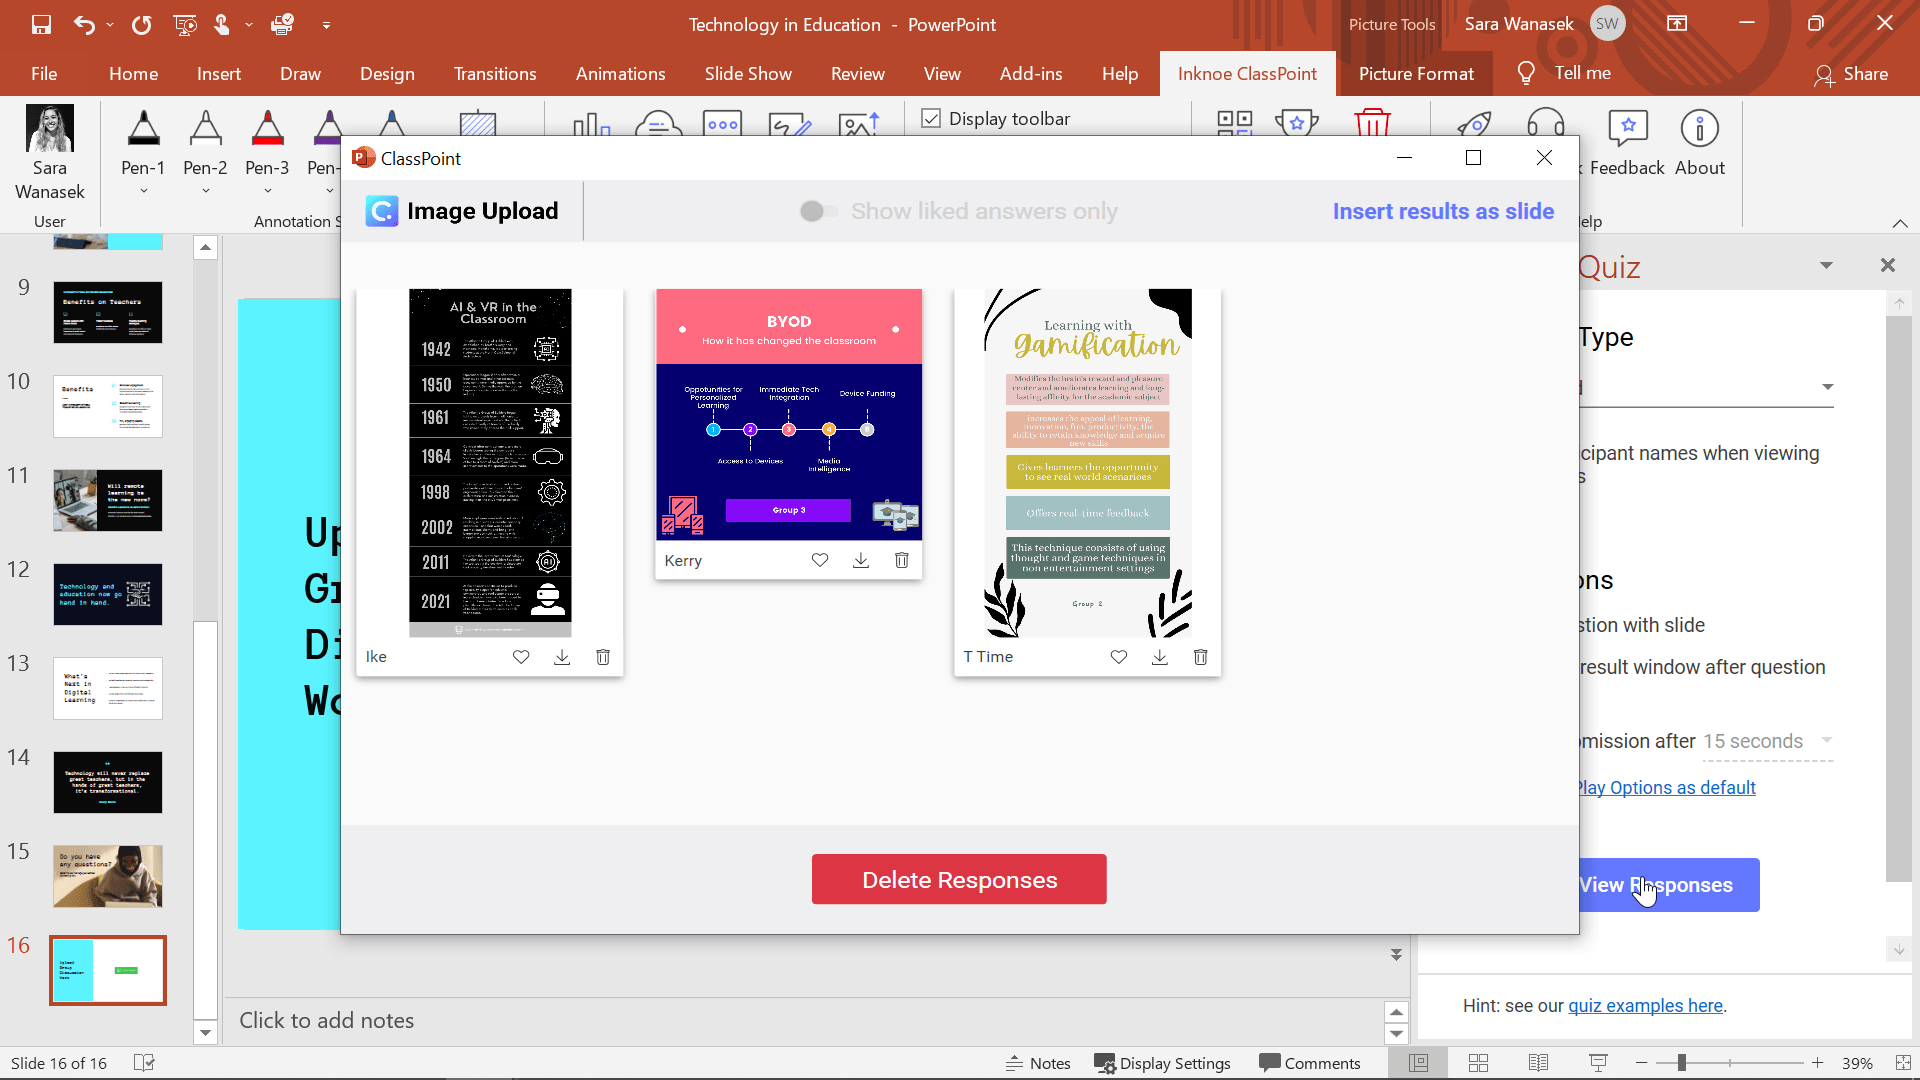
Group projects are always a great way to add something new to your classes. Canva allows your students to work together in real-time on the same visual.
Once they share a link with each other, they can begin collaborating and editing their visuals to share with the class later. Our example was to have students work together to share information about one aspect of technology that has changed the classroom.
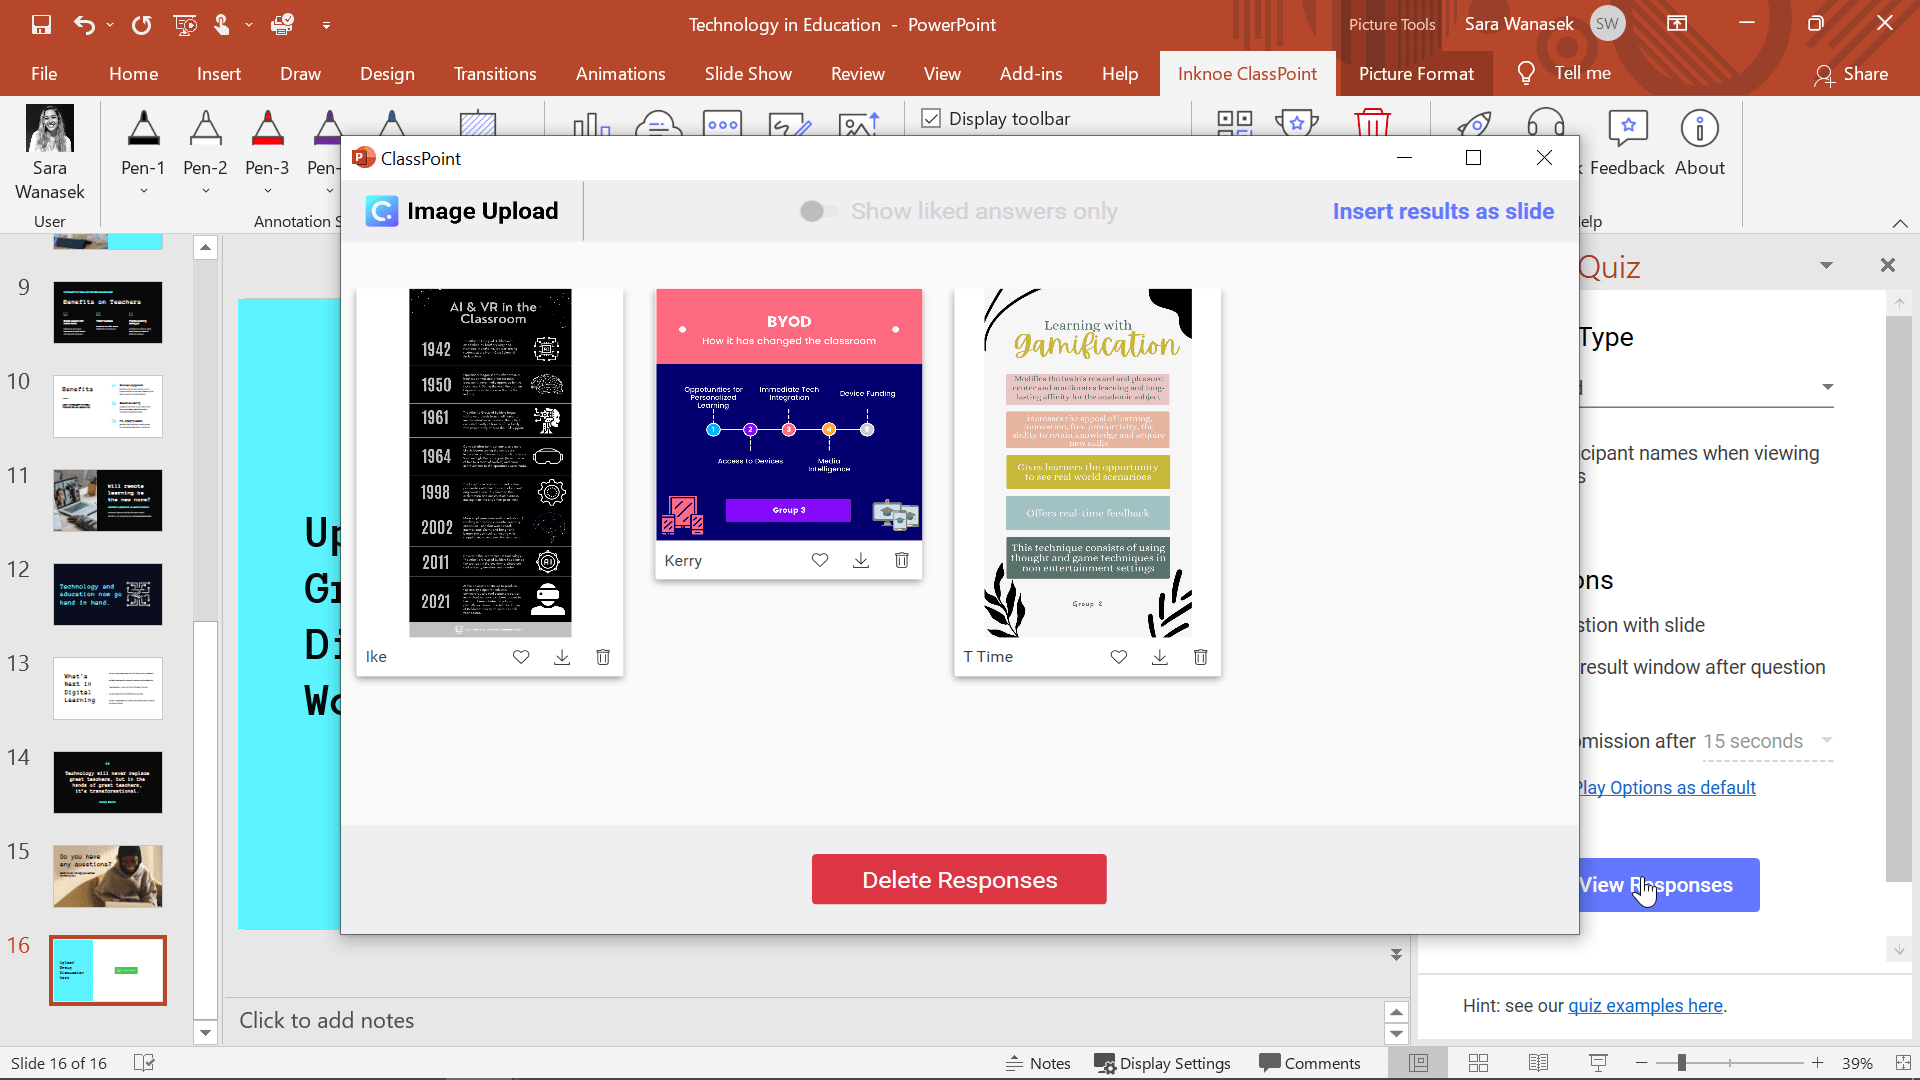
Students can wait until the next day to share with the class, or they can submit with an Image Upload activity and share more details about their graphic right away with the light-box view!
Final Thoughts
Canva can be used to create beautiful presentations along with activities, and other visuals for your presentations in conjunction with ClassPoint. These two applications will help to spice up your classroom in such an easy and non-time-consuming way – what every teacher wants to hear, right?
Do not forget to download the example file below to view all the ideas and use the slides in your next class!