Are you looking to insert videos in PowerPoint presentations? Perhaps you want to spice up a boring slide or illustrate a point with a visual example? It is said that people pay 62% more attention to videos than written content. Whatever your reason, there are several ways to incorporate videos into your presentation.
In this blog, we’ll show you:
- How to simply add a video to your PowerPoint slides,
- How to watch videos from the web during your presentation, and
- A super cool activity that actually invites your own audience to submit videos to your PowerPoint presentation.
Follow along or if you’d like to watch how to do all three, check out this video here. Let’s get started!
How to Insert Videos in PowerPoint Natively
First up, we’ll show you how to insert videos in PowerPoint presentations using PowerPoint’s insert video tool. This is perfect if you already have a video in your files or straight from YouTube that you want to show your audience. Follow the steps to make it happen
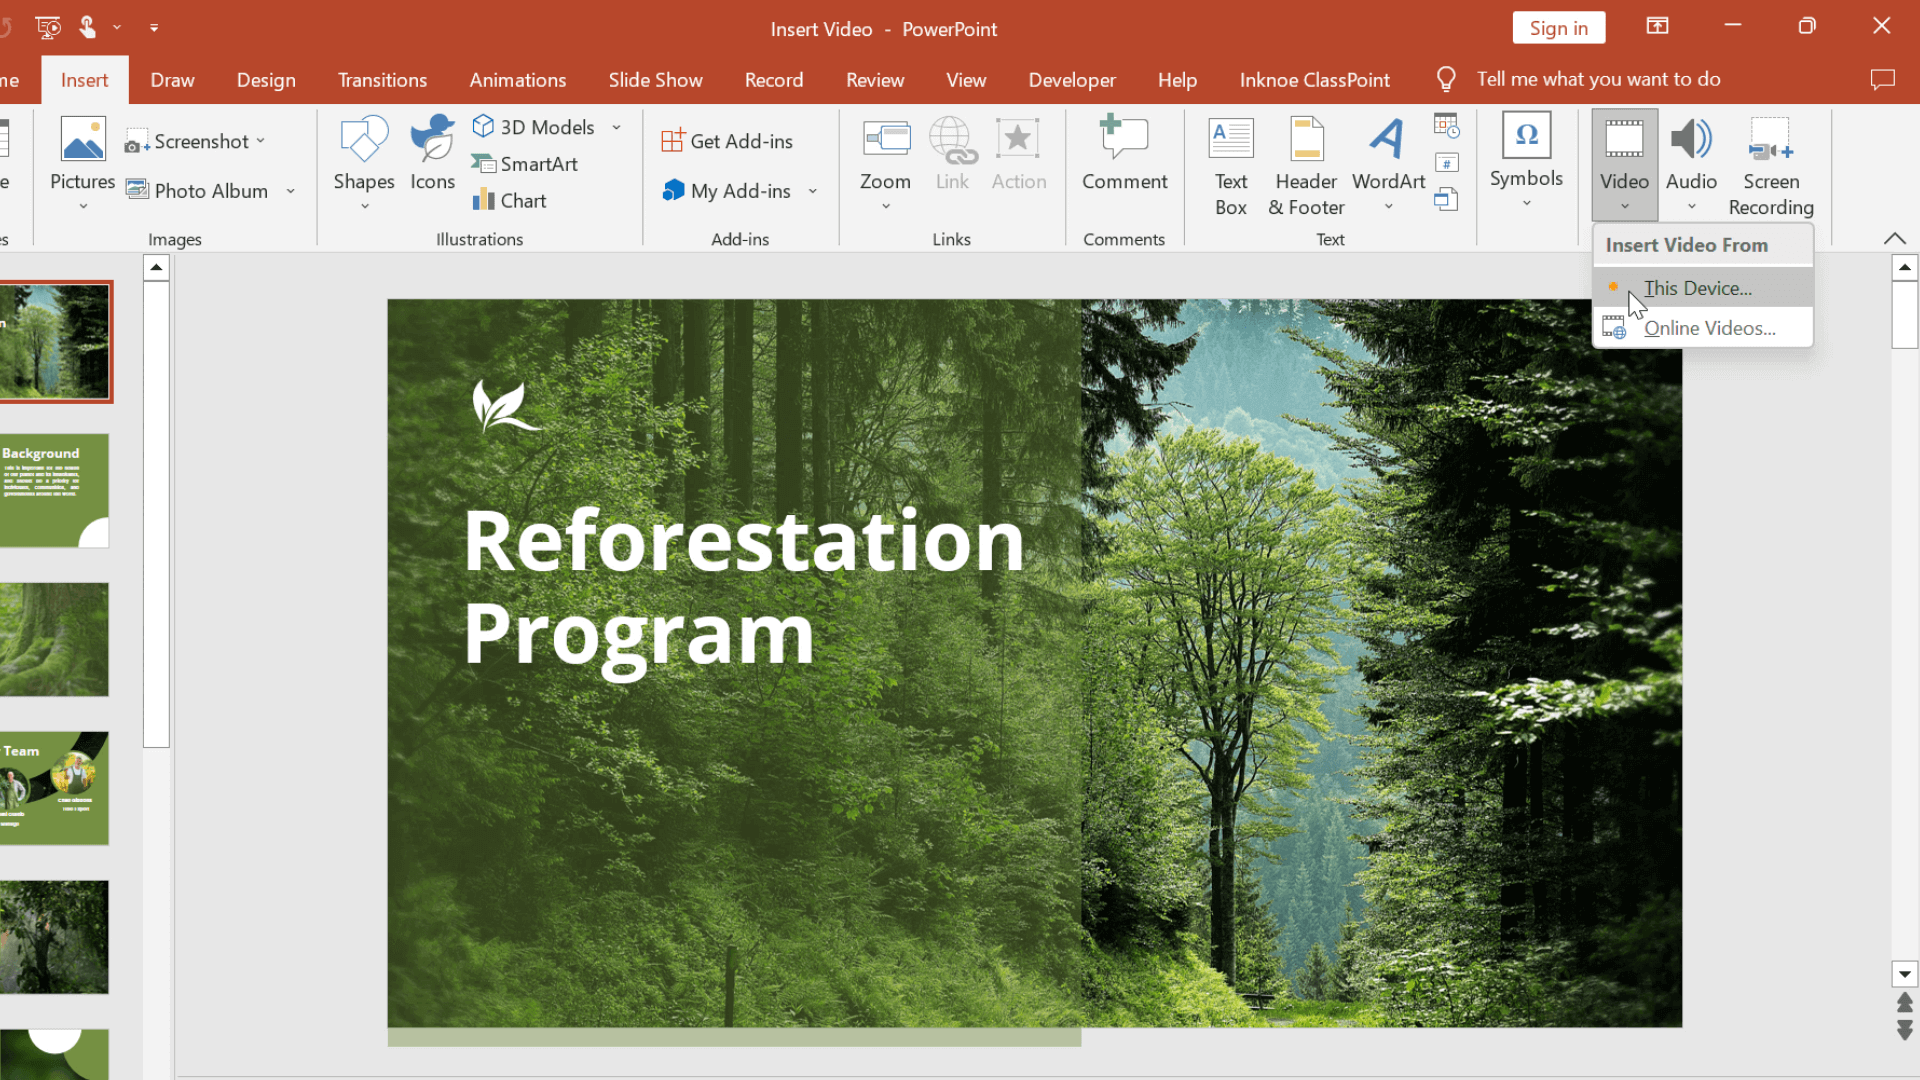
Step 1: Click on the Insert tab,
Inside the Insert Tab in the PowerPoint ribbon, find & click Video
Step 2: Select your video
Choose to add the video from an online link or upload from your files on your device

Step 3: Format Video
Once the video is uploaded, it will be added right onto your PowerPoint presentation. The video can be moved and resized just like any picture. Click on the Playback tab or Format tab to make changes. You can then continue to format the video by trimming it, choosing to loop it, or adding bookmarks so that you can easily jump to parts of the video. To have the video begin automatically during your presentation, check the box in the Playback options.
How to Watch a Video on the Internet During a PowerPoint Presentation
But what if your video isn’t from YouTube, or you’d also like the ability to navigate from one video to another video online or to other online information? Then you can use an embedded internet browser in PowerPoint! You just open up the internet right from your presentation where you can search or go straight to a bookmarked video to play. It’s so easy to use, you just need the free PowerPoint add-in, ClassPoint. Here are the steps:
Step 1: Download ClassPoint
Head to classpoint.io to download and install ClassPoint. Then sign up for a free account!
Step 2: Open the Embedded Browser During Presentation
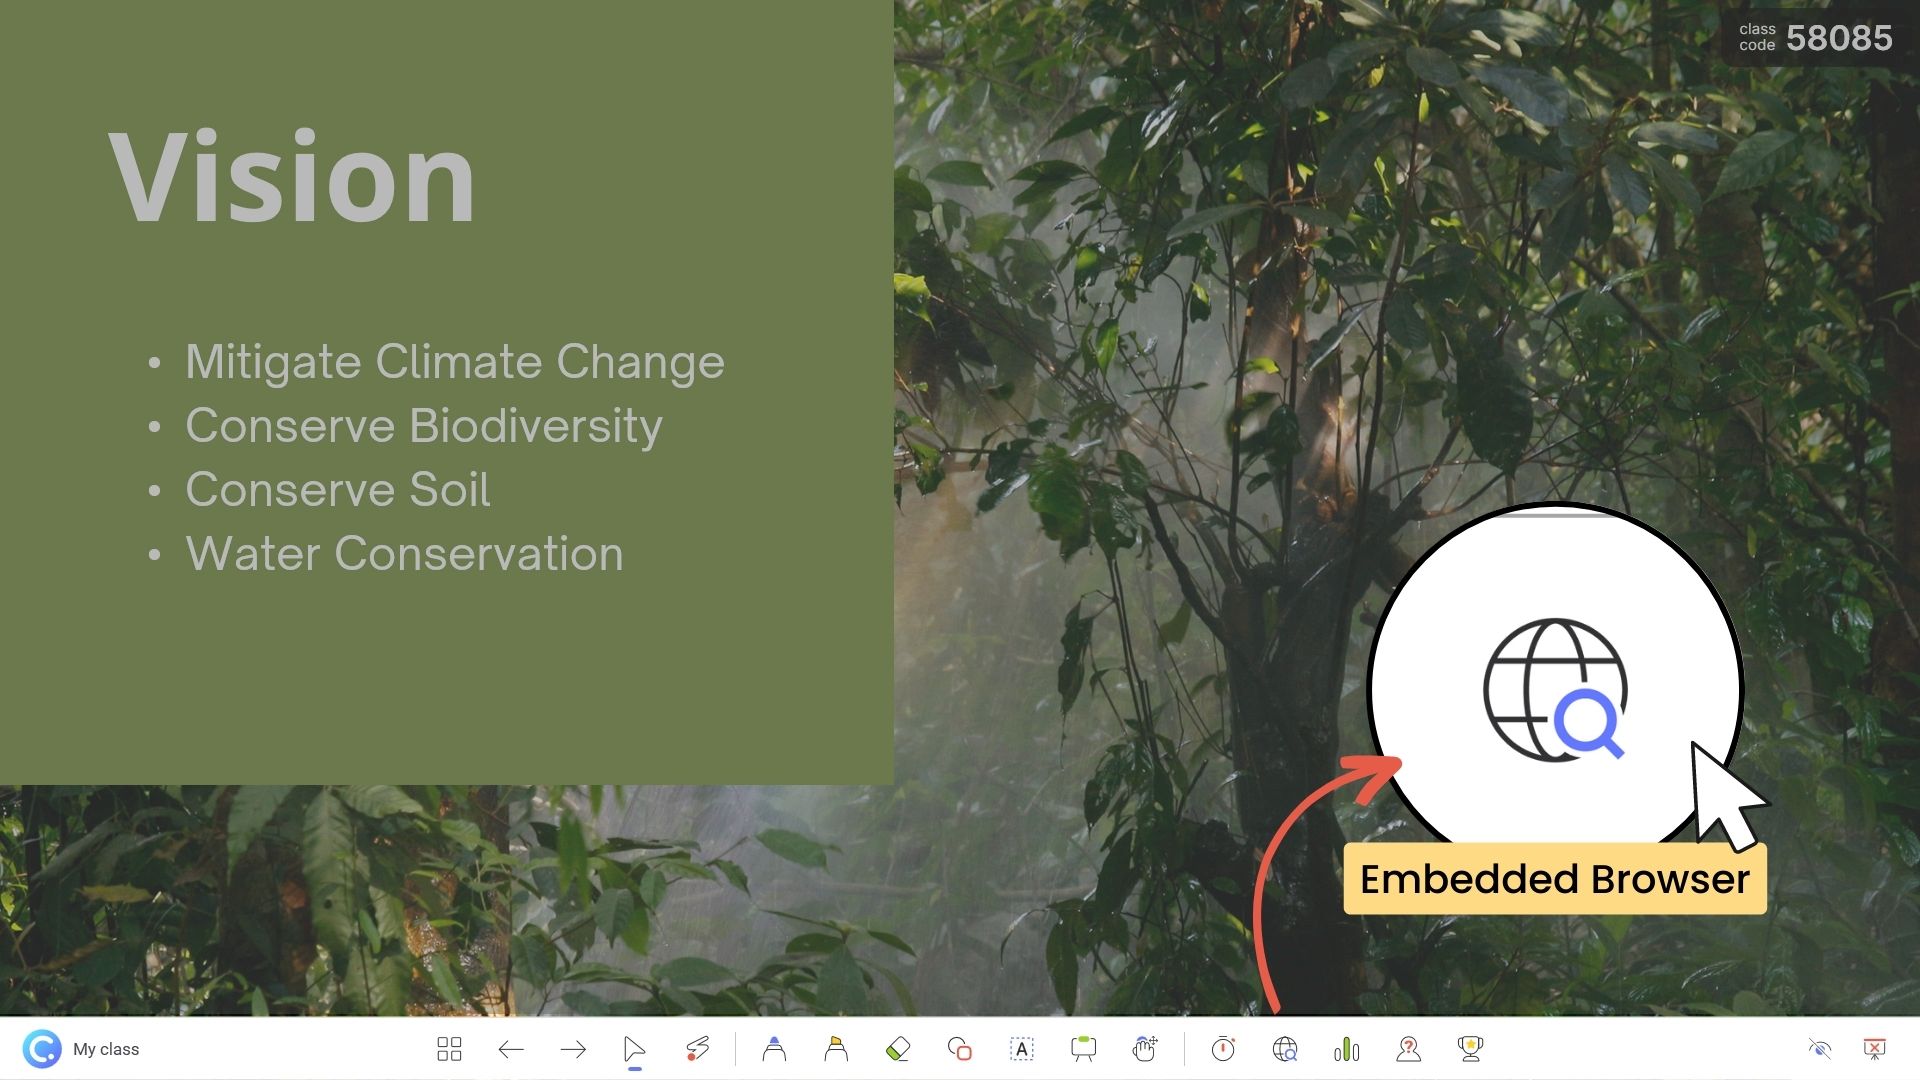
No setup is needed. During your presentation, click on the Embedded Browser icon on the ClassPoint toolbar at the bottom of the screen and search the web!

Step 3: Explore the Web!
This is a Google page, so begin searching and using the web just like you would outside of PowerPoint. Open multiple tabs and any of the pages can be pinned and bookmarked for easy quick access. When the browser is closed, it is minimized back to the icon. Open it again to continue where you left off!

Optional Step 4: Prep Web page for presentation
To have a video ready right away for your presentation, find the page, bookmark it, then pin it! Now, on the homepage of the Embedded Browser, you can see the pinned page and access it with one easy click.
Optional Step 5: Annotate on Video
Insert a part of the video by inserting the webpage as a slide. You can further explain and add notes to the video.
How to Watch Videos from Your Audience in PowerPoint
Did you know your audience members can share a video in your presentation? They can!
Using the same add-in ClassPoint, presenters can run a Video Upload activity that allows their audience to submit a video into the activity right on their slide. They can choose a video from their saved device or from YouTube! This is a great way to get your audience involved, share ideas or findings, or showcase their own work. Here are the steps:
Step 1: Add a prompt to your slide
Design your slide and add text for the prompt so your audience knows what to submit.
Step 2: Add the Interactive Button
From the ClassPoint Tab, click on the Video Upload icon and an interactive button will be added to your slide.
Step 3: Run the activity during the presentation
Click on the interactive button to open the question. The audience can join the class from www.classpoint.app and upload their videos!

Step 4: Review the Videos
Click on any of the names in the Response window to watch their submission!
It’s that easy! Plus ClassPoint has a free & paid version, but you can run Video Upload activities and use the embedded browser on the free version! You just have a limit of 25 participants and only 5 activities per PPT.
Videos are engaging, information-dense, and a great way to make your presentation interactive, and with these three methods, you can insert videos in PowerPoint presentations with ease. From inserting videos into your slides, navigating websites to watch videos right inside PowerPoint, and even allowing your audience members to submit videos, you can (& should!) use videos to make your presentation more engaging and informative.
And, if you haven’t heard of the PowerPoint add-in ClassPoint yet, check it out! It will save you time, and effort, and increase your audience engagement.
Read this Expert Guide to Interactive PowerPoint for more ways to insert multimedia in your PowerPoint presentations.